在OpenVINO 2019里是用Calibration tool把网络模型转成INT8模型。到了OpenVINO 2020版本开始这个工具被去掉了,取而代之的是POT (Post-Training Optimization Tool)工具. POT的使用方法和参数的含义和Calibration Tool又有所不同,因此要转INT8模型的话又要重新学习一遍官网的文档。这里简单记录一下我用这个工具转换mobilenet模型的一个过程。
这次用OpenVINO 2020转换INT8主要用到2个工具
1. pot
这个是INT8转换工具。在使用方法上和calibration tool不同的地方是calibration tool可以通过直接指定参数的方法来运行。而pot需要把大部分参数写进一个config文件,然后用
pot -c [config文件]
的方法来运行。
2. accuracy_check
这个可以用来检查模型在指定数据集上的推理精确度。
运行的命令和参数
accuracy_check -c [config配置文件] -s [放验证数据集的根目录路径] -td CPU
首先是安装过程
安装过程和以前不一样,以前是安装好OpenVINO 工具包之后calibration tool就会带在里面。而在OpenVINO 2020版之后,需要在安装好OpenVINO之后再手动安装accuracy_check和pot工具。
accuracy_checker安装的路径在
C:\Program Files (x86)\IntelSWTools\openvino\deployment_tools\open_model_zoo\tools\accuracy_checker
需要按照
https://docs.openvinotoolkit.org/latest/_tools_accuracy_checker_README.html的说明运行这个目录下的
python setup.py install
pot工具的安装路径在
C:\Program Files (x86)\IntelSWTools\openvino\deployment_tools\tools\post_training_optimization_toolkit
需要按照
https://docs.openvinotoolkit.org/latest/_README.html的说明运行这个目录下的
python setup.py install
安装好工具之后就可以做INT8的模型转换和模型的推理精度统计了
我的工作路径c:\temp\mobilenetv3里有这么几个文件
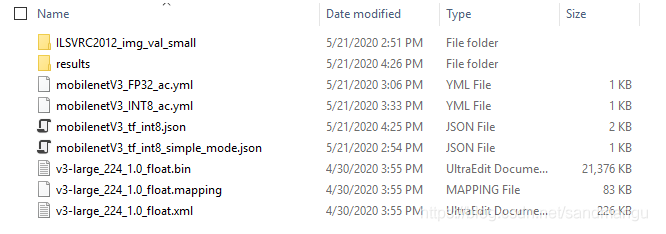
v3-large_224_1.0_float.xml/.bin/.mappling是mobilenet v3的FP32 OpenVINO IR模型
mobilenetV3_tf_int8_simple_mode.json和mobilenetV3_tf_int8.json是pot转换Int8模型的配置文件 (pot命令专用)
mobilenetV3_FP32_ac.yml和mobilenetV3_INT8_ac.yml是accuracy_checker统计FP32模型和int8模型推理精确度的配置文件 (accuracy_checker命令专用)
ILSVRC2012_img_val_small目录用来存放验证数据集和数据集的注释文件
运行后会生成
results目录用来存放转换出来的int8模型
ILSVRC2012_img_val_small下面的数据集和标注文件
我这个数据集是从imagenet里切出来的所以比较简单,目录里就是一个标注文件加一堆图片
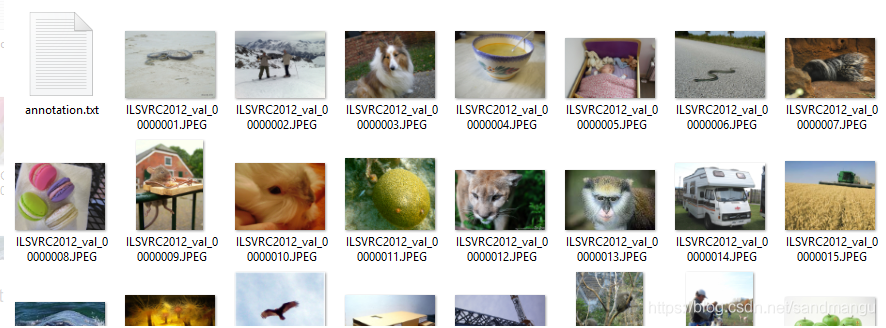
annotation.txt里每行就是目录里的文件名和对应的imagenet的标注label
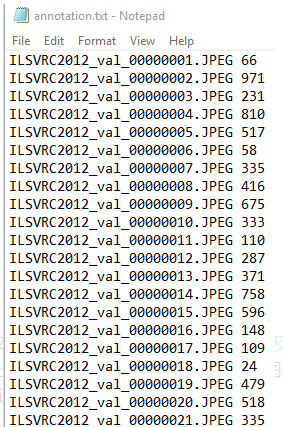
这个label在网上有2个版本,可以参考这篇文章 下载imagenet2012数据集,以及label说明 自己弄一下。因为mobilenet是属于图像分类classification,所以标注文件比较简单。要是mobilenet-ssd那种图像识别的模型,label就比较复杂,需要按照官方文档把识别窗口坐标,分类label都弄进去。
先从前面calibration_tool用过的simple mode转换开始,先写一个转换配置文件mobilenetV3_tf_int8_simple_mode.json
{
"model": {
//"model_name"指定生成的int8 IR文件的文件名
"model_name": "v3-large_224_1.0_int8",
//"model""weights"对应要转换的原始IR文件名
"model": "v3-large_224_1.0_float.xml",
"weights": "v3-large_224_1.0_float.bin"
},
"engine": {
//"type" 指定用simplified模式
"type": "simplified",
// you can specify path to directory with images or video file
// also you can specify template for file names to filter images to load
// templates are unix style
//数据集的目录
"data_source": "ILSVRC2012_img_val_small"
},
"compression": {
//指定优化的硬件运行设备,2020新加的设置,为将来用GPU推理做准备
"target_device": "CPU",
//优化算法设置,DefaultQuantization是默认的优化算法
"algorithms": [
{
"name": "DefaultQuantization",
"params": {
"preset": "performance",
"stat_subset_size": 300
}
}
]
}
}
然后运行
pot -c mobilenetV3_tf_int8_simple_mode.json
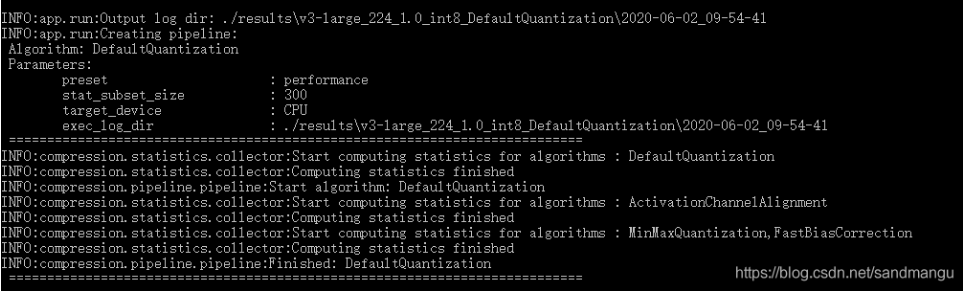
可以看到优化算法增加到了3种 DefaultQuantization/ActivationChannelAlignment/MinMaxQuantization。但是从目前官方2020.2文档看,只支持了前2种
https://docs.openvinotoolkit.org/2020.2/_compression_algorithms_quantization_README.html
最终转化的模型v3-large_224_1.0_int8.bin和v3-large_224_1.0_int8.xml生成到了./results\v3-large_224_1.0_int8_DefaultQuantization\2020-06-02_09-54-41下的optimized目录里
接下来看看FP32模型和INT8模型的推理精准度
先配置mobilenetV3_FP32_ac.yml
models:
- name: v3-large_224_1.0_float
launchers:
#下面指定运行的框架 dlsdk就是openvino, 也可以是tensorflow或者其他框架
#model/weights是要测试的模型文件名
#adapter是告诉accuracy checker模型的输出是目标分类还是目标识别或者其他的输出
- framework: dlsdk
model: v3-large_224_1.0_float.xml
weights: v3-large_224_1.0_float.bin
adapter: classification
datasets:
#下面这部分是有关数据集的路径,数据集的格式(imagenet,VOC或者其他)以及标注文件的名字
- name: ILSVRC2012_img_val_small
data_source: ILSVRC2012_img_val_small
annotation_conversion:
converter: imagenet
annotation_file: "ILSVRC2012_img_val_small/annotation.txt"
#预处理告诉ac_checker工具在把数据集图片送进模型前要做那些预处理,比如缩放,剪切或者调整RGB/BGR顺序之类
preprocessing:
- type: resize
size: 256
- type: crop
size: 224
#这里定义统计准确度用的算法,这里要看2种准确度,一个是top1的,还一个是top5的
metrics:
- name: accuracy @ top1
type: accuracy
top_k: 1
- name: accuracy @ top5
type: accuracy
top_k: 5
运行命令
accuracy_check -c mobilenetV3_FP32_ac.yml -s ./ -td CPU
看到输出
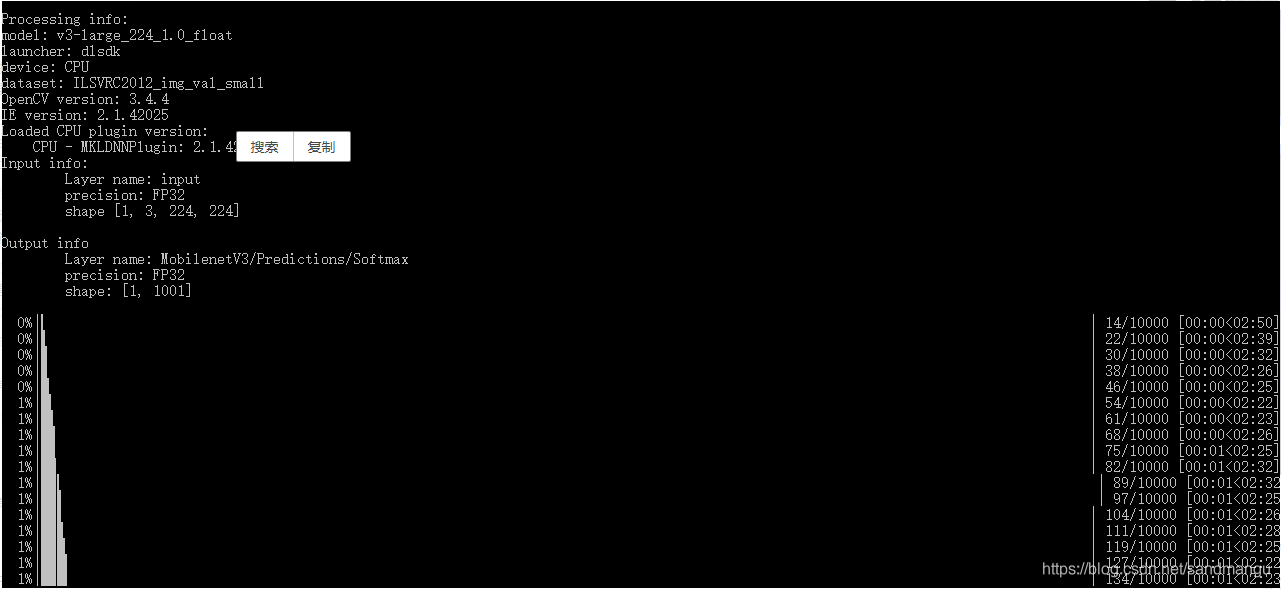
看到从0%到100%就对了,这里有个小坑,就是accuracy_check运行时候必须用"-s ./"参数来指定数据集的根目录,否则会报错。
最终得到原始FP32模型的准确度为

再看看转换出来的int8模型的准确度
mobilenetV3_INT8_ac.yml
models:
- name: v3-large_224_1.0_float
launchers:
- framework: dlsdk
model: results\v3-large_224_1.0_int8_DefaultQuantization\2020-06-02_09-54-41\optimized\v3-large_224_1.0_int8.xml
weights: results\v3-large_224_1.0_int8_DefaultQuantization\2020-06-02_09-54-41\optimized\v3-large_224_1.0_int8.bin
adapter: classification
datasets:
- name: ILSVRC2012_img_val_small
data_source: ILSVRC2012_img_val_small
annotation_conversion:
converter: imagenet
annotation_file: "ILSVRC2012_img_val_small/annotation.txt"
preprocessing:
- type: resize
size: 256
- type: crop
size: 224
metrics:
- name: accuracy @ top1
type: accuracy
top_k: 1
- name: accuracy @ top5
type: accuracy
top_k: 5
运行
accuracy_check -c mobilenetV3_int8_ac.yml -s ./ -td CPU
得到结果

可以看到,通过simplified_mode转出来的int8模型,因为前面文章讲到的mobilenetv3里面新的算法还不支持int8转换,所以导致精度损失很大
最后再试试pot里的新AccuracyAwareQuantization算法,
{
"model": {
"model_name": "v3-large_224_1.0_float",
"model": "v3-large_224_1.0_float.xml",
"weights": "v3-large_224_1.0_float.bin"
},
"engine": {
"launchers":
[
{
"framework": "dlsdk",
"adapter": "classification"
}
],
"datasets":
[
{
"name": "imagenet_1000_classes",
"annotation_conversion": {
"converter": "imagenet",
"annotation_file": "ILSVRC2012_img_val_small/annotation.txt"
},
"data_source": "ILSVRC2012_img_val_small",
"preprocessing": [
{
"type": "resize",
"size": 256,
},
{
"type": "crop",
"size": 224,
}
],
"metrics": [
{
"name": "accuracy@top1",
"type": "accuracy",
"top_k": 1
},
{
"name": "accuracy@top5",
"type": "accuracy",
"top_k": 5
}
]
}
]
},
"compression": {
"target_device": "CPU",
"algorithms": [
{
//"name": "DefaultQuantization",
//"params": {
// "preset": "performance",
// "stat_subset_size": 300
//}
#这里改成AccuracyAwareQuantizaton算法,下面的maximal_drop是定义的允许的转换后模型的最大推理精度下降值
"name": "AccuracyAwareQuantization",
"params": {
"preset": "performance",
"stat_subset_size": 300,
"maximal_drop": 0.01,
}
}
]
}
}
运行
pot -c mobilenetV3_tf_int8.json
通过下面的打印可以看到这个算法默认是先默认把所有支持int8转换的层都转成int8, 然后统计一遍推理精度,如果不满足定义好的精度下降值,就把几层int8的层回退到FP32模式,然后再统计推理精度,如果还不满足就再继续回退几层int8到FP32,这么反复循环下去,直到转换出的模型满足精度为止。
当然我这个转换mobilenetV3的尝试因为是算法不支持的原因,转出来的int8模型始终满足不了定义的精度下降值, 最后毫无悬念的失败了。如果是mobilenetV2模型,即使用simplified_mode, 精度下降也非常低,直接可以拿来用 :)
最后分享一下openvino 2020.2转int8的感受
首先是新的模型修改了模型压缩算法,原来老的calibration tool转出来的int8模型文件大小和转化前的FP32模型大小基本一致(20MB). 新的pot转出来的int8模型的大小是5MB左右,终于变到了FP32模型的四分之一大小
是老的GPU是不支持int8推理的,我尝试了一下在我的7代i5-7440HQ电脑上用集成显卡推理基于GPU硬件算出来int8模型,速度比算FP32还慢。看来新的int8模型是给未来的intel显卡做准备的 :)


 发帖
发帖 与我相关
与我相关 我的任务
我的任务
 分享
分享


