15,977
社区成员
 发帖
发帖 与我相关
与我相关 我的任务
我的任务 分享
分享
void CD3DWnd::OnShowWindow(BOOL bShow, UINT nStatus)

{

	CWnd::OnShowWindow(bShow, nStatus);


	// TODO: 在此处添加消息处理程序代码

	if (bShow)

	{

		//初始化变量

		g_pBrushPath="res\\Xfile\\brush1.X";

		this->GetParent()->GetWindowRect(m_WriteRect);

		GetWindowRect(m_ShowRect);

		//加载画笔

		g_pBrush=new XWYBrush;

		g_pBrush->CreateBrush(m_pd3dDevice,g_pBrushPath);

		g_pBrush->m_pBrushMesh->LockVertexBuffer(0,(LPVOID*)&pData);

		D3DXComputeBoundingSphere(

			pData

			,g_pBrush->m_pBrushMesh->GetNumVertices()

			,D3DXGetFVFVertexSize(g_pBrush->m_pBrushMesh->GetFVF())

			,&vCenter

			,&g_ObjectRadius);

		g_pBrush->m_pBrushMesh->UnlockVertexBuffer();

		D3DXMatrixTranslation(&g_mCenterWorld,-vCenter.x,-vCenter.y,-vCenter.z);

		//使得毛笔垂直

		D3DXMatrixRotationX(&m,-D3DX_PI/2.0);

		D3DXMatrixMultiply(&g_mCenterWorld,&g_mCenterWorld,&m);

		D3DXMatrixTranslation(&m,0.0,0.0,-(g_ObjectRadius+4));

		D3DXMatrixMultiply(&g_mCenterWorld,&g_mCenterWorld,&m);

		g_mOriginalCenterWorld=g_mCenterWorld;


		//初始化点

		XWYPoint* pVertices;

		m_pd3dDevice->CreateVertexBuffer(

			4*sizeof(XWYPoint)	//顶点个数

			,D3DUSAGE_WRITEONLY

			,FVF

			,D3DPOOL_DEFAULT

			,&g_pVertex

			,NULL);

		g_pVertex->Lock(0,0,(void**)&pVertices,0);

		pVertices[0] = XWYPoint( -1.0, 1.0, 1.0, 0.0, 0.0,0.0,0.0);     // p0

		pVertices[1] = XWYPoint( 1.0,1.0, 1.0, 1.0, 0.0,1.0,0.0);   // p1

		pVertices[2] = XWYPoint( -1.0,-1.0, 1.0, 1.0, 0.0,1.0,0.0 );	 // p2

		pVertices[3] = XWYPoint(  1.0,-1.0,1.0, 1.0, 1.0,1.0,1.0 );	 // p3

		g_pVertex->Unlock();

		m_pd3dDevice->CreateVertexBuffer(

			6*sizeof(XWYPoint)	//顶点个数

			,D3DUSAGE_WRITEONLY

			,FVF

			,D3DPOOL_DEFAULT

			,&g_pAliasingVertex

			,NULL);


		g_pAliasingVertex->Lock(0,0,(void**)&pVertices,0) ;

		pVertices[0] = XWYPoint(-1.0, -1.0, 0.0, 0.0, 1.0,0.0,1.0);

		pVertices[1] = XWYPoint(-1.0,  1.0, 0.0, 0.0, 0.0,0.0,0.0);

		pVertices[2] = XWYPoint( 1.0,  1.0, 0.0, 1.0, 0.0,1.0,0.0);


		pVertices[3] = XWYPoint(-1.0, -1.0, 0.0, 0.0, 1.0,0.0,1.0);

		pVertices[4] = XWYPoint( 1.0,  1.0, 0.0, 1.0, 0.0,1.0,0.0);

		pVertices[5] = XWYPoint( 1.0, -1.0, 0.0, 1.0, 1.0,1.0,1.0);

		g_pAliasingVertex->Unlock();


		D3DXCreateTextureFromFile(m_pd3dDevice,"kongbai.jpg",&g_pBackground);


		ID3DXBuffer* pError=NULL;

		D3DXCreateEffectFromFile(

			m_pd3dDevice

			,"calligraphy.fx"

			,NULL

			,NULL

			,D3DXFX_NOT_CLONEABLE|D3DXSHADER_DEBUG

			,NULL

			,&g_pEffect

			,NULL);

		//为抗锯齿纹理创建一个PS

		ID3DXBuffer* pShader=NULL;

		D3DXCompileShaderFromFile(

			"PS_Render2Texture.txt"

			,0

			,0

			,"Main"

			,"ps_2_0"

			,D3DXSHADER_DEBUG

			,&pShader

			,&pError

			,&g_pAliasingTexCT);

		if (pError)

		{

			pError->Release();

			pError=NULL;

		}

		m_pd3dDevice->CreatePixelShader(

			(DWORD*)pShader->GetBufferPointer()

			,&g_pAliasingTexPS);

		if (pShader)

		{

			pShader->Release();

			pShader=NULL;

		}


		//获取句柄

		g_FrontSurfaceHandle=g_pAliasingTexCT->GetConstantByName(0,"background");

		//设定常量描述符

		UINT count;

		g_pAliasingTexCT->GetConstantDesc(

			g_FrontSurfaceHandle

			,&g_FrontSurfaceDesc

			,&count);

		g_pAliasingTexCT->SetDefaults(m_pd3dDevice);

//创建一个空白的前表面

		m_pd3dDevice->CreateTexture(

			m_ShowRect.Width()

			,m_ShowRect.Height()

			,1

			,D3DUSAGE_RENDERTARGET

			,D3DFMT_A8R8G8B8

			,D3DPOOL_DEFAULT

			,&g_pFrontSurface

			,0);

		//创建一个空白的前表面抗锯齿纹理

		m_pd3dDevice->CreateTexture(

			m_ShowRect.Width()

			,m_ShowRect.Height()

			,1

			,D3DUSAGE_RENDERTARGET

			,D3DFMT_A8R8G8B8

			,D3DPOOL_DEFAULT

			,&g_pFrontSurfaceAliasing

			,0);

		//创建一张空白纹理

		IDirect3DTexture9* blanktexture=NULL;

		m_pd3dDevice->CreateTexture(

			m_ShowRect.Width()

			,m_ShowRect.Height()

			,1

			,0

			,D3DFMT_A8R8G8B8

			,D3DPOOL_MANAGED

			,&blanktexture

			,0);


		//得到空白纹理的表面

		LPDIRECT3DSURFACE9 pSurf;

		blanktexture->GetSurfaceLevel(0,&pSurf);

		D3DSURFACE_DESC surDesc;

		pSurf->GetDesc(&surDesc);


		//锁定空白纹理

		D3DLOCKED_RECT lockedrect;

		::ZeroMemory(&lockedrect,sizeof(lockedrect));

		blanktexture->LockRect(0,&lockedrect,NULL,0);

		unsigned char* pSurfBits=static_cast<unsigned char*>(lockedrect.pBits);

		for (unsigned int y=0;y<surDesc.Height;y++)

		{

			for (unsigned int x=0;x<surDesc.Width;x++)

			{

				pSurfBits[y*lockedrect.Pitch+x*4+0]=255;//b

				pSurfBits[y*lockedrect.Pitch+x*4+1]=255;//g

				pSurfBits[y*lockedrect.Pitch+x*4+2]=255;//r

				pSurfBits[y*lockedrect.Pitch+x*4+3]=255;//a

			}

		}

		blanktexture->UnlockRect(0);


		//纹理清空

		//得到各纹理表面

		m_pd3dDevice->GetRenderTarget(0,&g_pRender2Screen);

		g_pFrontSurfaceAliasing->GetSurfaceLevel(0,&g_pRender2Texture);

		g_pFrontSurface->GetSurfaceLevel(0,&g_pRenderStroke);

		D3DXLoadSurfaceFromSurface(

			g_pRender2Texture

			,NULL

			,NULL

			,pSurf

			,NULL

			,NULL

			,D3DX_DEFAULT

			,0);

		D3DXLoadSurfaceFromSurface(

			g_pRenderStroke

			,NULL

			,NULL

			,pSurf

			,NULL

			,NULL

			,D3DX_DEFAULT

			,0);

		if (blanktexture)

		{

			blanktexture->Release();

			blanktexture=NULL;

		}

		if (pSurf)

		{

			pSurf->Release();

			pSurf=NULL;

		}

	}

}

HRESULT CD3DWnd::Render()

{

	HRESULT hr=S_OK;

	//重新设定渲染目标到屏幕

	m_pd3dDevice->SetRenderTarget(0,g_pRender2Screen);

	//清理渲染目标和z缓存

	m_pd3dDevice->Clear(0,NULL,D3DCLEAR_TARGET|D3DCLEAR_ZBUFFER

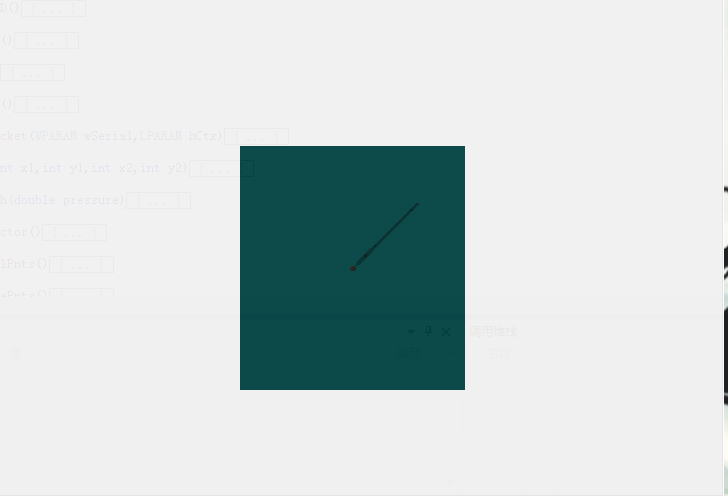
		,D3DXCOLOR(0.0f,0.25f,0.25f,0.55f),1.0f,0);

	m_pd3dDevice->Clear(0,NULL,D3DCLEAR_STENCIL,0xff000000,1.0f,0);

	//设定纹理过滤器

	m_pd3dDevice->SetSamplerState(0,D3DSAMP_MAGFILTER,D3DTEXF_LINEAR);

	m_pd3dDevice->SetSamplerState(0,D3DSAMP_MINFILTER,D3DTEXF_LINEAR);

	m_pd3dDevice->SetSamplerState(0,D3DSAMP_MIPFILTER,D3DTEXF_POINT);

	//设定光照,这个坐标是灯光方向坐标

	D3DXVECTOR3 dir(0.707f,-0.707f,0.707f);

	//纯白色光

	D3DXCOLOR col(1.0f,1.0f,1.0f,1.0f);

	D3DLIGHT9 light;

	::ZeroMemory(&light,sizeof(light));

	light.Type      = D3DLIGHT_DIRECTIONAL;

	light.Ambient   = col * 0.4f;

	light.Diffuse   = col;

	light.Specular  = col * 0.6f;

	light.Direction = dir;

	//注册灯光

	m_pd3dDevice->SetLight(0,&light);

	//开启灯光

	m_pd3dDevice->LightEnable(0,true);

	//重新规格化法线,并且设为镜面高光可用

	m_pd3dDevice->SetRenderState(D3DRS_NORMALIZENORMALS,true);

	m_pd3dDevice->SetRenderState(D3DRS_SPECULARENABLE,true);

	//设置相机

	//观察点

	D3DXVECTOR3 eye(0.0f,0.0f,-120.0f);

	//视线目标点

	D3DXVECTOR3 lookat(0.0f,0.0f,0.0f);

	//上方向

	D3DXVECTOR3 up(0.0f,1.0f,0.0f);

	//计算视角变换矩阵

	::D3DXMatrixLookAtLH(&m_View,&eye,&lookat,&up);

	//把视角变换矩阵设置到渲染环境

	m_pd3dDevice->SetTransform(D3DTS_VIEW,&m_View);

	//计算透视投影变换矩阵

	::D3DXMatrixPerspectiveFovLH(

		&m_Proj

		,D3DX_PI/2

		,(float)m_ShowRect.Width()/(float)m_ShowRect.Height()

		,1.0f

		,1000.0f);

	//把投影变换矩阵设置到渲染环境中

	m_pd3dDevice->SetTransform(D3DTS_PROJECTION,&m_Proj);

	//渲染场景

	m_pd3dDevice->BeginScene();

	//设置资源流和设置顶点格式

	m_pd3dDevice->SetStreamSource(0,g_pVertex,0,sizeof(XWYPoint));

	m_pd3dDevice->SetFVF(FVF);

	g_pEffect->SetTechnique("TVelDirect");

	//设置背景纹理

	g_pEffect->SetTexture("g_texture",g_pBackground);

	g_pEffect->SetTexture("g_frontsurface",g_pFrontSurface);

	g_pEffect->SetFloat("g_depthDelta",(float)(g_fBackDepth-0.5));

	//抗锯齿

	g_pEffect->SetTexture("g_frontsurfacealiasing",g_pFrontSurfaceAliasing);

	D3DXMatrixIdentity(&m_WorldViewProjection);

	m_pd3dDevice->SetTransform(D3DTS_WORLD,&m_WorldViewProjection);

	g_pEffect->SetMatrix("g_mWorldViewProjection",&m_WorldViewProjection);

	UINT uNumPasses=0;

	g_pEffect->Begin(&uNumPasses,0);

	for (iPass=0;iPass<uNumPasses;iPass++)

	{

		g_pEffect->BeginPass(iPass);

		g_pEffect->CommitChanges();

		m_pd3dDevice->DrawPrimitive(D3DPT_TRIANGLESTRIP,0,2);

		g_pEffect->EndPass();

	}

	g_pEffect->End();

	//将毛笔的自身坐标系转换为世界坐标系

	m_pd3dDevice->SetTransform(D3DTS_WORLD,&g_mCenterWorld);

	//渲染毛笔

	g_pBrush->RenderBrush(m_pd3dDevice);

	//绘制阴影

	m_pd3dDevice->SetRenderState(D3DRS_STENCILENABLE,    true);

	//(ref & mask) ComparisonOperation (value & mask)

	m_pd3dDevice->SetRenderState(D3DRS_STENCILFUNC,      D3DCMP_EQUAL);

	m_pd3dDevice->SetRenderState(D3DRS_STENCILREF,       0x0);

	m_pd3dDevice->SetRenderState(D3DRS_STENCILMASK,      0xffffffff);

	m_pd3dDevice->SetRenderState(D3DRS_STENCILWRITEMASK, 0xffffffff);

	m_pd3dDevice->SetRenderState(D3DRS_STENCILZFAIL,     D3DSTENCILOP_KEEP);

	m_pd3dDevice->SetRenderState(D3DRS_STENCILFAIL,      D3DSTENCILOP_KEEP);

	m_pd3dDevice->SetRenderState(D3DRS_STENCILPASS,      D3DSTENCILOP_INCR); // increment to 1

	//设置灯光

	//设置好毛笔阴影在场景中的位置

	D3DXMATRIX W;

	//这里是灯光的方向

	D3DXVECTOR4 lightDirection(0.707f,-0.707f,0.707f,0.0f);

	//设置地板平面

	D3DXPLANE groundPlane(0.0f,-1.0f,0.0f,-(g_ObjectRadius+4));

	//建立阴影矩阵

	D3DXMATRIX S;

	D3DXMatrixShadow(&S,&lightDirection,&groundPlane);

	D3DXMatrixIdentity(&W);

	D3DXMatrixMultiply(&W,&W,&S);

	D3DXMatrixMultiply(&W,&W,&g_mCenterWorld);

	m_pd3dDevice->SetTransform(D3DTS_WORLD,&W);

	//为了显示阴影,所以开启混合状态

	m_pd3dDevice->SetRenderState(D3DRS_ALPHABLENDENABLE, true);

	m_pd3dDevice->SetRenderState(D3DRS_SRCBLEND, D3DBLEND_SRCALPHA);

	m_pd3dDevice->SetRenderState(D3DRS_DESTBLEND, D3DBLEND_INVSRCALPHA);

	//设置材质为黑色

	D3DMATERIAL9 mtrl;

	mtrl.Ambient.a=0.0f;mtrl.Ambient.b=0.0f;mtrl.Ambient.g=0.0f;mtrl.Ambient.r=0.0f;

	mtrl.Diffuse.a=0.0f;mtrl.Diffuse.b=0.0f;mtrl.Diffuse.g=0.0f;mtrl.Diffuse.r=0.0f;

	mtrl.Emissive.a=0.0f;mtrl.Emissive.b=0.0f;mtrl.Emissive.g=0.0f;mtrl.Emissive.r=0.0f;

	mtrl.Specular.a=0.0f;mtrl.Specular.b=0.0f;mtrl.Specular.g=0.0f;mtrl.Specular.r=0.0f;

	mtrl.Power=0.0f;

	//设置漫反射的透明度为20%

	mtrl.Diffuse.a = 0.2f;


	//关闭深度渲染,为了防止闪动,因为阴影和地面都在同一层上,通过先渲染地板

	//然后用深度测试屏蔽阴影,这样我们就能够保持阴影将绘制在地面之上

	m_pd3dDevice->SetRenderState(D3DRS_ZENABLE, false);

	//画出阴影

	m_pd3dDevice->SetMaterial(&mtrl);

	m_pd3dDevice->SetTexture(0, 0);

	for (int i=0;i<g_pBrush->m_vMtrls.size();i++)

	{

		g_pBrush->m_pBrushMesh->DrawSubset(i);

	}

	//恢复原来状态

	m_pd3dDevice->SetRenderState(D3DRS_ZENABLE, true);

	m_pd3dDevice->SetRenderState(D3DRS_ALPHABLENDENABLE, false);

	m_pd3dDevice->SetRenderState(D3DRS_STENCILENABLE,    false);

	m_pd3dDevice->EndScene();

	m_pd3dDevice->Present(NULL,NULL,NULL,NULL);

	return hr;

}
