struts2-location.href使用404问题

xia929 2014-04-11 11:07:47
使用struts2在location.href这使用出现404问题。
HTTP Status 404 - There is no Action mapped for namespace [/] and action name [login!add] associated with context path [/Struts2].

这是jsp页面代码:
<body>
<form action="login.action">
<input type="text" name="username" ><br>
<input type="password" name="password" ><br>
<input type="submit" value="提交" ><br>
<input type="button" value="查询" onclick="location.href='login!query.action'" >
<input type="button" value="添加" onclick="location.href='login!add.action'" >
<input type="button" value="删除" onclick="location.href='login!delete.action'" >
<input type="button" value="修改" onclick="location.href='login!update.action'" >
</form>
</body>
struts.xml配置文件代码:
<struts>
<package name="default" extends="struts-default">
<action name="login" class="Test.LoginAction" method="execute">
<result name="success">pages/success.jsp</result>
<result name="add">pages/add.jsp</result>
<result name="update">pages/update.jsp</result>
<result name="delete">pages/delete.jsp</result>
<result name="query">pages/query.jsp</result>
</action>
提交按钮能够通过,但是增删改查这四个就不行,为什么?请教各位大神!!
...全文
701 15 打赏 收藏 转发到动态 举报
写回复
用AI写文章
15 条回复
切换为时间正序
请发表友善的回复…
发表回复
xia929 2014-04-20
  • 打赏
  • 举报
回复
引用 14 楼 wlwlwlwl015 的回复:
[quote=引用 13 楼 xia929 的回复:] [quote=引用 12 楼 wlwlwlwl015 的回复:] 1.你把package名改一下,不要起那么特殊。 2.加上namespace="/"。 3.检查一下你Action中的方法名是否正确。 4.确认你没有改项目的默认路径。 其它的确实再看不出来还有什么可能性报这个异常。
那个jsp的 <form action="login.action">的action应该要改为你的那个testone吧。能不能麻烦你有时间帮我看下,实在是没找出问题。。。[/quote] 我没改。我只测试的是4个按钮没问题。我跑过了没发现问题。如果你也找不到问题的话。我把项目发给你你跑一下。如果成功了你再自习对比一下。[/quote] 终于知道原因了,是struts版本的原因,要在配置文件中加入动态调用。。。
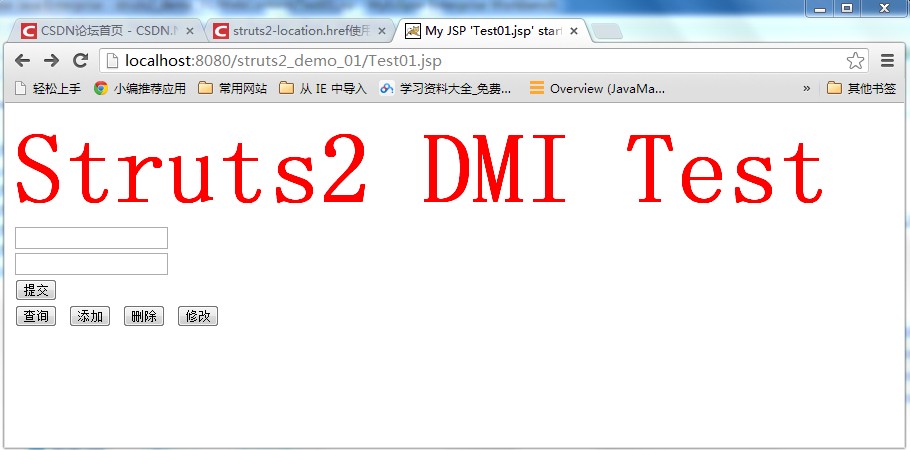
小灯光环 2014-04-17
  • 打赏
  • 举报
回复
引用 13 楼 xia929 的回复:
[quote=引用 12 楼 wlwlwlwl015 的回复:] 1.你把package名改一下,不要起那么特殊。 2.加上namespace="/"。 3.检查一下你Action中的方法名是否正确。 4.确认你没有改项目的默认路径。 其它的确实再看不出来还有什么可能性报这个异常。
那个jsp的 <form action="login.action">的action应该要改为你的那个testone吧。能不能麻烦你有时间帮我看下,实在是没找出问题。。。[/quote] 我没改。我只测试的是4个按钮没问题。我跑过了没发现问题。如果你也找不到问题的话。我把项目发给你你跑一下。如果成功了你再自习对比一下。
xia929 2014-04-17
  • 打赏
  • 举报
回复
引用 12 楼 wlwlwlwl015 的回复:
1.你把package名改一下,不要起那么特殊。
2.加上namespace="/"。
3.检查一下你Action中的方法名是否正确。
4.确认你没有改项目的默认路径。
其它的确实再看不出来还有什么可能性报这个异常。

那个jsp的 <form action="login.action">的action应该要改为你的那个testone吧。能不能麻烦你有时间帮我看下,实在是没找出问题。。。
小灯光环 2014-04-16
  • 打赏
  • 举报
回复
1.你把package名改一下,不要起那么特殊。 2.加上namespace="/"。 3.检查一下你Action中的方法名是否正确。 4.确认你没有改项目的默认路径。 其它的确实再看不出来还有什么可能性报这个异常。
小灯光环 2014-04-16
  • 打赏
  • 举报
回复
引用 9 楼 xia929 的回复:
[quote=引用 7 楼 wlwlwlwl015 的回复:]
[quote=引用 4 楼 xia929 的回复:]


[quote=引用 1 楼 jintianhen1 的回复:]
应该是你的struts配置文件的问题


引用 2 楼 huxiweng 的回复:
There is no Action mapped for namespace [/] and action name [login!add] associated with context path [/Struts2].

配置问题,你访问的url是什么,项目名称是什么


引用 3 楼 u012724379 的回复:
配置文件struts.xml检查检查,

struts配置文件就是上面贴出来的那些啊 ,就是那个使用onclick="location.href='login!query.action'" >的出错,那个提交按钮的能够通过。。。项目名称就是struts2[/quote]
HTTP Status 404 - There is no Action mapped for namespace [/] and action name [login!add] associated with context path [/Struts2].
你用的是DMI动态方法调用,在名为login的Action访问add()方法。
可是你在struts.xml定义的Action方法名为execute:
<action name="login" class="Test.LoginAction" method="execute">
这就不对了,你要么把execute去掉,要么把method改成add。
你的result的name只是Action中return的出口,而不是你的入口,好好检查一下。[/quote]

把execute去掉这样是不行的,默认的方法也是execute()啊,不写的效果是一样的。还有把method改成add的话四个增删改查这四个button还是没有实现。 不过谢谢你的建议。[/quote]
其实以前只是在书上看过DMI,一直没有实践过,今天就利用你这个问题的机会写了一个小demo测试了一下:
1.jsp代码和你的一样:

<body>
<span style="font-size: 100px;color: red;font-weight: bold;">Struts2 DMI Test</span><br/>
<form action="login.action">
<input type="text" name="username" ><br>
<input type="password" name="password" ><br>
<input type="submit" value="提交" ><br>
<input type="button" value="查询" onclick="location.href='testone!query.action'" >
<input type="button" value="添加" onclick="location.href='testone!add.action'" >
<input type="button" value="删除" onclick="location.href='testone!delete.action'" >
<input type="button" value="修改" onclick="location.href='testone!update.action'" >
</form>
</body>


2.struts.xml代码:

<package name="my01" namespace="/" extends="struts-default">
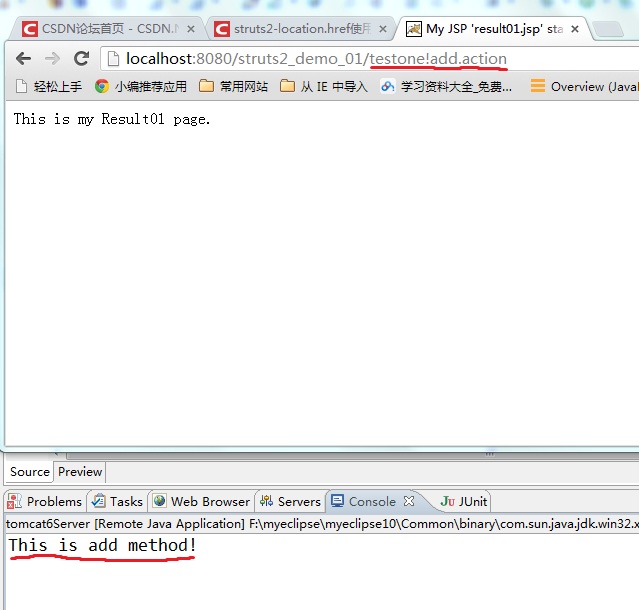
<action name="testone" class="com.fit.action.TestAction" method="execute">
<result name="success">/result01.jsp</result>
</action>
</package>


3.Action代码:

public class TestAction extends ActionSupport{

public String query(){
System.out.println("This is query method!");
return "success";
}

public String add(){
System.out.println("This is add method!");
return "success";
}

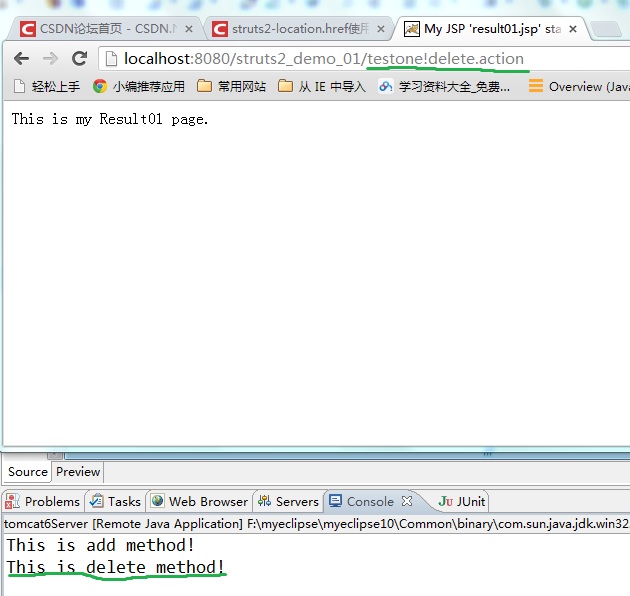
public String delete(){
System.out.println("This is delete method!");
return "success";
}

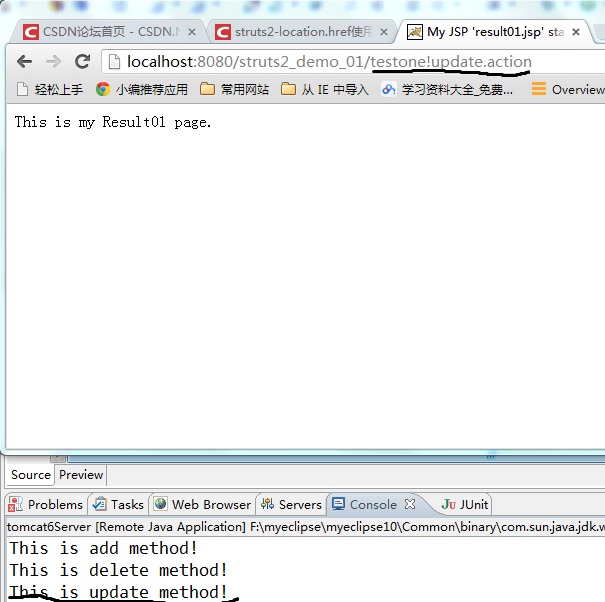
public String update(){
System.out.println("This is update method!");
return "success";
}
}


4.测试一切正常,上图:


xia929 2014-04-16
  • 打赏
  • 举报
回复
引用 8 楼 gansigandou 的回复:
英文的意思在ActionMap中 找不到/login!add,也就是说你没有给这个入口,你说你的提交<input type="submit" value="提交" ><br>可以执行是因为提交对应的路径是<form action="login.action">所以他找到的就是名称为login的action,这个是存在的所以可以执行。而你的其他的方法指定了不仅是action名称而且指定了这个action对应的执行方法,所以自然找不到了。 解决方法:<action name="login" class="Test.LoginAction" method="execute">把这个配置五个分别对应你的五个按钮。 楼上说的去掉method的方法我觉得不可行,有两个疑问一个是如果去掉有可能还是找不到,如果能找到那么都会走execute方法那么在具体的execute方法中需要判断是哪个按钮的请求(这个难度应该很大)。如果你有什么好的解决方案也可以回复我!
这样好像也不行,还是实现不了。。。你这个五个配置是说加在配置文件里吗?
xia929 2014-04-16
  • 打赏
  • 举报
回复
引用 7 楼 wlwlwlwl015 的回复:
[quote=引用 4 楼 xia929 的回复:] [quote=引用 1 楼 jintianhen1 的回复:] 应该是你的struts配置文件的问题
引用 2 楼 huxiweng 的回复:
There is no Action mapped for namespace [/] and action name [login!add] associated with context path [/Struts2]. 配置问题,你访问的url是什么,项目名称是什么
引用 3 楼 u012724379 的回复:
配置文件struts.xml检查检查,
struts配置文件就是上面贴出来的那些啊 ,就是那个使用onclick="location.href='login!query.action'" >的出错,那个提交按钮的能够通过。。。项目名称就是struts2[/quote] HTTP Status 404 - There is no Action mapped for namespace [/] and action name [login!add] associated with context path [/Struts2]. 你用的是DMI动态方法调用,在名为login的Action访问add()方法。 可是你在struts.xml定义的Action方法名为execute: <action name="login" class="Test.LoginAction" method="execute"> 这就不对了,你要么把execute去掉,要么把method改成add。 你的result的name只是Action中return的出口,而不是你的入口,好好检查一下。[/quote] 把execute去掉这样是不行的,默认的方法也是execute()啊,不写的效果是一样的。还有把method改成add的话四个增删改查这四个button还是没有实现。 不过谢谢你的建议。
gansigandou 2014-04-15
  • 打赏
  • 举报
回复
英文的意思在ActionMap中 找不到/login!add,也就是说你没有给这个入口,你说你的提交<input type="submit" value="提交" ><br>可以执行是因为提交对应的路径是<form action="login.action">所以他找到的就是名称为login的action,这个是存在的所以可以执行。而你的其他的方法指定了不仅是action名称而且指定了这个action对应的执行方法,所以自然找不到了。 解决方法:<action name="login" class="Test.LoginAction" method="execute">把这个配置五个分别对应你的五个按钮。 楼上说的去掉method的方法我觉得不可行,有两个疑问一个是如果去掉有可能还是找不到,如果能找到那么都会走execute方法那么在具体的execute方法中需要判断是哪个按钮的请求(这个难度应该很大)。如果你有什么好的解决方案也可以回复我!
小灯光环 2014-04-15
  • 打赏
  • 举报
回复
引用 4 楼 xia929 的回复:
[quote=引用 1 楼 jintianhen1 的回复:] 应该是你的struts配置文件的问题
引用 2 楼 huxiweng 的回复:
There is no Action mapped for namespace [/] and action name [login!add] associated with context path [/Struts2]. 配置问题,你访问的url是什么,项目名称是什么
引用 3 楼 u012724379 的回复:
配置文件struts.xml检查检查,
struts配置文件就是上面贴出来的那些啊 ,就是那个使用onclick="location.href='login!query.action'" >的出错,那个提交按钮的能够通过。。。项目名称就是struts2[/quote] HTTP Status 404 - There is no Action mapped for namespace [/] and action name [login!add] associated with context path [/Struts2]. 你用的是DMI动态方法调用,在名为login的Action访问add()方法。 可是你在struts.xml定义的Action方法名为execute: <action name="login" class="Test.LoginAction" method="execute"> 这就不对了,你要么把execute去掉,要么把method改成add。 你的result的name只是Action中return的出口,而不是你的入口,好好检查一下。
tony4geek 2014-04-15
  • 打赏
  • 举报
回复
action 里面有对应的方法不。
静山晚风 2014-04-15
  • 打赏
  • 举报
回复
你用的根据不同参数名执行不同方法,不知道你写对没
xia929 2014-04-14
  • 打赏
  • 举报
回复
引用 1 楼 jintianhen1 的回复:
应该是你的struts配置文件的问题
引用 2 楼 huxiweng 的回复:
There is no Action mapped for namespace [/] and action name [login!add] associated with context path [/Struts2]. 配置问题,你访问的url是什么,项目名称是什么
引用 3 楼 u012724379 的回复:
配置文件struts.xml检查检查,
struts配置文件就是上面贴出来的那些啊 ,就是那个使用onclick="location.href='login!query.action'" >的出错,那个提交按钮的能够通过。。。项目名称就是struts2
-江沐风- 2014-04-13
  • 打赏
  • 举报
回复
配置文件struts.xml检查检查,
teemai 2014-04-13
  • 打赏
  • 举报
回复
There is no Action mapped for namespace [/] and action name [login!add] associated with context path [/Struts2]. 配置问题,你访问的url是什么,项目名称是什么
静山晚风 2014-04-13
  • 打赏
  • 举报
回复
应该是你的struts配置文件的问题
弃用了struts,用spring mvc框架做了几个项目,感觉都不错,而且使用了注解方式,可以省掉一大堆配置文件。本文主要介绍使用注解方式配置的spring mvc,之前写的spring3.0 mvc和rest小例子没有介绍到数据层的内容,现在这一篇补上。下面开始贴代码。 文中用的框架版本:spring 3,hibernate 3,没有的,自己上网下。 先说web.xml配置: [java] view plaincopy 01.<?xml version="1.0" encoding="UTF-8"?> 02.Location="http://java.sun.com/xml/ns/javaee http://java.sun.com/xml/ns/javaee/web-app_2_5.xsd" id="WebApp_ID" version="2.5"> 03. s3h3 04. 05. contextConfigLocation 06. classpath:applicationContext*.xml 07. 08. 09. org.springframework.web.context.ContextLoaderListener 10. 11. 12. 13. spring 14. org.springframework.web.servlet.DispatcherServlet 15. 1 16. 17. 18. spring <!-- 这里在配成spring,下边也要写一个名为spring-servlet.xml的文件,主要用来配置它的controller --> 19. *.do 20. 21. 22. index.jsp 23. 24. spring-servlet,主要配置controller的信息 [java] view plaincopy 01.<?xml version="1.0" encoding="UTF-8"?> 02. Location="http://www.springframework.org/schema/beans http://www.springframework.org/schema/beans/spring-beans-3.0.xsd 06. http://www.springframework.org/schema/aop http://www.springframework.org/schema/aop/spring-aop-3.0.xsd 07. http://www.springframework.org/schema/tx http://www.springframework.org/schema/tx/spring-tx-3.0.xsd 08. http://www.springframework.org/schema/context http://www.springframework.org/schema/context/spring-context-3.0.xsd"> 09. 10. 11. <!-- 把标记了@Controller注解的类转换为bean --> 12. 13. <!-- 启动Spring MVC的注解功能,完成请求和注解POJO的映射 --> 14. 15. 16. <!-- 对模型视图名称的解析,即在模型视图名称添加前后缀 --> 17. 19. 20. 23. applicationContext.xml代码 [java] view plaincopy 01.<?xml version="1.0" encoding="UTF-8"?> 02.Location=" 07. http://www.springframework.org/schema/beans http://www.springframework.org/schema/beans/spring-beans-3.0.xsd 08. http://www.springframework.org/schema/context http://www.springframework.org/schema/context/spring-context-3.0.xsd 09. http://www.springframework.org/schema/aop http://www.springframework.org/schema/aop/spring-aop-3.0.xsd 10. http://www.springframework.org/schema/tx http://www.springframework.org/schema/tx/spring-tx-3.0.xsd"> 11. 12. 13. <!-- 自动扫描所有注解该路径 --> 14. 15. location="classpath:/hibernate.properties" /> 16. 17. 19. 20. 21. 22. ${dataSource.dialect} 23. ${dataSource.hbm2ddl.auto} 24. update 25. 26. 27. 28. 29. com.mvc.entity<!-- 扫描实体类,也就是平时所说的model --> 30. 31. 32. 33. 34. 36. 37. 38. 39. 40. 42. 43. 44. 45. 46. 47. <!-- Dao的实现 --> 48. 49. 50. 51. 52. 53. 54. 55. hibernate.properties数据库连接配置 [java] view plaincopy 01.dataSource.password=123 02.dataSource.username=root 03.dataSource.databaseName=test 04.dataSource.driverClassName=com.mysql.jdbc.Driver 05.dataSource.dialect=org.hibernate.dialect.MySQL5Dialect 06.dataSource.serverName=localhost:3306 07.dataSource.url=jdbc:mysql://localhost:3306/test 08.dataSource.properties=user=${dataSource.username};databaseName=${dataSource.databaseName};serverName=${dataSource.serverName};password=${dataSource.password} 09.dataSource.hbm2ddl.auto=update 配置已经完成,下面开始例子 先在数据库建表,例子用的是mysql数据库 [java] view plaincopy 01.CREATE TABLE `test`.`student` ( 02. `id` int(10) unsigned NOT NULL AUTO_INCREMENT, 03. `name` varchar(45) NOT NULL, 04. `psw` varchar(45) NOT NULL, 05. PRIMARY KEY (`id`) 06.) 建好表后,生成实体类 [java] view plaincopy 01.package com.mvc.entity; 02. 03.import java.io.Serializable; 04. 05.import javax.persistence.Basic; 06.import javax.persistence.Column; 07.import javax.persistence.Entity; 08.import javax.persistence.GeneratedValue; 09.import javax.persistence.GenerationType; 10.import javax.persistence.Id; 11.import javax.persistence.Table; 12. 13.@Entity 14.@Table(name = "student") 15.public class Student implements Serializable { 16. private static final long serialVersionUID = 1L; 17. @Id 18. @Basic(optional = false) 19. @GeneratedValue(strategy = GenerationType.IDENTITY) 20. @Column(name = "id", nullable = false) 21. private Integer id; 22. @Column(name = "name") 23. private String user; 24. @Column(name = "psw") 25. private String psw; 26. public Integer getId() { 27. return id; 28. } 29. public void setId(Integer id) { 30. this.id = id; 31. } 32. 33. public String getUser() { 34. return user; 35. } 36. public void setUser(String user) { 37. this.user = user; 38. } 39. public String getPsw() { 40. return psw; 41. } 42. public void setPsw(String psw) { 43. this.psw = psw; 44. } 45.} Dao层实现 [java] view plaincopy 01.package com.mvc.dao; 02. 03.import java.util.List; 04. 05.public interface EntityDao { 06. public List<Object> createQuery(final String queryString); 07. public Object save(final Object model); 08. public void update(final Object model); 09. public void delete(final Object model); 10.} [java] view plaincopy 01.package com.mvc.dao; 02. 03.import java.util.List; 04. 05.import org.hibernate.Query; 06.import org.springframework.orm.hibernate3.HibernateCallback; 07.import org.springframework.orm.hibernate3.support.HibernateDaoSupport; 08. 09.public class EntityDaoImpl extends HibernateDaoSupport implements EntityDao{ 10. public List<Object> createQuery(final String queryString) { 11. return (List<Object>) getHibernateTemplate().execute( 12. new HibernateCallback<Object>() { 13. public Object doInHibernate(org.hibernate.Session session) 14. throws org.hibernate.HibernateException { 15. Query query = session.createQuery(queryString); 16. List<Object> rows = query.list(); 17. return rows; 18. } 19. }); 20. } 21. public Object save(final Object model) { 22. return getHibernateTemplate().execute( 23. new HibernateCallback<Object>() { 24. public Object doInHibernate(org.hibernate.Session session) 25. throws org.hibernate.HibernateException { 26. session.save(model); 27. return null; 28. } 29. }); 30. } 31. public void update(final Object model) { 32. getHibernateTemplate().execute(new HibernateCallback<Object>() { 33. public Object doInHibernate(org.hibernate.Session session) 34. throws org.hibernate.HibernateException { 35. session.update(model); 36. return null; 37. } 38. }); 39. } 40. public void delete(final Object model) { 41. getHibernateTemplate().execute(new HibernateCallback<Object>() { 42. public Object doInHibernate(org.hibernate.Session session) 43. throws org.hibernate.HibernateException { 44. session.delete(model); 45. return null; 46. } 47. }); 48. } 49.} Dao在applicationContext.xml注入 Dao只有一个类的实现,直接供其它service层调用,如果你想更换为其它的Dao实现,也只需修改这里的配置就行了。 开始写view页面,WEB-INF/view下新建页面student.jsp,WEB-INF/view这路径是在spring-servlet.xml文件配置的,你可以配置成其它,也可以多个路径。student.jsp代码 [xhtml] view plaincopy 01.<%@ page language="java" contentType="text/html; charset=UTF-8" 02. pageEncoding="UTF-8"%> 03.<%@ include file="/include/head.jsp"%> 04. 05.<html> 06.<head> 07.<meta http-equiv="Content-Type" content="text/html; charset=UTF-8"> 08.<title>添加</title> 09. 11.// --><!-- 13.table{ border-collapse:collapse; } 14.td{ border:1px solid #f00; } 15.--><style mce_bogus="1">table{ border-collapse:collapse; } 16.td{ border:1px solid #f00; }</style> 17.<!-- 18.function add(){ 19. [removed].href="<%=request.getContextPath() %>/student.do?method=add"; 20.} 21. 22.function del(id){ 23.$.ajax( { 24. type : "POST", 25. url : "<%=request.getContextPath()%>/student.do?method=del&id;=" + id, 26. dataType: "json", 27. success : function(data) { 28. if(data.del == "true"){ 29. alert("删除成功!"); 30. $("#" + id).remove(); 31. } 32. else{ 33. alert("删除失败!"); 34. } 35. }, 36. error :function(){ 37. alert("网络连接出错!"); 38. } 39.}); 40.} 41.// --> 47. 48. 序号 49. 姓名 50. 密码 51. 操作 52. 53. 54. "> 55. 56. 57. 58. 59. <input type="button" value="编辑"/> 60. <input type="button" value="${student.id}"/>')" value="删除"/> 61. 62. 63. 64. 65. 66.</body> 67.</html> student_add.jsp [xhtml] view plaincopy 01.<%@ page language="java" contentType="text/html; charset=UTF-8" 02. pageEncoding="UTF-8"%> 03.<%@ include file="/include/head.jsp"%> 04. 05.<html> 06.<head> 07.<meta http-equiv="Content-Type" content="text/html; charset=UTF-8"> 08.<title>学生添加</title> 09.<!-- 10.function turnback(){ 11. [removed].href="<%=request.getContextPath() %>/student.do"; 12.} 13.// --> 17.
18. 19. 20. 21. 22.
姓名<input id="user" name="user" type="text" /></td>
密码<input id="psw" name="psw" type="text" /></td>
<input type="submit" value="提交"/><input type="button" value="返回" />
23. 24.</form> 25.</body> 26.</html> controller类实现,只需把注解写上,spring就会自动帮你找到相应的bean,相应的注解标记意义,不明白的,可以自己查下@Service,@Controller,@Entity等等的内容。 [java] view plaincopy 01.package com.mvc.controller; 02. 03.import java.util.List; 04. 05.import javax.servlet.http.HttpServletRequest; 06.import javax.servlet.http.HttpServletResponse; 07. 08.import org.apache.commons.logging.Log; 09.import org.apache.commons.logging.LogFactory; 10.import org.springframework.beans.factory.annotation.Autowired; 11.import org.springframework.stereotype.Controller; 12.import org.springframework.ui.ModelMap; 13.import org.springframework.web.bind.annotation.RequestMapping; 14.import org.springframework.web.bind.annotation.RequestMethod; 15.import org.springframework.web.bind.annotation.RequestParam; 16.import org.springframework.web.servlet.ModelAndView; 17. 18.import com.mvc.entity.Student; 19.import com.mvc.service.StudentService; 20. 21.@Controller 22.@RequestMapping("/student.do") 23.public class StudentController { 24. protected final transient Log log = LogFactory 25. .getLog(StudentController.class); 26. @Autowired 27. private StudentService studentService; 28. public StudentController(){ 29. 30. } 31. 32. @RequestMapping 33. public String load(ModelMap modelMap){ 34. List<Object> list = studentService.getStudentList(); 35. modelMap.put("list", list); 36. return "student"; 37. } 38. 39. @RequestMapping(params = "method=add") 40. public String add(HttpServletRequest request, ModelMap modelMap) throws Exception{ 41. return "student_add"; 42. } 43. 44. @RequestMapping(params = "method=save") 45. public String save(HttpServletRequest request, ModelMap modelMap){ 46. String user = request.getParameter("user"); 47. String psw = request.getParameter("psw"); 48. Student st = new Student(); 49. st.setUser(user); 50. st.setPsw(psw); 51. try{ 52. studentService.save(st); 53. modelMap.put("addstate", "添加成功"); 54. } 55. catch(Exception e){ 56. log.error(e.getMessage()); 57. modelMap.put("addstate", "添加失败"); 58. } 59. 60. return "student_add"; 61. } 62. 63. @RequestMapping(params = "method=del") 64. public void del(@RequestParam("id") String id, HttpServletResponse response){ 65. try{ 66. Student st = new Student(); 67. st.setId(Integer.valueOf(id)); 68. studentService.delete(st); 69. response.getWriter().print("{/"del/":/"true/"}"); 70. } 71. catch(Exception e){ 72. log.error(e.getMessage()); 73. e.printStackTrace(); 74. } 75. } 76.} service类实现 [java] view plaincopy 01.package com.mvc.service; 02. 03.import java.util.List; 04. 05.import org.springframework.beans.factory.annotation.Autowired; 06.import org.springframework.stereotype.Service; 07.import org.springframework.transaction.annotation.Transactional; 08. 09.import com.mvc.dao.EntityDao; 10.import com.mvc.entity.Student; 11. 12.@Service 13.public class StudentService { 14. @Autowired 15. private EntityDao entityDao; 16. 17. @Transactional 18. public List<Object> getStudentList(){ 19. StringBuffer sff = new StringBuffer(); 20. sff.append("select a from ").append(Student.class.getSimpleName()).append(" a "); 21. List<Object> list = entityDao.createQuery(sff.toString()); 22. return list; 23. } 24. 25. public void save(Student st){ 26. entityDao.save(st); 27. } 28. public void delete(Object obj){ 29. entityDao.delete(obj); 30. } 31.} OK,例子写完。有其它业务内容,只需直接新建view,并实现相应comtroller和service就行了,配置和dao层的内容基本不变,也就是每次只需写jsp(view),controller和service调用dao就行了。 怎样,看了这个,spring mvc是不是比ssh实现更方便灵活。

62,610

社区成员

发帖
与我相关
我的任务
社区描述
Java 2 Standard Edition
社区管理员
  • Java SE
加入社区
  • 近7日
  • 近30日
  • 至今
社区公告
暂无公告

试试用AI创作助手写篇文章吧