81,111
社区成员
 发帖
发帖 与我相关
与我相关 我的任务
我的任务
 分享
分享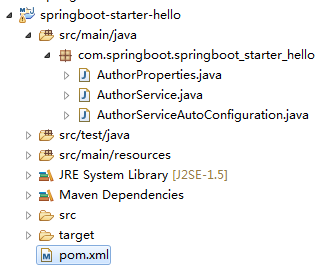
package com.springboot.springboot_starter_hello;
import org.springframework.boot.context.properties.ConfigurationProperties;
@ConfigurationProperties(prefix="author")//指定配置内容的前缀
public class AuthorProperties {
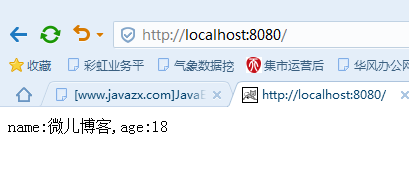
private static final String NAME = "微儿博客";
private static final int AGE = 18;
private String name = NAME;//默认为微儿博客
private int age = AGE;//默认为18
public String getName() {
return name;
}
public void setName(String name) {
this.name = name;
}
public int getAge() {
return age;
}
public void setAge(int age) {
this.age = age;
}
}package com.springboot.springboot_starter_hello;
public class AuthorService {
private String name;
private int age;
public String who(){
return "name:"+name+",age:"+age;
}
public String getName() {
return name;
}
public void setName(String name) {
this.name = name;
}
public int getAge() {
return age;
}
public void setAge(int age) {
this.age = age;
}
}package com.springboot.springboot_starter_hello;
import org.springframework.beans.factory.annotation.Autowired;
import org.springframework.boot.autoconfigure.condition.ConditionalOnClass;
import org.springframework.boot.autoconfigure.condition.ConditionalOnMissingBean;
import org.springframework.boot.autoconfigure.condition.ConditionalOnProperty;
import org.springframework.boot.context.properties.EnableConfigurationProperties;
import org.springframework.context.annotation.Bean;
import org.springframework.context.annotation.Configuration;
@Configuration//声明配置类
@EnableConfigurationProperties(AuthorProperties.class)
@ConditionalOnClass(AuthorService.class)//类路径下存在AuthorService类的条件下
@ConditionalOnProperty(prefix="author",value="enabled",matchIfMissing=true)//在前缀为author的配置为enabled的情况下,即author=enabled,没有配置默认为enabled
public class AuthorServiceAutoConfiguration {
@Autowired
private AuthorProperties authorProperties;
@Bean
@ConditionalOnMissingBean(AuthorService.class)//容器中没有AuthorService的Bean的条件下配置该Bean
public AuthorService authorService(){
AuthorService authorService = new AuthorService();
authorService.setName(authorProperties.getName());
authorService.setAge(authorProperties.getAge());
return authorService;
}
}org.springframework.boot.autoconfigure.EnableAutoConfiguration=\
com.springboot.springboot_starter_hello.AuthorServiceAutoConfiguration<dependency>
<groupId>com.springboot</groupId>
<artifactId>springboot-starter-hello</artifactId>
<version>0.0.1-SNAPSHOT</version>
</dependency>package com.springboot.autoconfig;
import org.springframework.beans.factory.annotation.Autowired;
import org.springframework.boot.SpringApplication;
import org.springframework.boot.autoconfigure.SpringBootApplication;
import org.springframework.web.bind.annotation.RequestMapping;
import org.springframework.web.bind.annotation.RestController;
import com.springboot.springboot_starter_hello.AuthorService;
@SpringBootApplication
@RestController
public class AutoConfig {
@Autowired
private AuthorService authorService;
@RequestMapping("/")
public String who(){
return authorService.who();
}
public static void main(String[] args) {
SpringApplication.run(AutoConfig.class, args);
}
}
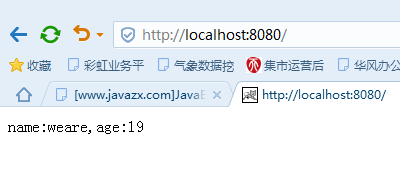
author.name=weare

author.age=19