111,129
社区成员
 发帖
发帖 与我相关
与我相关 我的任务
我的任务
 分享
分享


using System;
using System.Windows.Forms;
namespace WindowsFormsApp2
{
public partial class Form1 : Form
{
public Form1()
{
InitializeComponent();
}
private void Form1_Load(object sender, EventArgs e)
{
this.treeView1.ImageList = imageList1;
}
private void button1_Click(object sender, EventArgs e)
{
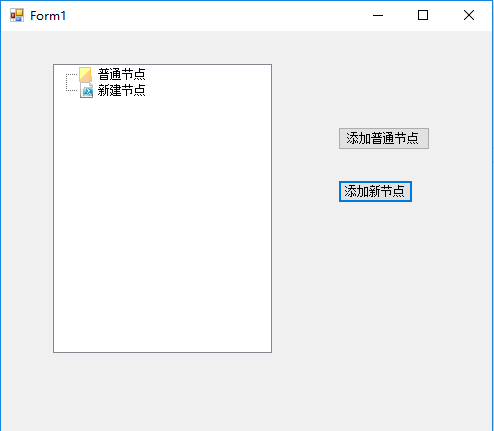
this.treeView1.Nodes.Add(new TreeNode("普通节点", 0, 0));
}
private void button2_Click(object sender, EventArgs e)
{
this.treeView1.Nodes.Add(new TreeNode("新建节点", 1, 1));
}
}
}
namespace WindowsFormsApp2
{
partial class Form1
{
/// <summary>
/// 必需的设计器变量。
/// </summary>
private System.ComponentModel.IContainer components = null;
/// <summary>
/// 清理所有正在使用的资源。
/// </summary>
/// <param name="disposing">如果应释放托管资源,为 true;否则为 false。</param>
protected override void Dispose(bool disposing)
{
if (disposing && (components != null))
{
components.Dispose();
}
base.Dispose(disposing);
}
#region Windows 窗体设计器生成的代码
/// <summary>
/// 设计器支持所需的方法 - 不要修改
/// 使用代码编辑器修改此方法的内容。
/// </summary>
private void InitializeComponent()
{
this.components = new System.ComponentModel.Container();
System.ComponentModel.ComponentResourceManager resources = new System.ComponentModel.ComponentResourceManager(typeof(Form1));
this.treeView1 = new System.Windows.Forms.TreeView();
this.imageList1 = new System.Windows.Forms.ImageList(this.components);
this.button1 = new System.Windows.Forms.Button();
this.button2 = new System.Windows.Forms.Button();
this.SuspendLayout();
//
// treeView1
//
this.treeView1.Location = new System.Drawing.Point(52, 33);
this.treeView1.Name = "treeView1";
this.treeView1.Size = new System.Drawing.Size(219, 289);
this.treeView1.TabIndex = 0;
//
// imageList1
//
this.imageList1.ImageStream = ((System.Windows.Forms.ImageListStreamer)(resources.GetObject("imageList1.ImageStream")));
this.imageList1.TransparentColor = System.Drawing.Color.Transparent;
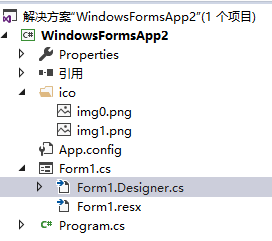
this.imageList1.Images.SetKeyName(0, "img0.png");
this.imageList1.Images.SetKeyName(1, "img1.png");
//
// button1
//
this.button1.Location = new System.Drawing.Point(337, 96);
this.button1.Name = "button1";
this.button1.Size = new System.Drawing.Size(92, 23);
this.button1.TabIndex = 1;
this.button1.Text = "添加普通节点";
this.button1.UseVisualStyleBackColor = true;
this.button1.Click += new System.EventHandler(this.button1_Click);
//
// button2
//
this.button2.Location = new System.Drawing.Point(337, 149);
this.button2.Name = "button2";
this.button2.Size = new System.Drawing.Size(75, 23);
this.button2.TabIndex = 2;
this.button2.Text = "添加新节点";
this.button2.UseVisualStyleBackColor = true;
this.button2.Click += new System.EventHandler(this.button2_Click);
//
// Form1
//
this.AutoScaleDimensions = new System.Drawing.SizeF(6F, 12F);
this.AutoScaleMode = System.Windows.Forms.AutoScaleMode.Font;
this.ClientSize = new System.Drawing.Size(491, 401);
this.Controls.Add(this.button2);
this.Controls.Add(this.button1);
this.Controls.Add(this.treeView1);
this.Name = "Form1";
this.Text = "Form1";
this.Load += new System.EventHandler(this.Form1_Load);
this.ResumeLayout(false);
}
#endregion
private System.Windows.Forms.TreeView treeView1;
private System.Windows.Forms.ImageList imageList1;
private System.Windows.Forms.Button button1;
private System.Windows.Forms.Button button2;
}
}