


67,512
社区成员
 发帖
发帖 与我相关
与我相关 我的任务
我的任务
 分享
分享

<?xml version="1.0" encoding="UTF-8"?>

<beans xmlns="http://www.springframework.org/schema/beans"

	xmlns:context="http://www.springframework.org/schema/context" xmlns:p="http://www.springframework.org/schema/p"

	xmlns:aop="http://www.springframework.org/schema/aop" xmlns:tx="http://www.springframework.org/schema/tx"

	xmlns:xsi="http://www.w3.org/2001/XMLSchema-instance"

	xsi:schemaLocation="http://www.springframework.org/schema/beans http://www.springframework.org/schema/beans/spring-beans-4.0.xsd

	http://www.springframework.org/schema/context http://www.springframework.org/schema/context/spring-context-4.0.xsd

	http://www.springframework.org/schema/aop http://www.springframework.org/schema/aop/spring-aop-4.0.xsd http://www.springframework.org/schema/tx http://www.springframework.org/schema/tx/spring-tx-4.0.xsd

	http://www.springframework.org/schema/util http://www.springframework.org/schema/util/spring-util-4.0.xsd">


	<!-- 配置 读取properties文件 jdbc.properties -->

	<context:property-placeholder location="classpath:conf/*.properties" />


	<!-- 配置 数据源 -->

	<bean id="dataSource" class="com.alibaba.druid.pool.DruidDataSource">

		<property name="driverClassName" value="${jdbc.driver}" />

		<property name="url" value="${jdbc.url}" />

		<property name="username" value="${jdbc.username}" />

		<property name="password" value="${jdbc.password}" />

		<!-- 最大连接和超时设置 -->

		<property name="initialSize" value="1" />

        <property name="minIdle" value="1" />

		<property name="maxActive" value="500" />

		<!-- 配置获取连接等待超时的时间 -->

		<property name="maxWait" value="60000" />

		<!-- 配置间隔多久才进行一次检测,检测需要关闭的空闲连接,单位是毫秒 -->

		<property name="timeBetweenEvictionRunsMillis" value="60000" />

		<!-- 配置一个连接在池中最小生存的时间,单位是毫秒 -->

		<property name="minEvictableIdleTimeMillis" value="300000" />


		<!-- <property name="validationQuery" value="select 1 from dual" />

		<property name="testWhileIdle" value="true" />

		 <property name="testOnBorrow" value="false" />

		<property name="testOnReturn" value="false" />

		打开PSCache,并且指定每个连接上PSCache的大小  分库分表较多的数据库建议poolPreparedStatements为false,oracle这类单表大库建议true

		<property name="poolPreparedStatements" value="true" />

		<property name="maxPoolPreparedStatementPerConnectionSize" value="20"/>

		配置监控统计拦截的filters,去掉后监控界面sql无法统计

		开启druid监控支持(stat),SQL防火墙(wall)以及SQL合并(mergeStat)

		<property name="filters" value="stat,config" /> -->


		<!-- 配置druid监控 -->

		<property name="validationQuery" value="select 1 from dual" />

        <property name="testWhileIdle" value="true" />

        <property name="poolPreparedStatements" value="true" /><!-- 打开PSCache,并且指定每个连接上PSCache的大小 -->

        <property name="maxPoolPreparedStatementPerConnectionSize" value="20" />

        <property name="filters" value="stat,config" /><!-- 开启druid监控支持(stat),SQL防火墙(wall)以及SQL合并(mergeStat) -->

        <property name="connectionProperties"

            value="druid.stat.slowSqlMillis=1000;config.decrypt=false" /><!-- 慢SQL标准 1s查询 -->

        <property name="removeAbandoned" value="true" /> <!-- 打开removeAbandoned功能 -->

        <property name="removeAbandonedTimeout" value="1800" /> <!-- 1800秒,也就是30分钟 -->

        <property name="logAbandoned" value="true" /> <!-- 关闭abanded连接时输出错误日志 -->

	</bean>


	<!-- 配置SqlSessionFactory -->

	<bean class="org.mybatis.spring.SqlSessionFactoryBean">

		<!-- 设置MyBatis核心配置文件 -->

		<property name="configLocation" value="classpath:mybatis/SqlMapConfig.xml" />

		<!-- 设置数据源 -->

		<property name="dataSource" ref="dataSource" />

	</bean>


	<!-- 配置Mapper扫描 -->

	<bean class="tk.mybatis.spring.mapper.MapperScannerConfigurer">

		<!-- 设置Mapper扫描包 -->

		<property name="basePackage" value="com.module.mapper.**" />

	</bean>

</beans>
<?xml version="1.0" encoding="UTF-8"?>

<beans xmlns="http://www.springframework.org/schema/beans"

	xmlns:xsi="http://www.w3.org/2001/XMLSchema-instance" xmlns:p="http://www.springframework.org/schema/p"

	xmlns:context="http://www.springframework.org/schema/context"

	xmlns:dubbo="http://code.alibabatech.com/schema/dubbo" xmlns:mvc="http://www.springframework.org/schema/mvc"

	xsi:schemaLocation="http://www.springframework.org/schema/beans http://www.springframework.org/schema/beans/spring-beans.xsd

        http://www.springframework.org/schema/mvc http://www.springframework.org/schema/mvc/spring-mvc-4.2.xsd

        http://www.springframework.org/schema/context http://www.springframework.org/schema/context/spring-context.xsd">


	<bean id="freemarkerConfig"

		class="org.springframework.web.servlet.view.freemarker.FreeMarkerConfigurer">

		<property name="templateLoaderPath" value="/WEB-INF/ftl/" />

		<property name="defaultEncoding" value="UTF-8" />

	</bean>

</beans><?xml version="1.0" encoding="UTF-8"?>
<beans xmlns="http://www.springframework.org/schema/beans"
xmlns:xsi="http://www.w3.org/2001/XMLSchema-instance" xmlns:cache="http://www.springframework.org/schema/cache"
xmlns:context="http://www.springframework.org/schema/context"
xsi:schemaLocation="http://www.springframework.org/schema/beans http://www.springframework.org/schema/beans/spring-beans-4.3.xsd
http://www.springframework.org/schema/cache http://www.springframework.org/schema/cache/spring-cache-4.3.xsd
http://www.springframework.org/schema/context http://www.springframework.org/schema/context/spring-context-4.3.xsd">
<bean id="bossGroup" class="io.netty.channel.nio.NioEventLoopGroup"></bean>
<bean id="workerGroup" class="io.netty.channel.nio.NioEventLoopGroup"></bean>
<bean id="serverBootstrap" class="io.netty.bootstrap.ServerBootstrap"
scope="prototype"></bean>
<bean id="webSocketServer" class="com.module.netty.WebSocketServer">
<property name="port" value="${websocket.server.port}"></property>
<property name="childChannelHandler" ref="webSocketChildChannelHandler" />
</bean>
<bean id="webSocketChildChannelHandler" class="com.module.netty.WebSocketChildChannelHandler"></bean>
<bean id="webSocketServerHandler" class="com.web.handler.QrcodeNettyHanlder"></bean>
</beans>


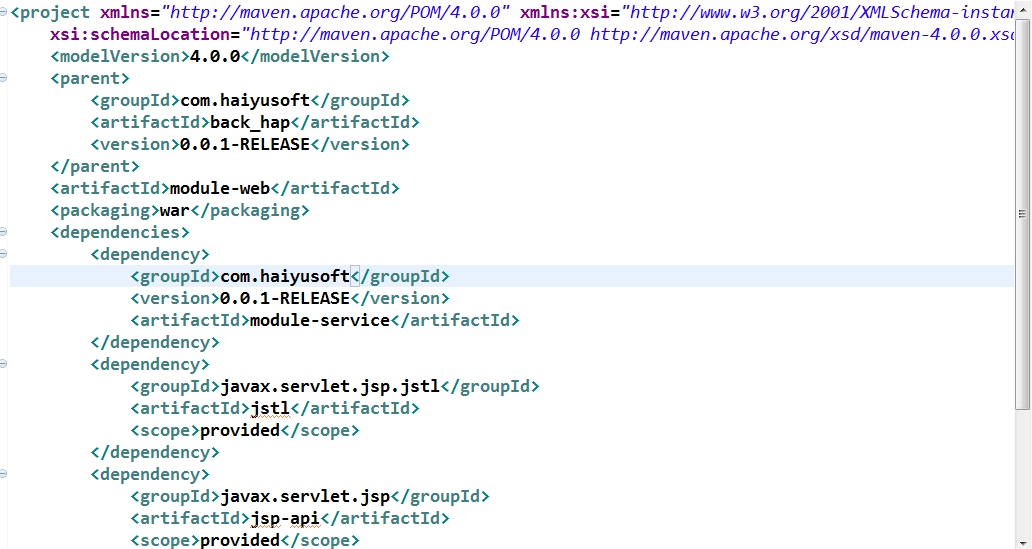
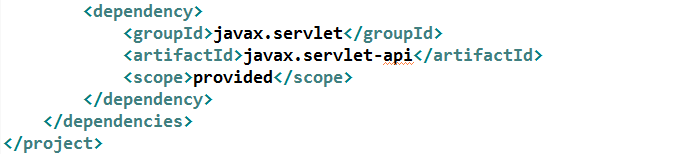
 有对这个问题感兴趣的吗?可以留下邮箱我发送工程给你,帮我看下哦


<?xml version="1.0" encoding="UTF-8"?>
<web-app xmlns:xsi="http://www.w3.org/2001/XMLSchema-instance"
	xmlns="http://java.sun.com/xml/ns/javaee"
	xsi:schemaLocation="http://java.sun.com/xml/ns/javaee http://java.sun.com/xml/ns/javaee/web-app_2_5.xsd"
	version="2.5">
	<display-name>module-web</display-name>
	<welcome-file-list>
		<welcome-file>/WEB-INF/jsp/index.jsp</welcome-file>
	</welcome-file-list>
	<!-- 配置spring -->
	<context-param>
		<param-name>contextConfigLocation</param-name>
		<param-value>classpath*:spring/spring-*.xml</param-value>
	</context-param>
	<!-- 配置监听器加载spring -->
	<listener>
		<listener-class>org.springframework.web.context.ContextLoaderListener</listener-class>
	</listener>
	<!-- 配置过滤器,解决post的乱码问题 -->
	<filter>
		<filter-name>encoding</filter-name>
		<filter-class>org.springframework.web.filter.CharacterEncodingFilter</filter-class>
	</filter>
	<filter-mapping>
		<filter-name>encoding</filter-name>
		<url-pattern>/*</url-pattern>
	</filter-mapping>
	<!-- log4j2-begin -->
	<listener>
		<listener-class>org.apache.logging.log4j.web.Log4jServletContextListener</listener-class>
	</listener>
	<filter>
		<filter-name>log4jServletFilter</filter-name>
		<filter-class>org.apache.logging.log4j.web.Log4jServletFilter</filter-class>
	</filter>
	<filter-mapping>
		<filter-name>log4jServletFilter</filter-name>
		<url-pattern>/*</url-pattern>
		<dispatcher>REQUEST</dispatcher>
		<dispatcher>FORWARD</dispatcher>
		<dispatcher>INCLUDE</dispatcher>
		<dispatcher>ERROR</dispatcher>
	</filter-mapping>
	<!-- log4j2-end -->
	<!-- 支持GET、POST、PATCH、PUT与DELETE请求 -->
	<filter>
		<filter-name>httpPutFormFilter</filter-name>
		<filter-class>org.springframework.web.filter.HttpPutFormContentFilter</filter-class>
	</filter>
	<filter-mapping>
		<filter-name>httpPutFormFilter</filter-name>
		<url-pattern>/*</url-pattern>
	</filter-mapping>
	<!-- 跨站请求过滤器 -->
	<filter>
	   <filter-name>CorsFilter</filter-name>
	   <filter-class>com.web.handler.CorsFilter</filter-class>
	   <init-param>
	      <param-name>IsCross</param-name>
	      <param-value>true</param-value>
	   </init-param>
	</filter>
    <filter-mapping>
       <filter-name>CorsFilter</filter-name>
       <url-pattern>/*</url-pattern>
    </filter-mapping>
	<!-- 配置SpringMVC -->
	<servlet>
		<servlet-name>module-web</servlet-name>
		<servlet-class>org.springframework.web.servlet.DispatcherServlet</servlet-class>
		<init-param>
			<param-name>contextConfigLocation</param-name>
			<param-value>classpath*:spring/springMvc.xml</param-value>
		</init-param>
		<!-- 配置springmvc什么时候启动,参数必须为整数 -->
		<!-- 如果为0或者大于0,则springMVC随着容器启动而启动 -->
		<!-- 如果小于0,则在第一次请求进来的时候启动 -->
		<load-on-startup>1</load-on-startup>
	</servlet>
	<servlet-mapping>
		<servlet-name>module-web</servlet-name>
		<!-- 所有的请求都进入springMVC,伪静态方式,提高seo网站速度 -->
		<url-pattern>*.html</url-pattern>
	</servlet-mapping>
	<!-- shiro的filter -->
	<!-- shiro过虑器,DelegatingFilterProxy通过代理模式将spring容器中的bean和filter关联起来 -->
	<filter>
		<filter-name>shiroFilter</filter-name>
		<filter-class>org.springframework.web.filter.DelegatingFilterProxy</filter-class>
		<!-- 设置true由servlet容器控制filter的生命周期 -->
		<init-param>
			<param-name>targetFilterLifecycle</param-name>
			<param-value>true</param-value>
		</init-param>
		<!-- 设置spring容器filter的bean id,如果不设置则找与filter-name一致的bean -->
		<init-param>
			<param-name>targetBeanName</param-name>
			<param-value>shiroFilter</param-value>
		</init-param>
	</filter>
	<filter-mapping>
		<filter-name>shiroFilter</filter-name>
		<url-pattern>/*</url-pattern>
	</filter-mapping>

	<!-- 性能监控start -->
	<servlet>
		<servlet-name>DruidStatView</servlet-name>
		<servlet-class>com.alibaba.druid.support.http.StatViewServlet</servlet-class>
	</servlet>
	<servlet-mapping>
		<servlet-name>DruidStatView</servlet-name>
		<url-pattern>/druid/*</url-pattern>
	</servlet-mapping>
	<!-- DruidWebStatFilter -->
	<filter>
		<filter-name>DruidWebStatFilter</filter-name>
		<filter-class>com.alibaba.druid.support.http.WebStatFilter</filter-class>
		<init-param>
			<param-name>exclusions</param-name>
			<param-value>*.js,*.gif,*.jpg,*.png,*.css,*.ico,/druid/*</param-value>
		</init-param>
	</filter>
	<filter-mapping>
		<filter-name>DruidWebStatFilter</filter-name>
		<url-pattern>/*</url-pattern>
	</filter-mapping>
	<!-- 性能监控end -->
	<!-- 配置一个拦截tomcat启动的过滤器,在tomcat启动当前项目的时候可以用来做一些初始化操作, 比如项目有锚点,或者有服务器功能,有im通讯服务或者视频服务器等这类都可以在这里启动之前全部初始化启动了,
		整个tomcat周期范围内只有一次,同时如果没有用quartz这类任务调度框架,可以在这里初始化定时器, 当然也可以在spring中配置bean默认启动加载的时候直接初始化调用也可以 -->
	<!-- <filter> <filter-name>startFilter</filter-name> <filter-class>com.web.handler.TomcatStartFilter</filter-class>
		</filter> -->
	<!-- webservice支持 -->
	<servlet>
		<servlet-name>AxisServlet</servlet-name>
		<servlet-class>org.apache.axis2.transport.http.AxisServlet</servlet-class>
		<load-on-startup>1</load-on-startup>
	</servlet>
	<servlet-mapping>
		<servlet-name>AxisServlet</servlet-name>
		<url-pattern>/services/*</url-pattern>
	</servlet-mapping>
</web-app><?xml version="1.0" encoding="UTF-8"?>
<beans xmlns="http://www.springframework.org/schema/beans"
xmlns:xsi="http://www.w3.org/2001/XMLSchema-instance"
xsi:schemaLocation="http://www.springframework.org/schema/beans http://www.springframework.org/schema/beans/spring-beans.xsd">
<!-- 为当前项目的上传文件下载文件以及导入导出功能设计的线程池,并发环境下使用(使用方法@Autowired private TaskExecutor executor;) -->
<bean id="threadPoolExecutor" class="java.util.concurrent.ThreadPoolExecutor">
<!-- 核心线程数 -->
<constructor-arg type="int" value="3"/>
<!-- 默认的线程池最大线程数 -->
<constructor-arg type="int" value="20"/>
<!-- 注入存活时间 keepAliveTime -->
<constructor-arg type="long" value="2000"/>
<!-- 注入枚举类型 时间类型 -->
<constructor-arg type="java.util.concurrent.TimeUnit" ref="timeUnit"/>
<!-- 注入队列 -->
<constructor-arg type="java.util.concurrent.BlockingQueue" ref="workQueue"/>
</bean>
<!-- 配置枚举时间bean -->
<bean id="timeUnit" class="org.springframework.beans.factory.config.FieldRetrievingFactoryBean">
<property name="staticField" value="java.util.concurrent.TimeUnit.SECONDS" />
</bean>
<!-- 配置队列 -->
<bean id="workQueue" class="java.util.concurrent.LinkedBlockingQueue">
</bean>
</beans>
<?xml version="1.0" encoding="UTF-8"?>
<beans xmlns="http://www.springframework.org/schema/beans"
	xmlns:context="http://www.springframework.org/schema/context" xmlns:p="http://www.springframework.org/schema/p"
	xmlns:aop="http://www.springframework.org/schema/aop" xmlns:tx="http://www.springframework.org/schema/tx"
	xmlns:xsi="http://www.w3.org/2001/XMLSchema-instance"
	xsi:schemaLocation="http://www.springframework.org/schema/beans http://www.springframework.org/schema/beans/spring-beans-4.0.xsd
	http://www.springframework.org/schema/context http://www.springframework.org/schema/context/spring-context-4.0.xsd
	http://www.springframework.org/schema/aop http://www.springframework.org/schema/aop/spring-aop-4.0.xsd http://www.springframework.org/schema/tx http://www.springframework.org/schema/tx/spring-tx-4.0.xsd
	http://www.springframework.org/schema/util http://www.springframework.org/schema/util/spring-util-4.0.xsd">

	<!-- 事务管理器 -->
	<bean id="transactionManager"	class="org.springframework.jdbc.datasource.DataSourceTransactionManager">
		<!-- 数据源 -->
		<property name="dataSource" ref="dataSource" />
	</bean>

	<!-- 通知 -->
	<tx:advice id="txAdvice" transaction-manager="transactionManager">
		<tx:attributes>
			<!-- 传播行为 -->
			<tx:method name="save*" propagation="REQUIRED" />
			<tx:method name="insert*" propagation="REQUIRED" />
			<tx:method name="add*" propagation="REQUIRED" />
			<tx:method name="create*" propagation="REQUIRED" />
			<tx:method name="delete*" propagation="REQUIRED" />
			<tx:method name="update*" propagation="REQUIRED" />
			<tx:method name="find*" propagation="SUPPORTS" read-only="true" />
			<tx:method name="select*" propagation="SUPPORTS" read-only="true" />
			<tx:method name="get*" propagation="SUPPORTS" read-only="true" />
			<tx:method name="query*" propagation="SUPPORTS" read-only="true" />
		</tx:attributes>
	</tx:advice>

	<!-- 切面 -->
	<aop:config>
		<aop:advisor advice-ref="txAdvice"
			pointcut="execution(* com.module.service.*.*(..))" />
	</aop:config>
</beans>
<?xml version="1.0" encoding="UTF-8"?>
<beans xmlns="http://www.springframework.org/schema/beans"
	xmlns:xsi="http://www.w3.org/2001/XMLSchema-instance" xmlns:p="http://www.springframework.org/schema/p"
	xmlns:context="http://www.springframework.org/schema/context"
	xmlns:mvc="http://www.springframework.org/schema/mvc"
	xsi:schemaLocation="http://www.springframework.org/schema/beans http://www.springframework.org/schema/beans/spring-beans-4.3.xsd
        http://www.springframework.org/schema/mvc http://www.springframework.org/schema/mvc/spring-mvc-4.3.xsd
        http://www.springframework.org/schema/aop http://www.springframework.org/schema/aop/spring-aop-4.3.xsd
        http://www.springframework.org/schema/context http://www.springframework.org/schema/context/spring-context-4.3.xsd">
	<!-- 配置Controller扫描 -->
	<context:component-scan base-package="com.module.controller.**" />
 	<!-- 处理静态资源,解决css、js等文件引入出现404:让DispatcherServlet核心控制器其他映射无效 -->
	<mvc:default-servlet-handler />
	<!-- 解决控制器无效问题 -->
	<mvc:annotation-driven/>
	<bean
		class="org.springframework.aop.framework.autoproxy.DefaultAdvisorAutoProxyCreator"
		depends-on="lifecycleBeanPostProcessor">
		<property name="proxyTargetClass" value="true" />
	</bean>

	<bean
		class="org.apache.shiro.spring.security.interceptor.AuthorizationAttributeSourceAdvisor">
		<property name="securityManager" ref="securityManager" />
	</bean>

	<!-- 通过annotation-driven可以替代下边的处理器映射器和适配器 -->
	<mvc:annotation-driven conversion-service="conversionService" content-negotiation-manager="contentNegotiationManager">
	 <mvc:message-converters>
	    <bean  class="org.springframework.http.converter.json.MappingJackson2HttpMessageConverter">
		   <property name="objectMapper">
		     <bean class="com.web.handler.JaskonMapper">
		     </bean>
		   </property>
		</bean>
	 </mvc:message-converters>
	</mvc:annotation-driven>

	<bean id="contentNegotiationManager"
		class="org.springframework.web.accept.ContentNegotiationManagerFactoryBean">
		<property name="mediaTypes">
			<map>
				<entry key="html" value="application/json;charset=UTF-8" />
			</map>
		</property>
	</bean>

	<!-- 实体字段转换器 -->
	<bean id="conversionService"
		class="org.springframework.format.support.FormattingConversionServiceFactoryBean">
		<property name="converters">
			<list>
				<bean class="com.module.converter.CustomDateConverter" />
				<bean class="com.module.converter.StringTrimConverter" />
			</list>
		</property>
	</bean>

	<!-- springmvc读取CustomMessages.properties配置文件 -->
	<bean id="messageSource"
		class="org.springframework.context.support.ReloadableResourceBundleMessageSource">
		<property name="defaultEncoding" value="iso-8859-1" />
		<!-- 资源文件名 -->
		<property name="basenames">
			<list>
				<value>classpath:CustomMessages</value>
			</list>
		</property>
		<!-- 资源文件编码格式 -->
		<property name="fileEncodings" value="utf-8" />
		<!-- 对资源文件内容缓存时间,单位秒 -->
		<property name="cacheSeconds" value="120" />
	</bean>

	<!-- 配置 读取properties文件 jdbc.properties -->
	<context:property-placeholder location="classpath:conf/*.properties" />

	<!-- 配置静态资源模块 -->
	<mvc:resources location="/js/" mapping="/js/**" />
	<mvc:resources location="/css/" mapping="/css/**" />
	<mvc:resources location="/img/" mapping="/img/**" />

	<!-- 定义文件上传解析器 -->
	<bean id="multipartResolver"
		class="org.springframework.web.multipart.commons.CommonsMultipartResolver">
		<!-- 设定默认编码 -->
		<property name="defaultEncoding" value="UTF-8" />
		<!-- 设定文件上传的最大值5MB,5*1024*1024 -->
		<property name="maxUploadSize" value="5242880" />
		<!-- 一次读取的字节数,1024的倍数,默认最小一次读取1024字节 -->
		<property name="maxInMemorySize" value="4096" />
	</bean>

	<!-- 配置视图解析器 -->
	<bean
		class="org.springframework.web.servlet.view.InternalResourceViewResolver">
		<!-- 前缀 -->
		<property name="prefix" value="/WEB-INF/jsp/" />
		<!-- 后缀 -->
		<property name="suffix" value=".jsp" />
	</bean>

	<!-- 配置的全局异常处理类 -->
	<bean class="com.web.handler.GlobalExceptionHandler" />

	<!-- 动态quartz -->
	<bean id="startQuartz" lazy-init="true" autowire="no"
		class="org.springframework.scheduling.quartz.SchedulerFactoryBean">
		<property name="triggers">
			<list>
			</list>
		</property>
	</bean>

	<bean id="quartzManager" class="com.module.utils.quartz.QuartzManager"
		lazy-init="false" init-method="startAll">
		<property name="scheduler" ref="startQuartz" />
	</bean>
</beans>
<?xml version="1.0" encoding="UTF-8"?>
<beans xmlns="http://www.springframework.org/schema/beans"
	xmlns:context="http://www.springframework.org/schema/context" xmlns:p="http://www.springframework.org/schema/p"
	xmlns:aop="http://www.springframework.org/schema/aop" xmlns:tx="http://www.springframework.org/schema/tx"
	xmlns:xsi="http://www.w3.org/2001/XMLSchema-instance"
	xsi:schemaLocation="http://www.springframework.org/schema/beans http://www.springframework.org/schema/beans/spring-beans-4.2.xsd
	http://www.springframework.org/schema/context http://www.springframework.org/schema/context/spring-context-4.2.xsd
	http://www.springframework.org/schema/aop http://www.springframework.org/schema/aop/spring-aop-4.2.xsd http://www.springframework.org/schema/tx http://www.springframework.org/schema/tx/spring-tx-4.2.xsd
	http://www.springframework.org/schema/util http://www.springframework.org/schema/util/spring-util-4.2.xsd">

	<!-- 使用了简单工厂配置的redis工具类,使用的时候直接auto注解 JedisClient父接口就好-->
	<!-- 连接redis单机版 -->
	<bean id="jedisClientPool" class="com.module.utils.jedis.JedisClientPool">
		<property name="jedisPool" ref="jedisPool"></property>
	</bean>
	<bean id="jedisPool" class="redis.clients.jedis.JedisPool">
		<constructor-arg name="host" value="192.168.1.103"/>
		<constructor-arg name="port" value="6379"/>
	</bean>
	<!-- 连接redis集群放开这里 并且把每一个集群中的redis的ip和端口都配置一下-->
	<!-- <bean id="jedisClientCluster" class="com.module.utils.jedis.JedisClientCluster">
		<property name="jedisCluster" ref="jedisCluster"/>
	</bean>
	<bean id="jedisCluster" class="redis.clients.jedis.JedisCluster">
		<constructor-arg name="nodes">
			<set>
				<bean class="redis.clients.jedis.HostAndPort">
					<constructor-arg name="host" value="192.168.25.162"></constructor-arg>
					<constructor-arg name="port" value="7001"></constructor-arg>
				</bean>
				<bean class="redis.clients.jedis.HostAndPort">
					<constructor-arg name="host" value="192.168.25.162"></constructor-arg>
					<constructor-arg name="port" value="7002"></constructor-arg>
				</bean>
			</set>
		</constructor-arg>
	</bean> -->

</beans><?xml version="1.0" encoding="UTF-8"?>
<beans xmlns="http://www.springframework.org/schema/beans"
xmlns:context="http://www.springframework.org/schema/context" xmlns:p="http://www.springframework.org/schema/p"
xmlns:aop="http://www.springframework.org/schema/aop" xmlns:tx="http://www.springframework.org/schema/tx"
xmlns:xsi="http://www.w3.org/2001/XMLSchema-instance"
xsi:schemaLocation="http://www.springframework.org/schema/beans http://www.springframework.org/schema/beans/spring-beans-4.0.xsd
http://www.springframework.org/schema/context http://www.springframework.org/schema/context/spring-context-4.0.xsd
http://www.springframework.org/schema/aop http://www.springframework.org/schema/aop/spring-aop-4.0.xsd http://www.springframework.org/schema/tx http://www.springframework.org/schema/tx/spring-tx-4.0.xsd
http://www.springframework.org/schema/util http://www.springframework.org/schema/util/spring-util-4.0.xsd">
<!-- 配置Service扫描 -->
<context:component-scan base-package="com.module.service.**" />
</beans>
<?xml version="1.0" encoding="UTF-8"?>
<beans xmlns="http://www.springframework.org/schema/beans"
	xmlns:context="http://www.springframework.org/schema/context" xmlns:p="http://www.springframework.org/schema/p"
	xmlns:aop="http://www.springframework.org/schema/aop" xmlns:tx="http://www.springframework.org/schema/tx"
	xmlns:xsi="http://www.w3.org/2001/XMLSchema-instance"
	xsi:schemaLocation="http://www.springframework.org/schema/beans http://www.springframework.org/schema/beans/spring-beans-4.2.xsd
	http://www.springframework.org/schema/context http://www.springframework.org/schema/context/spring-context-4.2.xsd
	http://www.springframework.org/schema/aop http://www.springframework.org/schema/aop/spring-aop-4.2.xsd http://www.springframework.org/schema/tx http://www.springframework.org/schema/tx/spring-tx-4.2.xsd">
	<!-- Shiro 的Web过滤器 -->
	<bean id="shiroFilter" class="org.apache.shiro.spring.web.ShiroFilterFactoryBean">
		<property name="securityManager" ref="securityManager" />
		<!-- loginUrl认证提交地址,如果没有认证将会请求此地址进行认证,请求此地址将由formAuthenticationFilter进行表单认证 -->
		<property name="loginUrl" value="/user/login_index.html" />
		<!-- 认证成功跳转的页面,shiro认证成功自动到上一个请求路径 -->
		<property name="successUrl" value="/index.jsp" />
		<!-- 通过unauthorizedUrl指定没有权限操作时跳转页面 这里配置的是无权操作的页面-->
		<property name="unauthorizedUrl" value="/noPermission.jsp" />
		<!-- 自定义filter配置 -->
		<property name="filters">
			<map>
				<!-- 将自定义 的FormAuthenticationFilter注入shiroFilter中 -->
				<entry key="authc" value-ref="formAuthenticationFilter" />
			</map>
		</property>

		<!-- 过虑器链定义,从上向下顺序执行,一般将/**放在最下边 -->
		<property name="filterChainDefinitions">
			<value>
			    <!-- 这里默认开放test层级,用来生成文件等 -->
			    /test/** = anon
				<!-- 对静态资源设置匿名访问 -->
				/images/** = anon
				/js/** = anon
				/css/** = anon
				/img/** = anon
				<!-- 如果登录注册的页面有验证码,这里需要配置不拦截 -->
				/user/login.html = anon
				/user//downloadApp** = anon
				/user/imgCode.html = anon
				/user/createQRcode.html = anon
				<!-- 这里提前配置了将来reful风格下,app或者微信或者客户端想要访问当前提供的api的地址,这些api一般来说不拦截的,内部代码验证token等 -->
				/api/**.json = anon
				<!-- 请求 logout.action地址,shiro去清除session -->
				/user/logout.html = logout
				<!--商品查询需要商品查询权限 ,取消url拦截配置,使用注解授权方式 -->
				<!-- /items/queryItems.action = perms[item:query] /items/editItems.action
					= perms[item:edit] -->
				<!-- 配置记住我或认证通过可以访问的地址,意思就是我们需要哪个页面可以下次直接url访问到的可以配置一下 -->
				/index.jsp = user
				<!-- /** = authc 所有url都必须认证通过才可以访问 -->
				/** = authc
			</value>
		</property>
	</bean>

	<!-- securityManager安全管理器 -->
	<bean id="securityManager" class="org.apache.shiro.web.mgt.DefaultWebSecurityManager">
		<property name="realm" ref="customRealm" />
		<!-- 注入缓存管理器 -->
		<property name="cacheManager" ref="cacheManager" />
		<!-- 注入session管理器 -->
		<property name="sessionManager" ref="sessionManager" />
		<!-- 记住我 -->
		<!-- <property name="rememberMeManager" ref="rememberMeManager" /> -->
	</bean>

	<!-- 自定义处理用户认证授权的realm -->
	<bean id="customRealm" class="com.web.handler.CustomRealm">
		<!-- 将凭证匹配器设置到realm中,realm按照凭证匹配器的要求进行散列 -->
		<!-- <property name="credentialsMatcher" ref="credentialsMatcher" /> -->
	</bean>

	<!-- 认证的时候会进行加盐加密凭证操作,默认配置好凭证的散列匹配器 -->
	<!-- <bean id="credentialsMatcher"
		class="org.apache.shiro.authc.credential.HashedCredentialsMatcher">
		<property name="hashAlgorithmName" value="md5" />
		<property name="hashIterations" value="1" />
	</bean> -->

	<!-- shiro缓存管理器 -->
	<bean id="cacheManager" class="org.apache.shiro.cache.ehcache.EhCacheManager">
		<property name="cacheManagerConfigFile" value="classpath:shiro-ehcache.xml" />
	</bean>

	<!-- Java UUID sessionId生成器 -->
	<bean id="sessionIdGenerator"
		class="org.apache.shiro.session.mgt.eis.JavaUuidSessionIdGenerator" />

	<!-- session操作dao -->
	<bean id="sessionDAO"
		class="org.apache.shiro.session.mgt.eis.EnterpriseCacheSessionDAO">
		<property name="sessionIdGenerator" ref="sessionIdGenerator" />
		<property name="activeSessionsCacheName" value="shiro-activeSessionCache"/>
	</bean>

	<!-- 会话管理器 shiro的session,如果我们使用了shiro的session,默认在这里配置session的过期时间,不要配置web.xml的过期时间,并且配置session过期策略,将其删除,否则会出现缓存独立session数据的问题 -->
	<bean id="sessionManager"
		class="org.apache.shiro.web.session.mgt.DefaultWebSessionManager">
		<property name="sessionDAO" ref="sessionDAO"></property>
		<!-- session的失效时长,单位毫秒  当前设置十分钟过期-->
		<property name="globalSessionTimeout" value="600000" />
		<!-- 删除失效的session -->
		<property name="deleteInvalidSessions" value="true" />
		<property name="sessionIdCookieEnabled" value="true"/>
		<property name="sessionIdCookie" ref="sessionIdCookie" />
        <!-- <property name="sessionIdCookie" ref="rememberMeCookie"/> -->
	</bean>

	<!-- 自定义form login认证过虑器 -->
	<!-- 基于Form表单的身份验证过滤器,不配置将也会注册此过虑器,表单中的用户账号、密码及loginurl将采用默认值,建议配置 -->
	<!-- <bean id="formAuthenticationFilter" class="org.apache.shiro.web.filter.authc.FormAuthenticationFilter"> -->
	<bean id="formAuthenticationFilter" class="com.web.handler.SsoFilter">
		<!-- 表单中账号的input名称 -->
		<property name="usernameParam" value="username" />
		<!-- 表单中密码的input名称 -->
		<property name="passwordParam" value="password" />
		<!-- 记住我checkbox的name (一般都是设置为多少天免登录)-->
		<property name="rememberMeParam" value="rememberMe" />
		<!-- <property name="rememberMeParam" value="autologin" /> -->
	</bean>

	<!-- rememberMeManager管理器,写cookie,取出cookie生成用户信息 -->
	<bean id="rememberMeManager" class="org.apache.shiro.web.mgt.CookieRememberMeManager">
		<property name="cookie" ref="rememberMeCookie" />
	</bean>

	<!-- shiro注解支持 -->
	<bean id="lifecycleBeanPostProcessor" class="org.apache.shiro.spring.LifecycleBeanPostProcessor" />

	<!-- 开启记住我功能 的 cookie -->
	<bean id="rememberMeCookie" class="org.apache.shiro.web.servlet.SimpleCookie">
		<!-- rememberMe是cookie的名字 -->
		<constructor-arg value="rememberMe" />
		<!-- 记住我cookie生效时间30天 -->
		<property name="maxAge" value="2592000" />
	</bean>

	<!-- 设置shiro存储sessionid的cookie信息 -->
	<bean id="sessionIdCookie" class="org.apache.shiro.web.servlet.SimpleCookie">
        <constructor-arg value="shiroId"/>
        <property name="httpOnly" value="true"/>
        <property name="maxAge" value="-1"/>
        <!-- 配置存储Session Cookie的domain为 一级域名 -->
        <!-- <property name="domain" value=".haiyusoft.cn"/> -->
    </bean>
</beans>
