


3,143
社区成员
 发帖
发帖 与我相关
与我相关 我的任务
我的任务
 分享
分享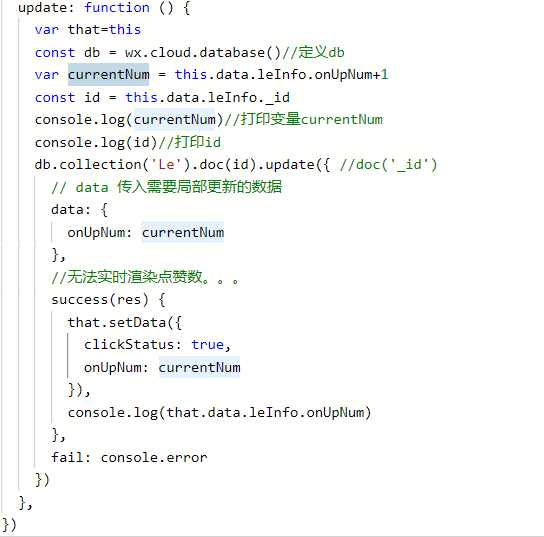


Page({
  data: {
    num:1
  },
  onLoad: function () {
    this._update()
  },
  _update:function(){
    var that=this
    var cnum=that.data.num+1;
    console.log(cnum)
    wx.getSystemInfo({
      success(){
        console.log(that.data.num)
        that.setData({
          num:cnum
        })
        console.log(that.data.num)
      }
    })
  }
})
 建议你看一下你引用update函数的地方有没有问题
(共勉,仅供参考)
并且我也碰到了类似的问题 , 也没有回答,这里是我的问题的链接 https://bbs.csdn.net/topics/392516002
建议你看一下你引用update函数的地方有没有问题
(共勉,仅供参考)
并且我也碰到了类似的问题 , 也没有回答,这里是我的问题的链接 https://bbs.csdn.net/topics/392516002