568
社区成员
 发帖
发帖 与我相关
与我相关 我的任务
我的任务 分享
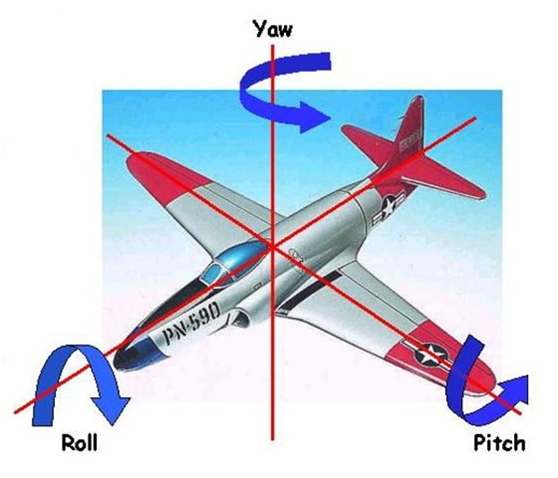
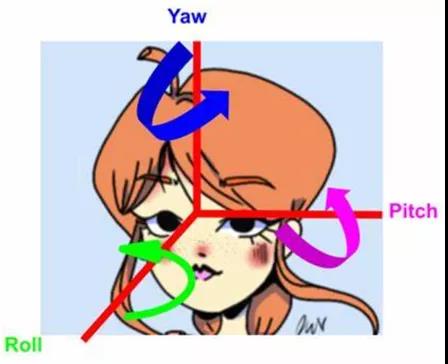
分享pitch是俯仰角,是“点头“
yaw是偏航角,是‘摇头’
roll是旋转角,是“翻滚YAW [-90,90], PITCH [-70,70], ROLL [-70,70]
name: "angle_y_fc", shape: [1, 1] - Estimated

name: "angle_p_fc", shape: [1, 1] - Estimated pitch

name: "angle_r_fc", shape: [1, 1] - Estimated roll
ie = IECore()

for device in ie.available_devices:

	print(device)


net = ie.read_network(model=model_xml, weights=model_bin)

input_blob = next(iter(net.input_info))

out_blob = next(iter(net.outputs))


n, c, h, w = net.input_info[input_blob].input_data.shape

print(n, c, h, w)


# cap = cv.VideoCapture("D:/images/video/Boogie_Up.mp4")

cap = cv.VideoCapture(0)

exec_net = ie.load_network(network=net, device_name="CPU")


head_net = ie.read_network(model=head_xml, weights=head_bin)

em_input_blob = next(iter(head_net.input_info))

head_it = iter(head_net.outputs)

head_out_blob1 = next(head_it)  # angle_p_fc

head_out_blob2 = next(head_it)  # angle_r_fc

head_out_blob3 = next(head_it)  # angle_y_fc

print(head_out_blob1, head_out_blob2, head_out_blob3)


en, ec, eh, ew = head_net.input_info[em_input_blob].input_data.shape

print(en, ec, eh, ew)


em_exec_net = ie.load_network(network=head_net, device_name="CPU")
while True:

	ret, frame = cap.read()

	if ret is not True:

		break

	image = cv.resize(frame, (w, h))

	image = image.transpose(2, 0, 1)

	inf_start = time.time()

	res = exec_net.infer(inputs={input_blob: [image]})

	inf_end = time.time() - inf_start

	# print("infer time(ms):%.3f"%(inf_end*1000))

	ih, iw, ic = frame.shape

	res = res[out_blob]

	for obj in res[0][0]:

		if obj[2] > 0.75:

			xmin = int(obj[3] * iw)

			ymin = int(obj[4] * ih)

			xmax = int(obj[5] * iw)

			ymax = int(obj[6] * ih)

			if xmin < 0:

				xmin = 0

			if ymin < 0:

				ymin = 0

			if xmax >= iw:

				xmax = iw - 1

			if ymax >= ih:

				ymax = ih - 1

			roi = frame[ymin:ymax, xmin:xmax, :]

			roi_img = cv.resize(roi, (ew, eh))

			roi_img = roi_img.transpose(2, 0, 1)

			head_res = em_exec_net.infer(inputs={em_input_blob: [roi_img]})

			angle_p_fc = head_res[head_out_blob1][0][0]

			angle_r_fc = head_res[head_out_blob2][0][0]

			angle_y_fc = head_res[head_out_blob3][0][0]

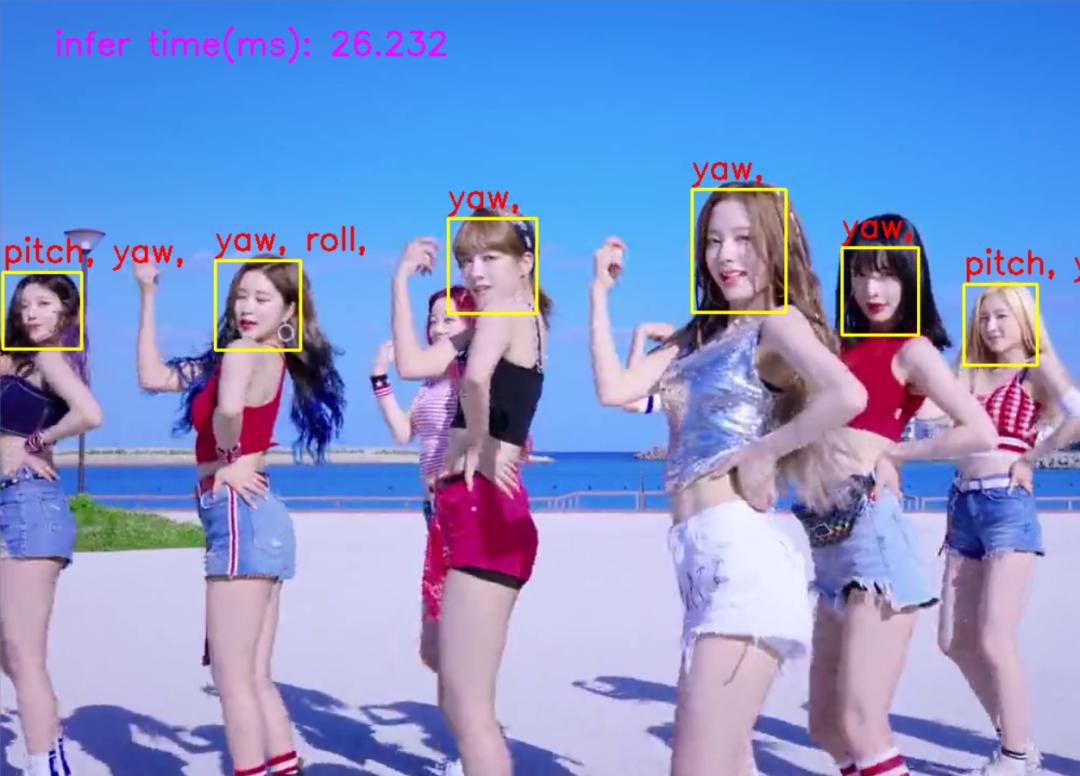
			head_pose = ""

			if angle_p_fc > 20 or angle_p_fc < -20:

				head_pose += "pitch, "

			if angle_r_fc > 20 or angle_r_fc < -20:

				head_pose += "roll, "

			if angle_y_fc > 20 or angle_y_fc < -20:

				head_pose += "yaw, "

			cv.rectangle(frame, (xmin, ymin), (xmax, ymax), (0, 255, 255), 2, 8)

			cv.putText(frame, head_pose, (xmin, ymin), cv.FONT_HERSHEY_SIMPLEX, 1.0, (255, 0, 255), 2, 8)


	cv.putText(frame, "infer time(ms): %.3f, FPS: %.2f" % (inf_end * 1000, 1/inf_end), (50, 50),

			   cv.FONT_HERSHEY_SIMPLEX, 1.0, (255, 0, 255), 2, 8)

	cv.imshow("Face+emotion Detection", frame)

	c = cv.waitKey(1)

	if c == 27:

		break

cv.waitKey(0)

cv.destroyAllWindows()