 Web3
Web3

从零开始编写自己的discord机器人
 墨衍会员 · AI 创作全网分发 墨衍智能分发 通过墨衍一键同步至各平台 可同步平台 CSDN微信公众号微博知乎掘金百家号博客园抖音小红书 你的文章也可以这样分发 墨衍会员 ¥399起/年,写一次发全网
我也要 关注 + 加入社区
墨衍会员 · AI 创作全网分发 墨衍智能分发 通过墨衍一键同步至各平台 可同步平台 CSDN微信公众号微博知乎掘金百家号博客园抖音小红书 你的文章也可以这样分发 墨衍会员 ¥399起/年,写一次发全网
我也要 关注 + 加入社区discord是web3社区常用的聊天工具。通过discord,用户不仅能方便地加入各种群组(服务器),也能轻松地创建属于自己的群组(服务器)。
而在discord生态中,discord机器人是非常重要的组成部分。它可以为管理员提供多种服务:用户鉴权、用户管理、广告消息清理、空投发放,也能为普通用户提供各类自助服务、发送欢迎消息等等。
而基于python的discord.py正是编写discord机器人最为常用的工具之一。本文会带领大家如何从零开始,创建属于自己的discord机器人。
1. 准备工作
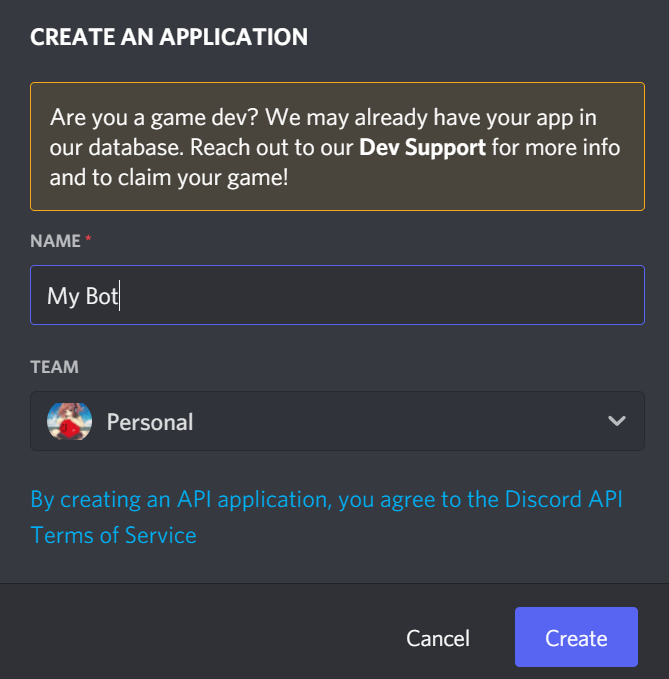
首先,访问discord开发者后台,注册新的应用
https://discord.com/developers/applications
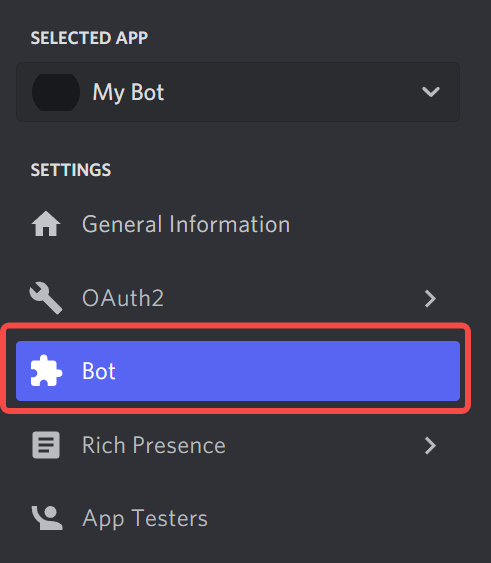
在新建应用的设置里,选择Bot
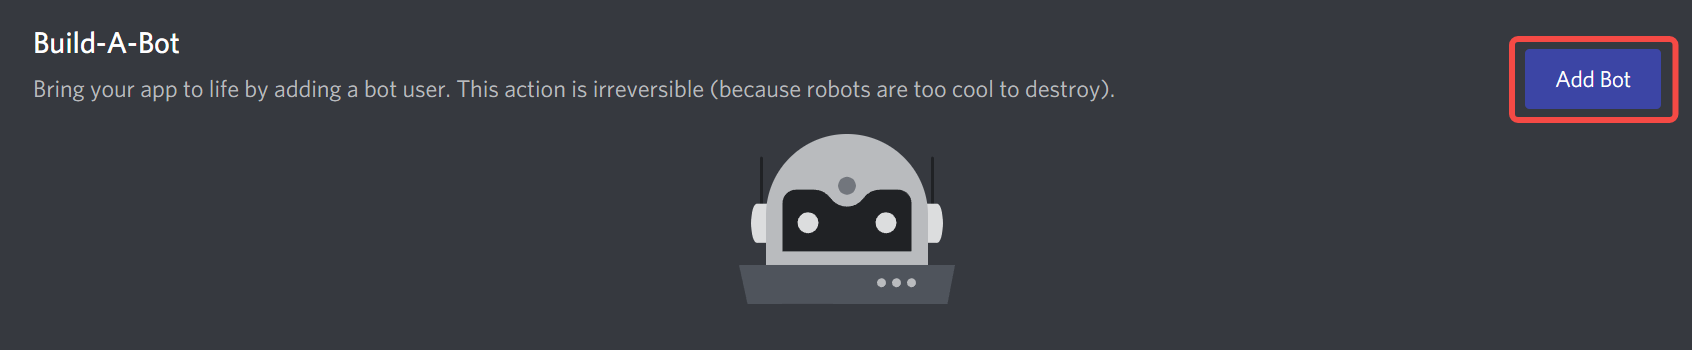
选择Add Bot进行机器人的创建
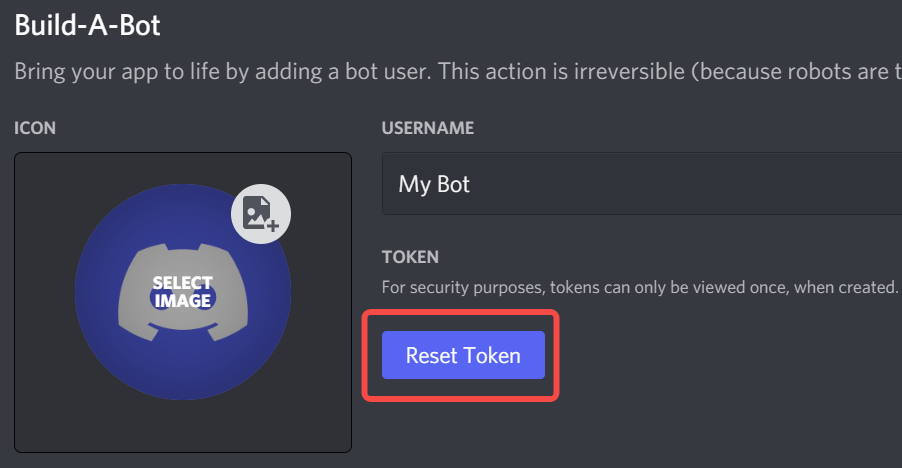
对新建的机器人点击Reset Token进行token的设置,设置完毕后务必记录下该token,以备后续使用
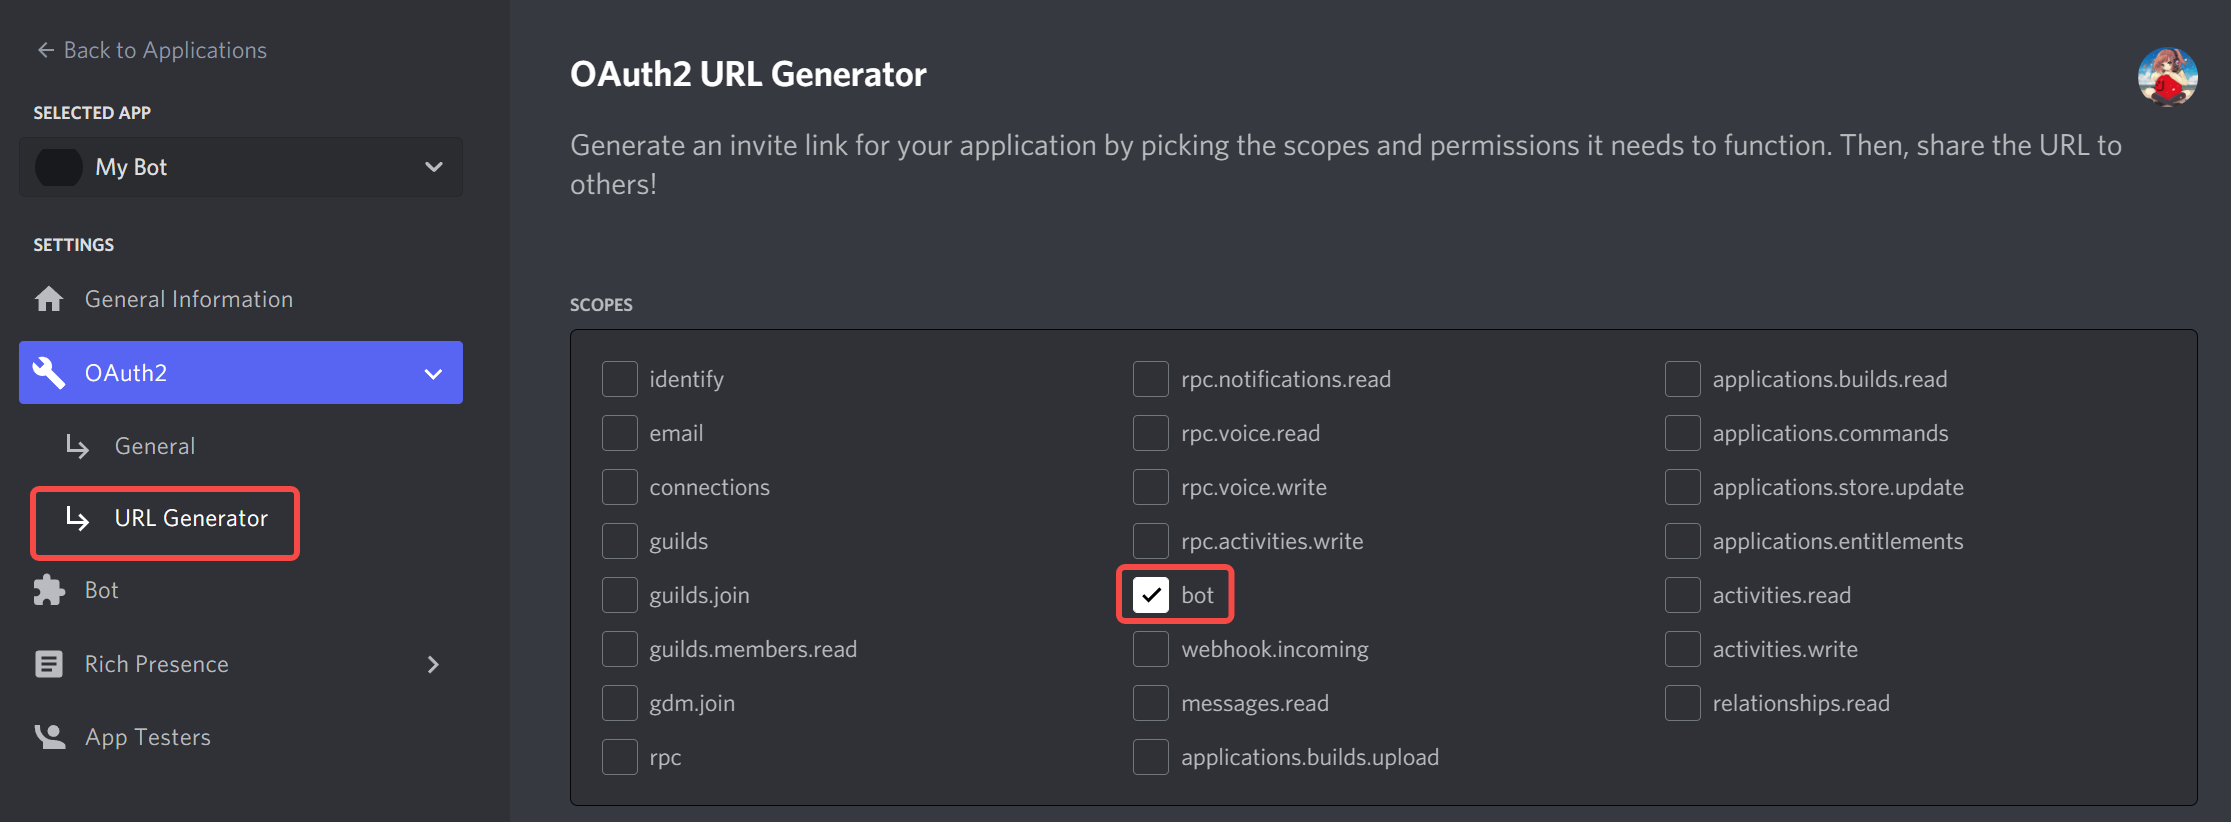
在设置中,选择OAuth2 -> URL Generator,勾选需要的权限。本文只需要用bot下面的发送消息和管理消息两个权限
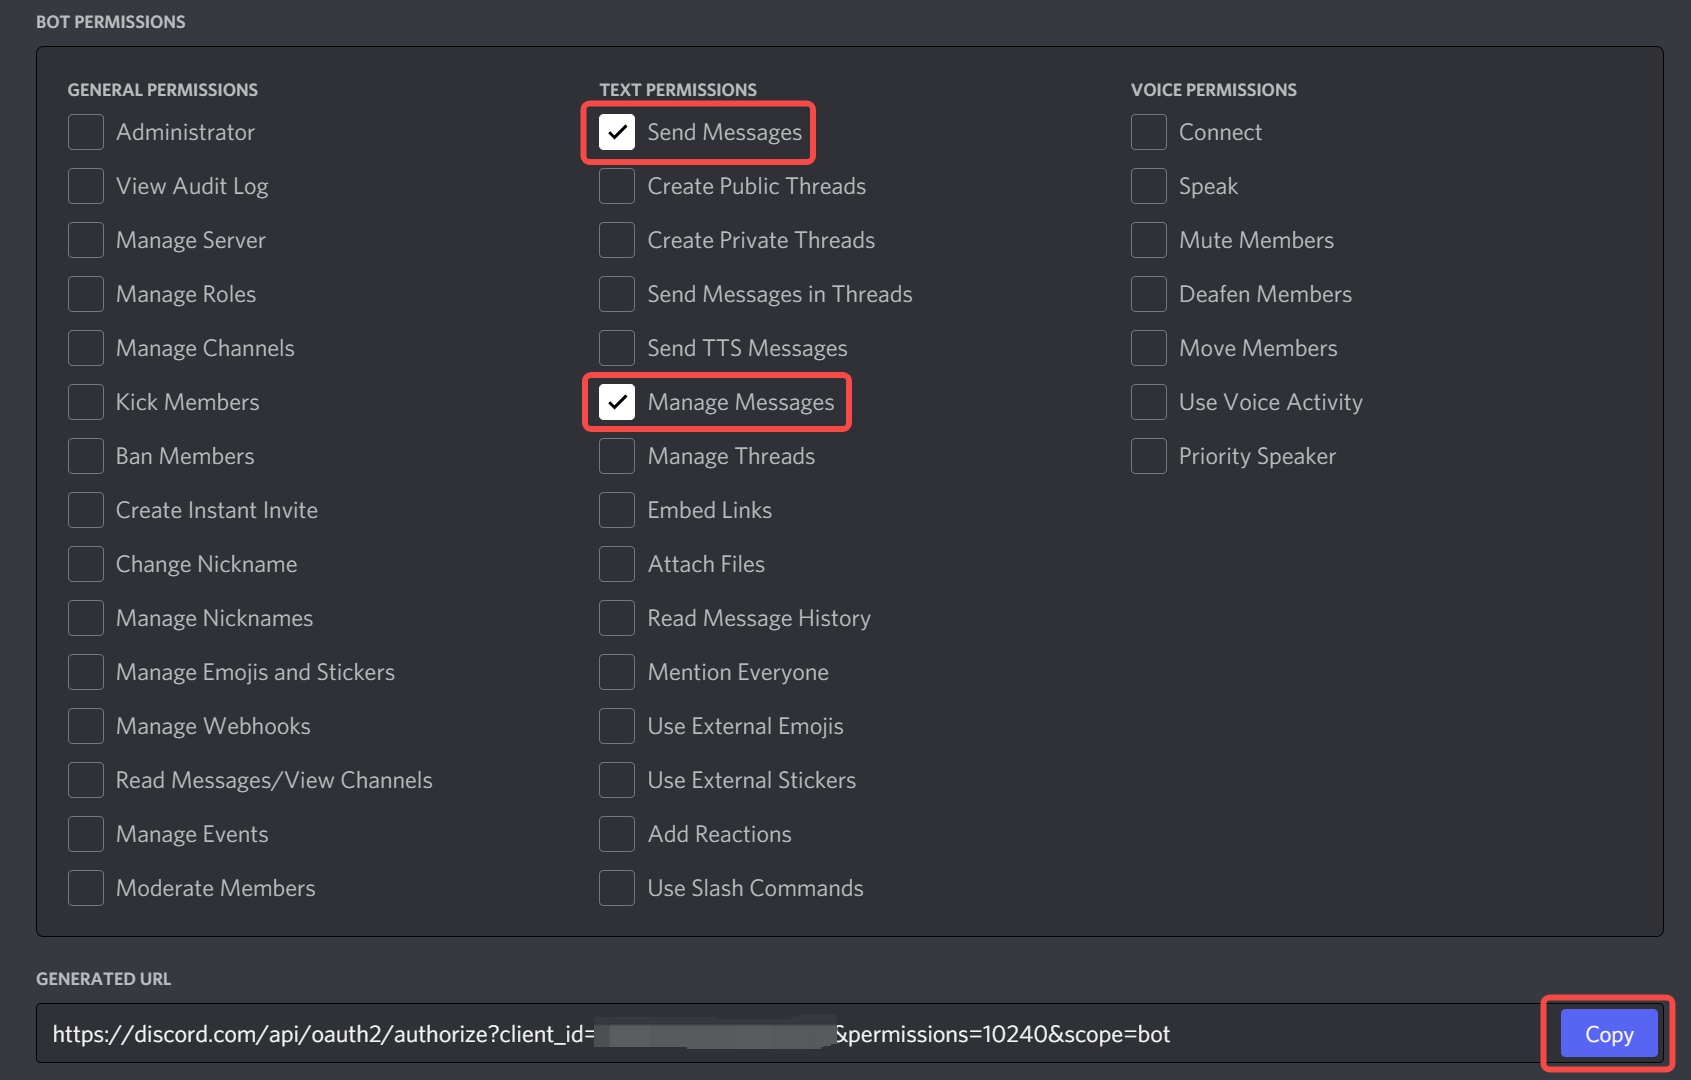
设置完毕后,点击下方的Copy按钮,获取机器人的URL格式如下
https://discord.com/api/oauth2/authorize?client_id=<your_client_id>&permissions=10240&scope=bot
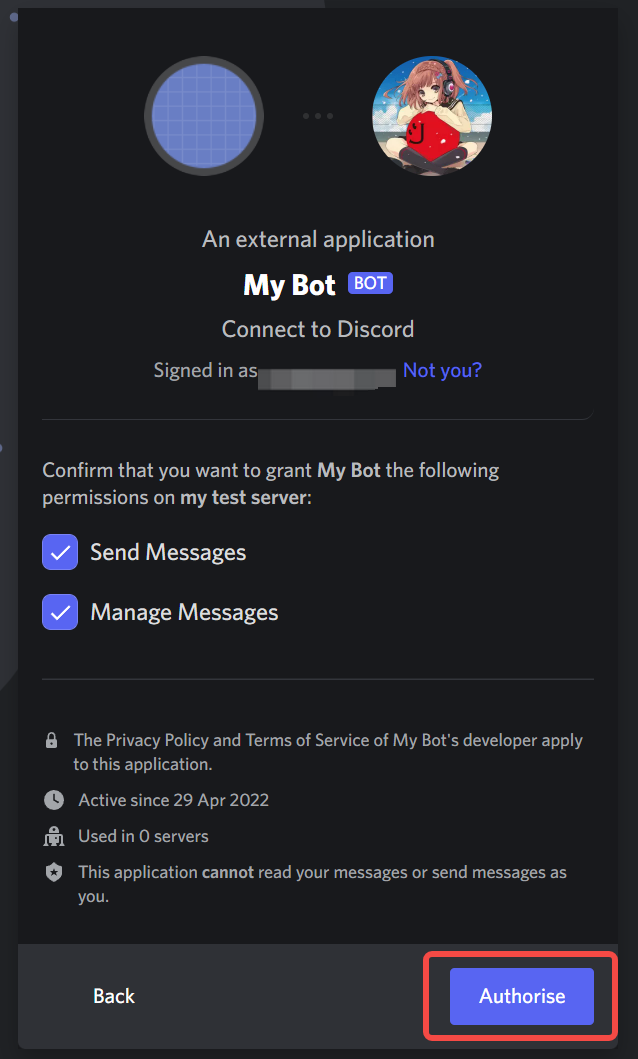
此时,在浏览器打开该URL,即可将新创建的机器人加入到你所管理的指定discord服务器中
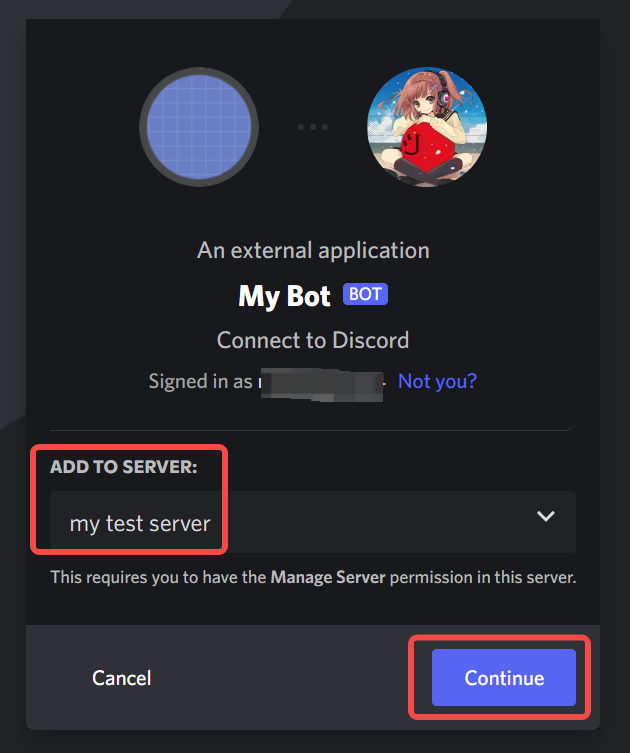
注意,需要你授权相应权限给机器人
2. 编写机器人程序
为python环境安装discord.py的依赖
pip install discord.py
下面开始编写程序
import discord
import asyncio
import re

# 这里填写创建机器人时生成的token
discord_bot_token = "xxxxxx"

# 如果希望通过代理连接discord服务器,可以设置http proxy参数
# client = discord.Client(proxy="http://127.0.0.1:10809")
client = discord.Client()


@client.event
async def on_ready():
    print("Bot client logged-in as: %s" % client.user)
    # 展示 `Playing xxx` 状态
    custom_activity = discord.Game('discord.py')
    await client.change_presence(status=discord.Status.online, activity=custom_activity)


@client.event
async def on_member_join(member):
    # 发送结构化消息
    embed_str = discord.Embed(title="my test server",
                              description=f"Hi {member.name}, "
                                          f"welcome to the official {member.guild.name} Discord Server!",

                              color=0x00ff00)
    await member.create_dm()
    await member.dm_channel.send(embed=embed_str)
    # 发送普通文本消息
    # await member.dm_channel.send(
    #     f'Hi {member.name}, welcome to the official {member.guild.name} Discord Server!'
    # )


@client.event
async def on_message(message):
    # 排除bot自身的消息
    if message.author == client.user:
        return

    # ping/pong测试,然后删除测试消息
    if message.content == 'ping':
        tmp_msg = await message.channel.send('pong')
        await asyncio.sleep(3)
        await tmp_msg.delete()
        await message.delete()
    # 返回at机器人的消息
    elif client.user.mentioned_in(message):
        trim_mentioned_msg = re.sub("<@!?(\d+)>", "", message.content).strip()
        await message.channel.send(
            f"{message.author.mention} Message received: {trim_mentioned_msg}")
    else:
        print("Do nothing with message: %s" % message.content)


# 启动机器人
client.run(discord_bot_token)
代码说明:
- on_ready() 定义了机器人上线后的操作。此时可以为机器人定义五种在线状态:playing / streaming / listening / watching / competing,如
# 展示 `Playing ` 状态
custom_activity = custom_activity = discord.Game("a game")

# 展示 `Streaming ` 状态
custom_activity = discord.Streaming(name="a live channel", url="https://example.com/your_live_channel_url")

# 展示 `Listening ` 状态
custom_activity = discord.Activity(type=discord.ActivityType.listening, name="a song")

# 展示 `Watching ` 状态
custom_activity = discord.Activity(type=discord.ActivityType.watching, name="a movie")

# 展示 `Competing in ` 状态
custom_activity = discord.Activity(type=discord.ActivityType.competing, name="a game")
- on_member_join(member)定义了一个成员加入群组时的操作。通常可以向用户发送结构化或者文本格式的欢迎消息。
- on_message(message)定义了机器人收到消息时的操作。可以根据用户发送的消息内容,来编写处理逻辑:如删除带链接的广告消息、为用户提供自助服务等。
3. 运行机器人程序
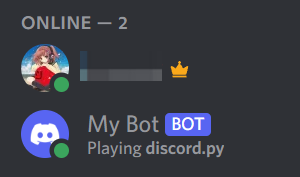
运行上面编写好的程序后,就能在对应discord服务器中看到机器人上线,并展示指定的状态
发送at机器人的文本消息
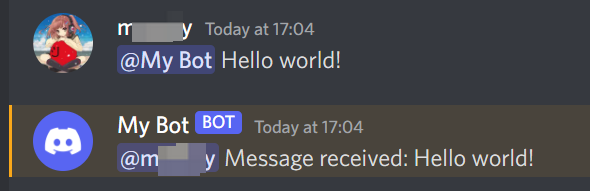
如果输入ping,机器人还会返回pong消息,并在3秒钟后删除ping/pong的消息。
至此,我们的第一个discord机器人就完成了!
参考资料
- https://discordpy.readthedocs.io/en/stable/api.html
- https://hackmd.io/@kangjw/Discordpy%E6%A9%9F%E5%99%A8%E4%BA%BA%E5%BE%9E0%E5%88%B01%E8%B6%85%E8%A9%B3%E7%B4%B0%E6%95%99%E5%AD%B8#%E9%96%8B%E5%A7%8B%E8%B7%9F%E6%A9%9F%E5%99%A8%E4%BA%BA%E4%BA%92%E5%8B%95%E5%90%A7
相关推荐
Discord-Handler:我为您的机器人制作的简单命令处理程序
不和谐处理程序 我为您的机器人设计的简单命令处理程序。
discord-js-template:创建Discord机器人时使用的简单模板
discord.js模板 这是我制作Discord机器人时克隆的模板。 它具有简单的文件夹结构,并包含一些入门的基本代码。 当我创建新的机器人时,这节省了很多时间。
Sirbotsalot:展示我的Discord机器人的故事
Sirbotsalot 一个展示我的Discord机器人的故事。
discord-bot:我正在研究的一个简单的不和谐机器人
我正在开发的一个简单的不和谐机器人
Discord-Bot-Example
Discord-Bot-Example