


571
社区成员
 发帖
发帖 与我相关
与我相关 我的任务
我的任务
 分享
分享环境:Ubuntu 18.04
具体步骤:
wget https://raw.github.com/mengning/mykernel/master/mykernel-2.0_for_linux-5.4.34.patch
sudo apt install axel
axel -n 20 https://mirrors.edge.kernel.org/pub/linux/kernel/v5.x/linux-5.4.34.tar.xz
xz -d linux-5.4.34.tar.xz
tar -xvf linux-5.4.34.tar
cd linux-5.4.34
patch -p1 < ../mykernel-2.0_for_linux-5.4.34.patch
sudo apt install build-essential libncurses-dev bison flex libssl-dev libelf-dev
make defconfig # Default configuration is based on 'x86_64_defconfig'
make -j$(nproc)
sudo apt install qemu # install QEMU
qemu-system-x86_64 -kernel arch/x86/boot/bzImage
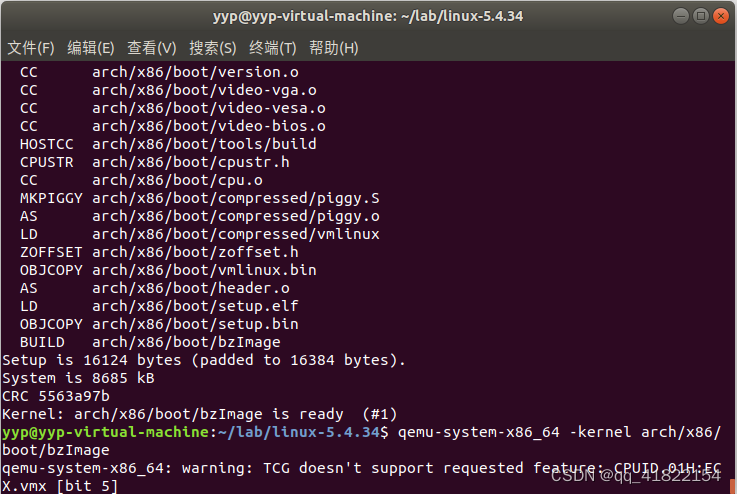
实验结果:
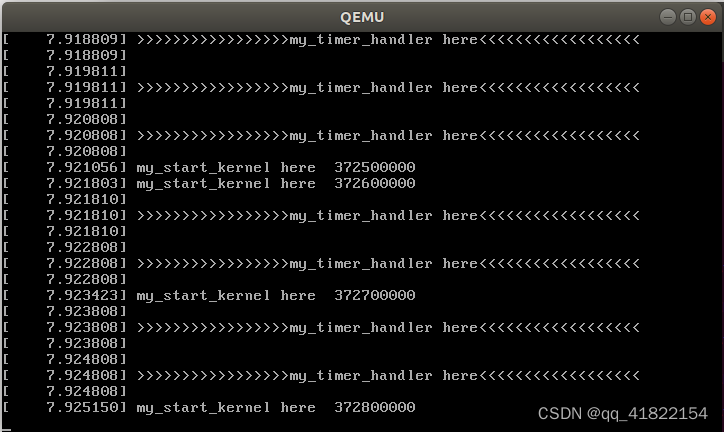
mykernel提供了一个周期性发生的时钟中断,周期性地产生时钟中断信号,从而周期性地执行中断处理程序(即my_timer_handler函数)
环境:Ubuntu 18.04
具体步骤:
1.和上一个实验一样,下载解压linux-5.4.34源码
2.配置内核选项
make defconfig
make menuconfig
# 打开debug相关选项
Kernel hacking --->
    Compile-time checks and compiler options --->
        [*] Compile the kernel with debug info
        [*] Provide GDB scripts for kernel debugging
[*] Kernel debugging
# 关闭KASLR,否则会导致打断点失败
Processor type and features ---->
    [] Randomize the address of the kernel image (KASLR)
3.编译和运行内核
make -j$(nproc)
# 测试内核能否正常运行,因为没有文件系统最终会kernel panic
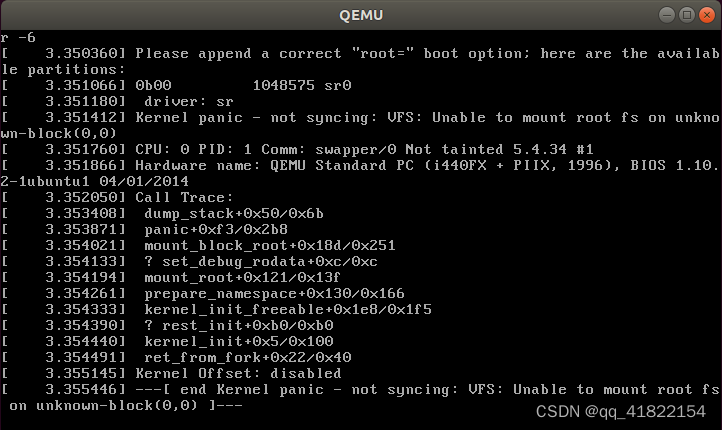
qemu-system-x86_64 -kernel arch/x86/boot/bzImage
由于还没有挂载根文件系统,出现kernel panic
4.制作根文件系统
# 下载busybox源代码
axel -n 20 https://busybox.net/downloads/busybox-1.31.1.tar.bz2

tar -jxvf busybox-1.31.1.tar.bz2

cd busybox-1.31.1

make menuconfig
# 编译成静态链接
Settings  --->
    [*] Build static binary (no shared libs)
# 编译安装
make -j$(nproc) && make install

# 制作内存根文件系统镜像
mkdir rootfs
cd rootfs
cp ../busybox-1.31.1/_install/* ./ -rf
mkdir dev proc sys home
sudo cp -a /dev/{null,console,tty,tty1,tty2,ty3,tty4} dev/
准备init脚本文件放在根文件系统根目录下(rootfs/init),添加如下内容到init文件
#!/bin/sh
mount -t proc none /proc
mount -t sysfs none /sys
echo "Welcome!"
echo "--------"
cd home
/bin/sh
打包成内存根文件系统镜像
# 给init文件加权限
chmod +x init

# 打包
find . -print0 | cpio --null -ov --format=newc|gzip -9 > ../rootfs.cpio.gz

#测试挂载根文件系统
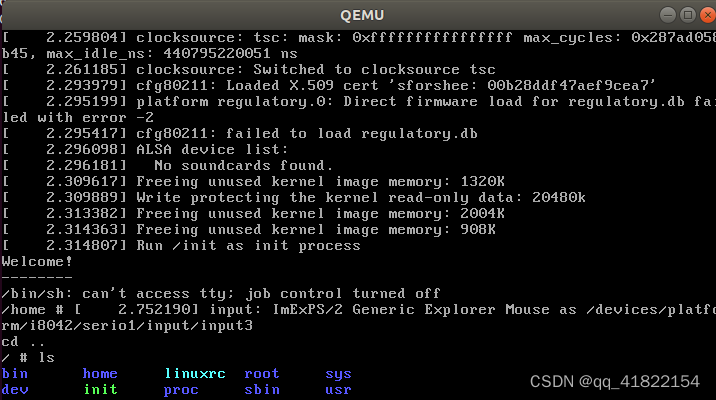
qemu-system-x86_64 -kernel linux-5.4.34/arch/x86/boot/bzImage -initrd rootfs.cpio.gz
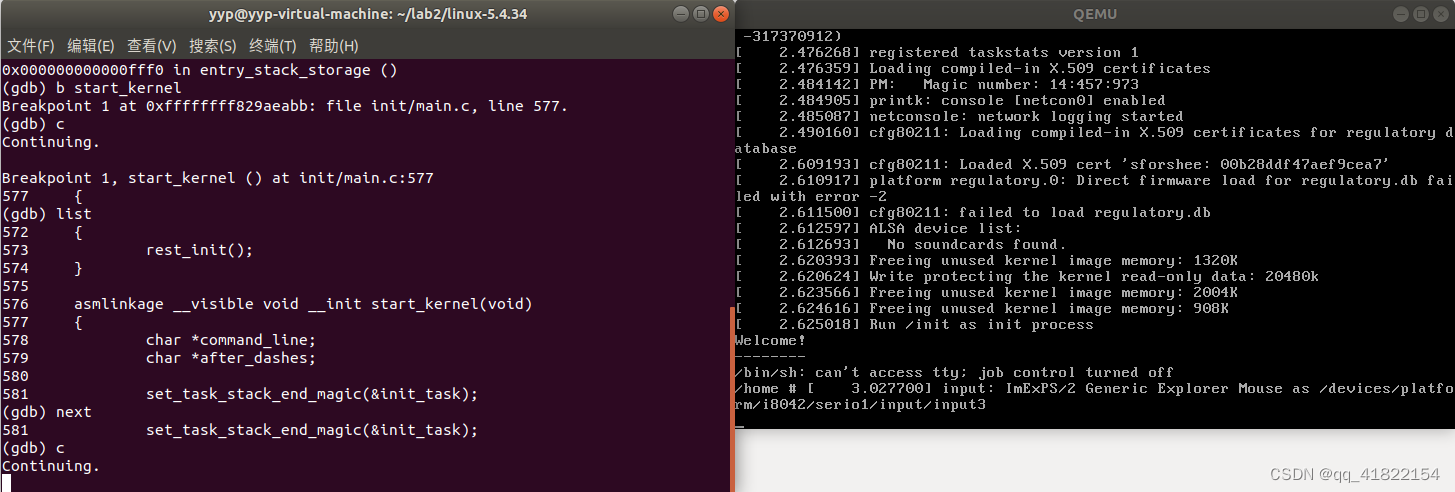
内核成功启动,并执行了init脚本文件中的内容,打印出了“Welcome!”,并且成功运行了shell程序
5.跟踪调试Linux内核
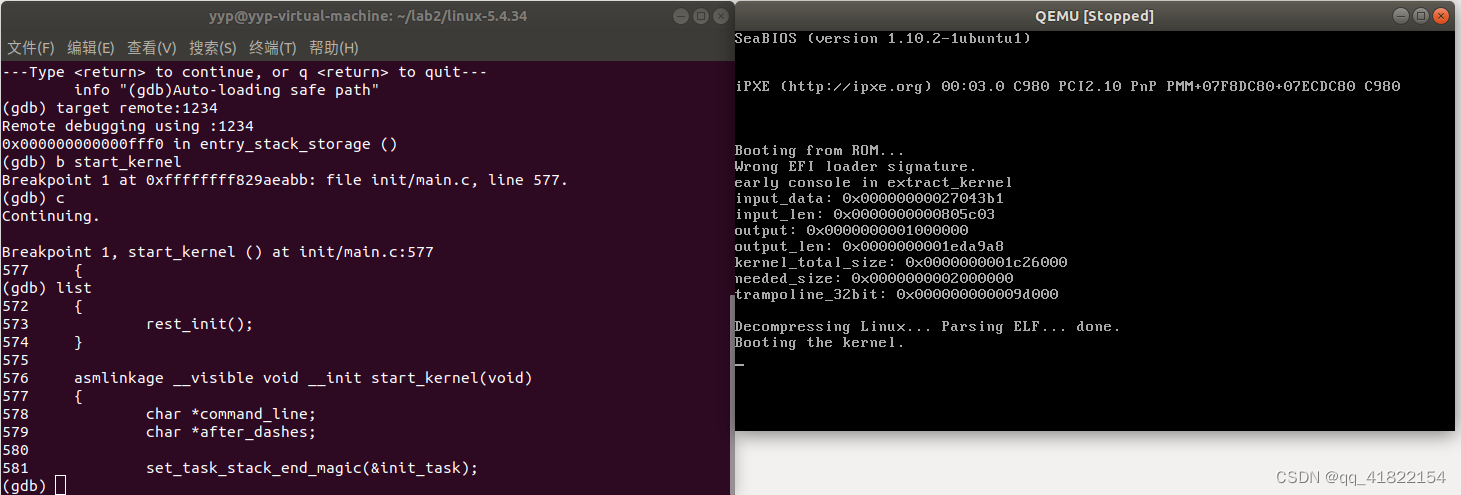
qemu-system-x86_64 -kernel linux-5.4.34/arch/x86/boot/bzImage -initrd rootfs.cpio.gz -S -s
另开一个窗口,用gdb把带有符号表的内核镜像vmlinux加载进来,然后连接gdb server,设置断点跟踪内核
cd linux-5.4.32/

gdb vmlinux

(gdb) target remote:1234

(gdb) b start_kernel

c、bt、list、next、step....
在start_kernel处打一个断点,然后输入list可以看到中断处的代码,输入c则继续执行直到内核完全启动
本学期选修了孟老师和李老师一同授课的《Linux操作系统分析》,课程从存储程序计算机(冯诺依曼结构)入手,引出函数调用堆栈框架,分别介绍了x86和arm64指令集架构,在函数调用堆栈框架的基础之上讲解了系统调用,用户程序通过系统调用陷入内核,完成用户态到内核态的切换,然后介绍了Linux文件系统,在Linux中万物皆文件的概念之上了解了设备驱动程序,最后介绍了容器和虚拟化技术。
课程安排十分合理,两位老师讲课深入浅出。通过《Linux操作系统分析》,将我之前获取的零散Linux操作系统知识整合起来,让我对Linux操作系统有了更深层次的理解。
525

