5,344
社区成员
 发帖
发帖 与我相关
与我相关 我的任务
我的任务
 分享
分享Web 组件用于在应用程序中显示 Web 页面内容,为开发者提供页面加载、页面交互、页面调试等能力。
● 页面加载:Web 组件提供基础的前端页面加载的能力,包括加载网络页面、本地页面、Html 格式文本数据。
● 页面交互:Web 组件提供丰富的页面交互的方式,包括:设置前端页面深色模式,新窗口中加载页面,位置权限管理,Cookie 管理,应用侧使用前端页面 JavaScript 等能力。
● 页面调试:Web 组件支持使用 Devtools 工具调试前端页面。
下面通过常见使用场景举例,来具体介绍 Web 组件功能特性。
页面加载是 Web 组件的基本功能。根据页面加载数据来源可以分为三种常用场景,包括加载网络页面、加载本地页面、加载 HTML 格式的富文本数据。
页面加载过程中,若涉及网络资源获取,需要配置ohos.permission.INTERNET网络访问权限。
开发者可以在 Web 组件创建的时候指定默认加载的网络页面 。在默认页面加载完成后,如果开发者需要变更此 Web 组件显示的网络页面,可以通过调用loadUrl()接口加载指定网络网页。
在下面的示例中,在 Web 组件加载完“www.example.com”页面后,开发者可通过 loadUrl 接口将此 Web 组件显示页面变更为“www.example1.com”。
// xxx.etsimport web_webview from '@ohos.web.webview';@Entry@Componentstruct WebComponent {webviewController: web_webview.WebviewController = new web_webview.WebviewController();build() {Column() {Button('loadUrl').onClick(() => {try {// 点击按钮时,通过loadUrl,跳转到www.example1.comthis.webviewController.loadUrl('www.example1.com');} catch (error) {console.error(`ErrorCode: ${error.code}, Message: ${error.message}`);}})// 组件创建时,加载www.example.comWeb({ src: 'www.example.com', controller: this.webviewController})}}}
将本地页面文件放在应用的 rawfile 目录下,开发者可以在 Web 组件创建的时候指定默认加载的本地页面 ,并且加载完成后可通过调用loadUrl()接口变更当前 Web 组件的页面。
在下面的示例中展示加载本地页面文件的方法:
● 将资源文件放置在应用的 resources/rawfile 目录下。图 1 资源文件路径
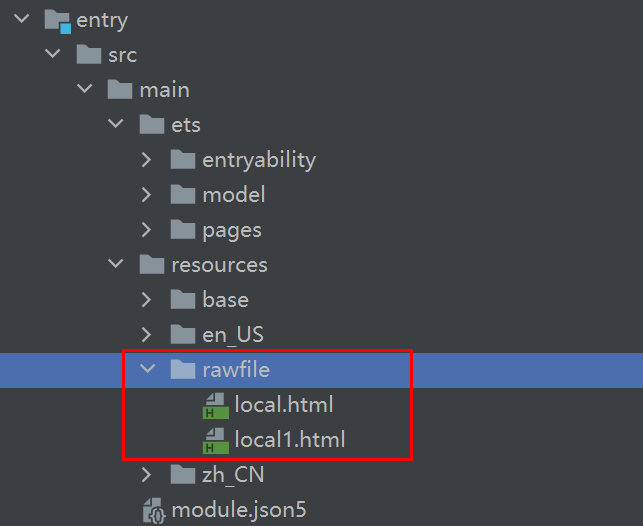
● 应用侧代码
// xxx.etsimport web_webview from '@ohos.web.webview';@Entry@Componentstruct WebComponent {webviewController: web_webview.WebviewController = new web_webview.WebviewController();build() {Column() {Button('loadUrl').onClick(() => {try {// 点击按钮时,通过loadUrl,跳转到local1.htmlthis.webviewController.loadUrl($rawfile("local1.html"));} catch (error) {console.error(`ErrorCode: ${error.code}, Message: ${error.message}`);}})// 组件创建时,通过$rawfile加载本地文件local.htmlWeb({ src: $rawfile("local.html"), controller: this.webviewController })}}}
● local.html 页面代码。
<!-- local.html --><!DOCTYPE html><html><body><p>Hello World</p></body></html>
Web 组件可以通过loadData接口实现加载 HTML 格式的文本数据。当开发者不需要加载整个页面,只需要显示一些页面片段时,可通过此功能来快速加载页面。
// xxx.etsimport web_webview from '@ohos.web.webview';@Entry@Componentstruct WebComponent {controller: web_webview.WebviewController = new web_webview.WebviewController();build() {Column() {Button('loadData').onClick(() => {try {// 点击按钮时,通过loadData,加载HTML格式的文本数据this.controller.loadData('<html><body bgcolor=\"white\">Source:<pre>source</pre></body></html>','text/html','UTF-8');} catch (error) {console.error(`ErrorCode: ${error.code}, Message: ${error.message}`);}})// 组件创建时,加载www.example.comWeb({ src: 'www.example.com', controller: this.controller })}}}
Web 组件支持对前端页面进行深色模式配置。
● 通过darkMode()接口可以配置不同的深色模式,WebDarkMode.Off模式表示关闭深色模式。WebDarkMode.On表示开启深色模式,并且深色模式跟随前端页面。WebDarkMode.Auto表示开启深色模式,并且深色模式跟随系统。在下面的示例中, 通过darkMode()接口将页面深色模式配置为跟随系统。
// xxx.etsimport web_webview from '@ohos.web.webview';@Entry@Componentstruct WebComponent {controller: web_webview.WebviewController = new web_webview.WebviewController();@State mode: WebDarkMode = WebDarkMode.Auto;build() {Column() {Web({ src: 'www.example.com', controller: this.controller }).darkMode(this.mode)}}}
● 通过forceDarkAccess()接口可将前端页面强制配置深色模式,且深色模式不跟随前端页面和系统。配置该模式时候,需要将深色模式配置成 WebDarkMode.On。在下面的示例中, 通过forceDarkAccess()接口将页面强制配置为深色模式。
// xxx.etsimport web_webview from '@ohos.web.webview';@Entry@Componentstruct WebComponent {controller: web_webview.WebviewController = new web_webview.WebviewController();@State mode: WebDarkMode = WebDarkMode.On;@State access: boolean = true;build() {Column() {Web({ src: 'www.example.com', controller: this.controller }).darkMode(this.mode).forceDarkAccess(this.access)}}}
Web 组件支持前端页面选择文件上传功能,应用开发者可以使用onShowFileSelector()接口来处理前端页面文件上传的请求。
下面的示例中,当用户在前端页面点击文件上传按钮,应用侧在onShowFileSelector()接口中收到文件上传请求,在此接口中开发者将上传的本地文件路径设置给前端页面。
● 应用侧代码。
// xxx.etsimport web_webview from '@ohos.web.webview';@Entry@Componentstruct WebComponent {controller: WebController = new WebController()build() {Column() {// 加载本地local.html页面Web({ src: $rawfile('local.html'), controller: this.controller }).onShowFileSelector((event) => {// 开发者设置要上传的文件路径let fileList: Array<string> = ['xxx/test.png',]event.result.handleFileList(fileList)return true;})}}}
● local.html 页面代码。
<!DOCTYPE html><html><head><meta charset="utf-8"><title>Document</title></head><body>// 点击文件上传按钮<input type="file" value="file"></br></body></html>
Web 组件提供了在新窗口打开页面的能力,开发者可以通过multiWindowAccess()接口来设置是否允许网页在新窗口打开。当有新窗口打开时,应用侧会在onWindowNew()接口中收到 Web 组件新窗口事件,开发者需要在此接口事件中,新建窗口来处理 Web 组件窗口请求。
说明
● 如果开发者在onWindowNew()接口通知中不需要打开新窗口,需要将ControllerHandler.setWebController()接口返回值设置成 null。
如下面的本地示例,当用户点击“新窗口中打开网页”按钮时,应用侧会在onWindowNew()接口中收到 Web 组件新窗口事件。
● 应用侧代码。
// xxx.etsimport web_webview from '@ohos.web.webview';@Entry@Componentstruct WebComponent {controller: web_webview.WebviewController = new web_webview.WebviewController();build() {Column() {Web({ src:$rawfile("window.html"), controller: this.controller }).multiWindowAccess(true).onWindowNew((event) => {console.info("onWindowNew...");var popController: web_webview.WebviewController = new web_webview.WebviewController();// 开发者需要在此处新建窗口,跟popController关联,并且将popController返回给Web组件。如果不需要打开新窗口请将返回值设置为event.handler.setWebController(null);event.handler.setWebController(popController);})}}}
● window.html 页面代码。
<!DOCTYPE html><html><head><meta charset="utf-8"><title>WindowEvent</title></head><body><input type="button" value="新窗口中打开网页" onclick="OpenNewWindow()"><script type="text/javascript">function OpenNewWindow(){let openedWindow = window.open("about:blank", "", "location=no,status=no,scrollvars=no");if (openedWindow) {openedWindow.document.body.write("<p>这是我的窗口</p>");} else {log.innerHTML = "window.open failed";}}</script></body></html>
Web 组件提供位置权限管理能力。开发者可以通过onGeolocationShow()接口对某个网站进行位置权限管理。Web 组件根据接口响应结果,决定是否赋予前端页面权限。获取设备位置,需要开发者配置ohos.permission.LOCATION权限。
在下面的示例中,用户点击前端页面"获取位置"按钮,Web 组件通过弹窗的形式通知应用侧位置权限请求消息,示例代码如下:
● 前端页面代码。
<!DOCTYPE html><html><body><p id="locationInfo">位置信息</p><button onclick="getLocation()">获取位置</button><script>var locationInfo=document.getElementById("locationInfo");function getLocation(){if (navigator.geolocation) {<!-- 前端页面访问设备地理位置 -->navigator.geolocation.getCurrentPosition(showPosition);}}function showPosition(position){locationInfo.innerHTML="Latitude: " + position.coords.latitude + "<br />Longitude: " + position.coords.longitude;}</script></body></html>
● 应用代码。
// xxx.etsimport web_webview from '@ohos.web.webview';@Entry@Componentstruct WebComponent {controller: web_webview.WebviewController = new web_webview.WebviewController();build() {Column() {Web({ src:$rawfile('getLocation.html'), controller:this.controller }).geolocationAccess(true).onGeolocationShow((event) => { // 地理位置权限申请通知AlertDialog.show({title: '位置权限请求',message: '是否允许获取位置信息',primaryButton: {value: 'cancel',action: () => {event.geolocation.invoke(event.origin, false, false); // 不允许此站点地理位置权限请求}},secondaryButton: {value: 'ok',action: () => {event.geolocation.invoke(event.origin, true, false); // 允许此站点地理位置权限请求}},cancel: () => {event.geolocation.invoke(event.origin, false, false); // 不允许此站点地理位置权限请求}})})}}}