


176
社区成员
 发帖
发帖 与我相关
与我相关 我的任务
我的任务
 分享
分享目录
Link to the finished project code
Presentation of the Finished Product
Design and Implementation Process
Personal Journey and Learnings
This blog post is based on a further refinement of the EE308's first assignment.
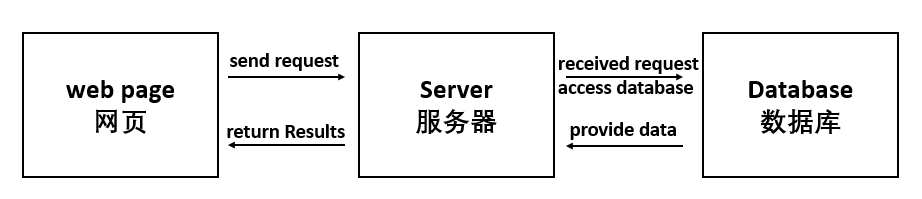
In this job, in addition to the basic functions of the front end of the web page calculator, the calculation data needs to be stored in the back end to separate the front and back sections of the calculator.
iam-Yue/Assignment2 (github.com)
| The Link Your Class | https://bbs.csdn.net/forums/ssynkqtd-04 |
|---|---|
| The Link of Requirement of This Assignment | https://bbs.csdn.net/topics/617378696 |
| The Aim of This Assignment | Implement front-end and back-end interactive calculators |
| MU STU ID and FZU STU ID | <21124931_832101117> |
| PSP | Estimated Time(minutes) | Actual Time(minutes) |
|---|---|---|
| Planning | 10 | 10 |
| • Estimate | 10 | 10 |
| Development | 810 | 980 |
| • Analysis | 120 | 180 |
| • Design Spec | 30 | 30 |
| • Design Review | 20 | 20 |
| • Coding Standard | 10 | 10 |
| • Design | 80 | 80 |
| • Coding | 500 | 600 |
| • Code Review | 20 | 20 |
| • Test | 30 | 40 |
| Reporting | 60 | 60 |
| • Test Repor | 20 | 20 |
| • Size Measurement | 10 | 10 |
| • Postmortem & Process Improvement Plan | 30 | 30 |
| 合计 | 880 | 1050 |
1. +, -, *, /, %
2. Clear and roll back

3. Read history
1. Calculate radical sign, trigonometric function, log

2. Implement bracket computation
3. Better looking UI interface
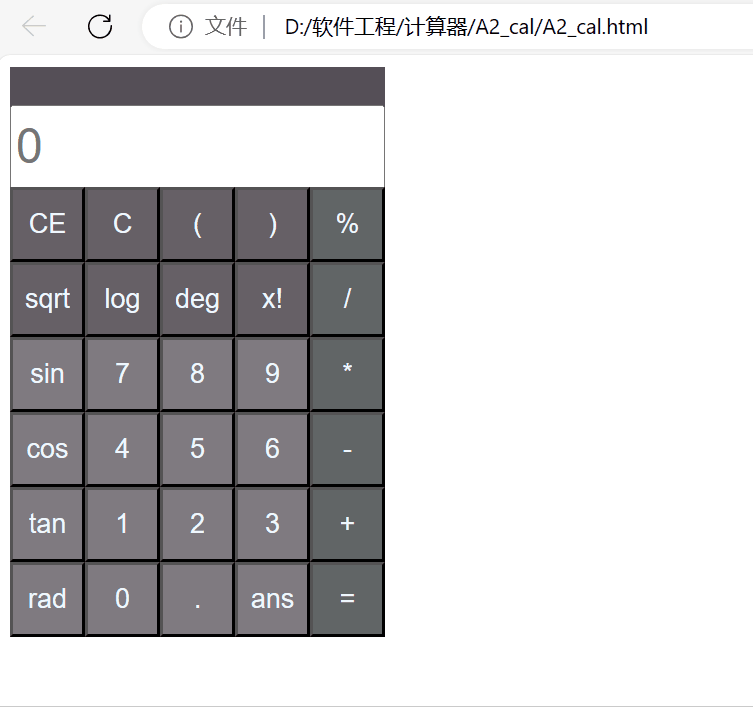
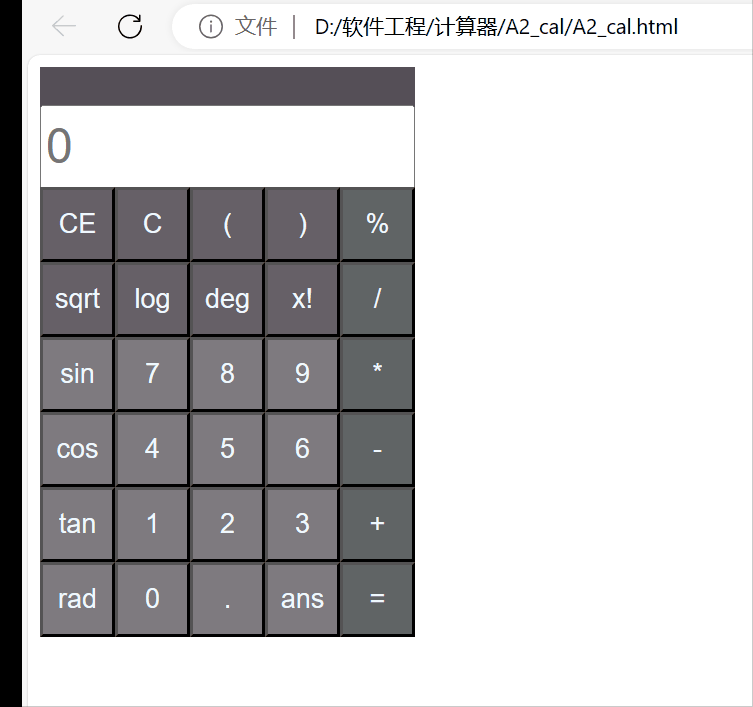
Front end:
1. Create an HTML page with an input field and a button for the user to enter the expression to be evaluated.
2. Add a div element to the page to display the results.
3. Use JavaScript to monitor the button click event. When the user clicks the button, the expression in the input box is obtained and sent to the back-end.
4. Use CSS for web UI design.
The back end:
1. Create a back-end server, implemented in the python language.
2. Create a Flask routing handler on the server side to receive requests sent by the front end.
3. In the route handler, get the expression sent by the front end, connect to the MySQL database and perform related operations.
4. The result is returned to the front end and the history is displayed on the database.
Front and back end interaction:
There is not much difference between the front end and the first job, only the addition of other functions and page optimization of the calculator on the basis of the first time. It is important to implement the connection interaction with the back end in Javascript.
Request to send POST
function equal(){
    try{
        var exp = document.form.show.value
    if(exp){
        document.form.show.value = eval(exp)
        if(eval(exp)=="Infinity")
        {
            document.form.show.value="error";
        }
        var result=eval(exp)
        var xhr= new XMLHttpRequest
        xhr.open('POST','http://127.0.0.1:5000/get_history',true);
        xhr.setRequestHeader('Content-type', 'application/json');
        xhr.onreadystatechange = function () {
            if (xhr.readyState === 4 && xhr.status === 200) {
                console.log(xhr.responseText);
            }
        };
        const data = {
            calculation: exp,
            result: result
            };
            xhr.send(JSON.stringify(data));
    }
    }
    catch{
        document.form.show.value = "error"
    }
}
Request to send GET
function gethistory(){
    const xhr = new XMLHttpRequest();
    xhr.open('GET', 'http://127.0.0.1:5000/get_calculation', true);
    xhr.onreadystatechange = function () {
      if (xhr.readyState === 4) {
        if (xhr.status === 200) {
            Data = JSON.parse(xhr.responseText);
            array = Data['data'];
            let str="";
            for(let i=0;i<array.length;i++){
                str +=array[i][0]+" = "+array[i][1]+"\n";
            }
            document.form.show.value=string
        }
      }
    };
    xhr.send();
 }
Calculator various functional codes
function clean(){
    document.form.show.value = ""
}
function back(){
    var text = document.form.show.value
    len = text.length
    document.form.show.value = text.substring(0,text.length-1)
}
function sin(){
    equal()
    var angle = document.form.show.value
    var view =  Math.sin(angle/180*Math.PI)
    view =view.toFixed(2)
    clean()
    document.form.show.value += view
}
function cos(){
    equal()
    var angle = document.form.show.value
    var view =  Math.cos(angle/180*Math.PI)
    view =view.toFixed(2)
    clean()
    document.form.show.value += view
}
function tan(){
    equal()
    var angle = document.form.show.value
    var view =  Math.tan(angle/180*Math.PI)
    view =view.toFixed(2)
    clean()
    document.form.show.value += view
}
function ln(){
    equal()
    document.form.show.value = Math.log10(document.form.show.value)
}
function sqrt(){
    equal()
    document.form.show.value = Math.sqrt(document.form.show.value)
}
function factorial(n) {
    let result = 1
    for(let i = 1; i <= n; i++) {
        result *= i
    }
    return result
}
function jiecheng(){
    equal()
    document.form.show.value = factorial(document.form.show.value)
}
function insert_num(num){
    document.form.show.value += num
    return document.form.show.value
}
function insert_op(op){
    var text = document.form.show.value
    var len = text.length
    if(text[len-1]<'0'||text[len]>'9'){

        document.form.show.value = text.substring(0,text.length-1)
    }
    document.form.show.value += op
}
function display(op){
    var text = document.form.show.value
    text+=op
    document.form.show.value=text
}
At the back end, pymysql+Flask is used to remotely connect the database, and the overall interaction between the front and back ends is realized.
Connecting front-end
#导入库
from flask import Flask, request, jsonify
import pymysql
from flask_cors import CORS
import datetime

#连接MySQL数据库
con = pymysql.connect(
    host='localhost',
    port=3306,
    user='root',
    password='123456',
    database='CalculatorData'
)

app = Flask(__name__)
CORS(app)
cursor = con.cursor()
Read the front-end records and store them in the database
@app.route('/get_history', methods=['POST'])
def get_history():
        data = request.get_json()
        expression = data.get('expression')
        result = data.get('result')

        time = datetime.datetime.now().strftime('%Y-%m-%d %H:%M:%S')
        data = (time, expression, result)
        insert = "INSERT INTO web_calculate VALUES (%s, %s, %s)"
        cursor.execute(insert, data)
        con.commit()

        response_message = "ok"
        return jsonify({"message": response_message})
Read the back-end database so that records can be returned when ans is pressed
@app.route('/get_calculation', methods=['GET'])
def get_calculation():
        cursor.execute("SELECT expression, result FROM web_calculate ORDER BY time DESC LIMIT 10")
        data = cursor.fetchall()
        return jsonify({"data": data})
In this assignment, I completed a front-to-back interactive calculator, which was much more difficult than the first assignment. The most important point of this job is the back-end part. In the study, I generally know the routing system of Flask, request processing, and learn how to connect to the mysql database and carry out related operations.
In the process of practice, I also found my shortcomings and weaknesses in software development, and I will work harder to learn relevant knowledge in the future.


