


98
社区成员
 发帖
发帖 与我相关
与我相关 我的任务
我的任务
 分享
分享本周学习内容如下:
SQLite是一款轻量级的嵌入式关系数据库系统。其特色在于它的跨平台兼容性和无需复杂配置。为了保持其简洁性,SQLite并不需要单独的服务器流程,用户可以直接与数据库进行交互,省去了通过服务器的中间环节。正因如此,SQLite在嵌入式设备及小型应用中广受欢迎。
在Android系统中,ContentResolver是一个核心类,它负责管理应用与不同组件(例如活动、服务、广播接收器等)之间的数据交流。ContentResolver为访问和修改应用数据提供了一个标准化的方法,这些数据可能存储在应用的私有空间或由其他应用提供。它经常与ContentProvider配合使用,后者作为数据源的抽象,为数据访问和操作提供了接口。
在Kotlin编程语言中,泛型是一个关键特性,它允许在定义类、接口、函数或对象时引入类型参数。这样做不仅能提升代码的灵活性和可重用性,还能确保类型安全。总的来说,虽然Kotlin中的泛型功能与Java相似,但其语法更为简练,并通过约束等特性提供了更高的灵活性。
1.掌握Android四大组件(Activity、Service、BroadcastReceiver、ContentProvider)的基本概念和使用方法。
2.学会如何在实际开发中灵活运用这四大组件构建Android应用程序。
3.提高Android应用开发能力和实践操作能力。
1.Android Studio开发环境
2.Android模拟器或真实Android设备
实验步骤
1.1创建一个activity并添加UI元素
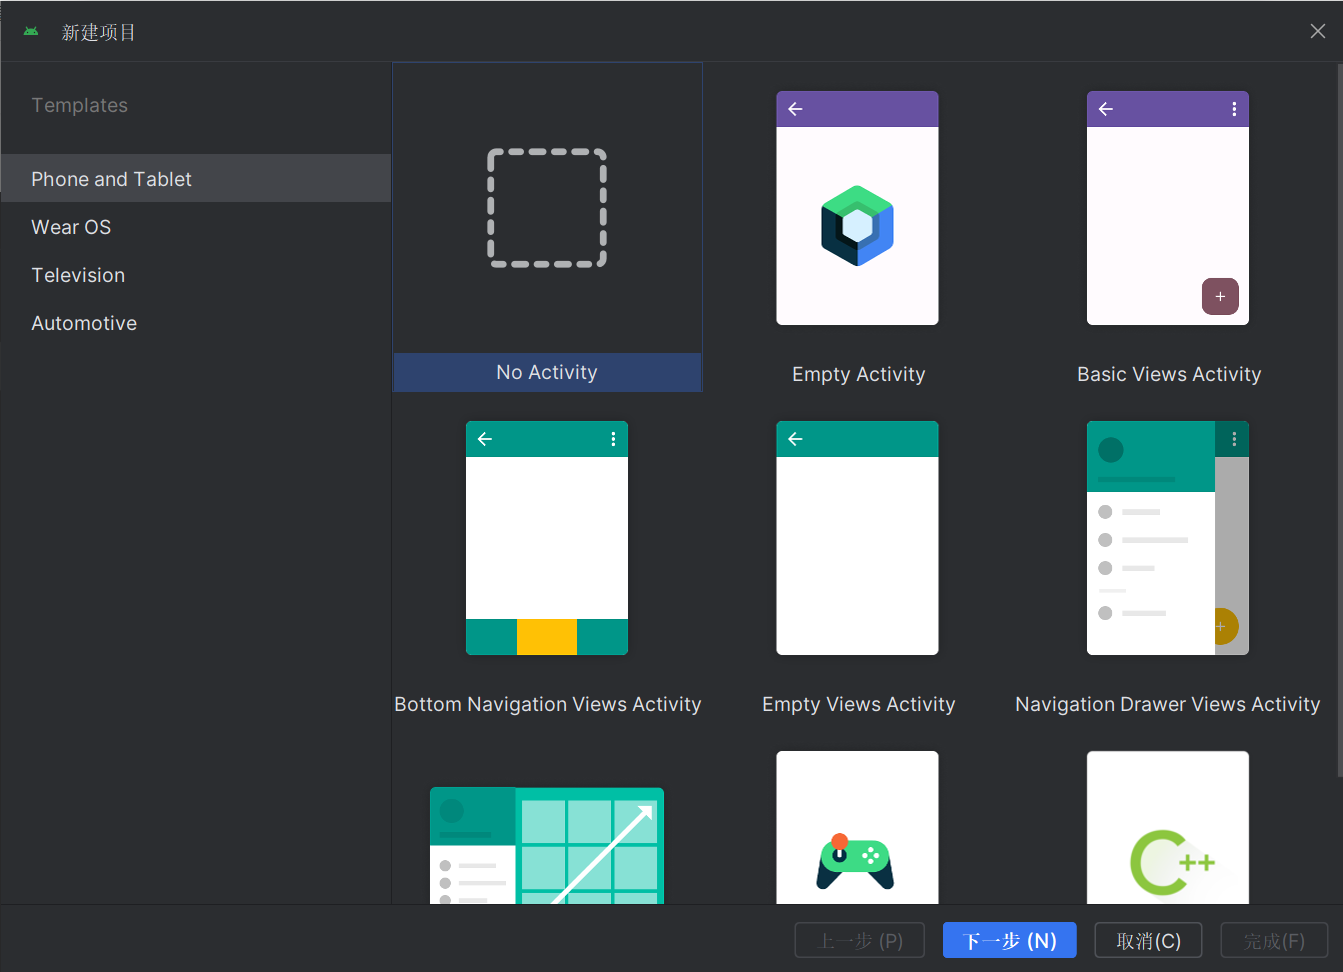
选择No Activity
创建FirstActivity,SecondActivity


按照书上的代码写FirstActivity.kt、SecondActivity.kt,两个相应的xml文件和AndroidManifest文件
FirstActivity
package com.example.project3

import android.content.Intent
import android.os.Bundle
import android.widget.Button
import androidx.activity.ComponentActivity

class FirstActivity : ComponentActivity() {
    override fun onCreate(savedInstanceState: Bundle?) {
        super.onCreate(savedInstanceState)
        setContentView(R.layout.activity_first)

        val button1: Button = findViewById(R.id.button1)
        button1.setOnClickListener {
            val intent = Intent(this, SecondActivity::class.java)
            startActivity(intent)
        }
    }
}
activity_first.xml
<?xml version="1.0" encoding="utf-8"?>
<LinearLayout xmlns:android="http://schemas.android.com/apk/res/android"
    android:orientation="vertical"
    android:layout_width="match_parent"
    android:layout_height="match_parent">


    <Button
        android:id="@+id/button1"
        android:layout_width="match_parent"
        android:layout_height="wrap_content"
        android:text="Button1" />
</LinearLayout>
SecondActivity
package com.example.project3

import android.content.Intent
import android.os.Bundle
import android.widget.Button
import androidx.activity.ComponentActivity

class SecondActivity : ComponentActivity() {
    override fun onCreate(savedInstanceState: Bundle?) {
        super.onCreate(savedInstanceState)
        setContentView(R.layout.activity_second)

        val button2: Button = findViewById(R.id.button2)

        button2.setOnClickListener {
            val intent = Intent(this, FirstActivity::class.java)
            startActivity(intent)
        }
    }
}
activity_second.xml
<?xml version="1.0" encoding="utf-8"?>
<LinearLayout xmlns:android="http://schemas.android.com/apk/res/android"
    android:orientation="vertical"
    android:layout_width="match_parent"
    android:layout_height="match_parent">
    <Button
        android:id="@+id/button2"
        android:layout_width="match_parent"
        android:layout_height="wrap_content"
        android:text="Button 2"
        />
</LinearLayout>
以及AndroidManifest文件
<?xml version="1.0" encoding="utf-8"?>
<manifest xmlns:android="http://schemas.android.com/apk/res/android"
    xmlns:tools="http://schemas.android.com/tools" >

    <application
        android:allowBackup="true"
        android:dataExtractionRules="@xml/data_extraction_rules"
        android:fullBackupContent="@xml/backup_rules"
        android:icon="@mipmap/ic_launcher"
        android:label="@string/app_name"
        android:roundIcon="@mipmap/ic_launcher_round"
        android:supportsRtl="true"
        android:theme="@style/Theme.Project3"
        tools:targetApi="31" >
        <activity
            android:name=".SecondActivity"
            android:exported="false" />
        <activity
            android:name=".FirstActivity"
            android:label="This is FirstActivity"
            android:exported="true">
            <intent-filter>
                <action android:name="android.intent.action.MAIN" />
                <category android:name="android.intent.category.LAUNCHER" />
            </intent-filter>
        </activity>
    </application>

</manifest>
运行效果如视频所示:
1.2实现Activity之间的传值
修改firstActivity中的代码,使用Intent提供的putExtra()方法的重载
package com.example.project3

import android.content.Intent
import android.os.Bundle
import android.widget.Button
import androidx.activity.ComponentActivity

class FirstActivity : ComponentActivity() {
    override fun onCreate(savedInstanceState: Bundle?) {
        super.onCreate(savedInstanceState)
        setContentView(R.layout.activity_first)

        val button1: Button = findViewById(R.id.button1)
        button1.setOnClickListener {
            val data = "Hello SecondActivity"
            val intent = Intent(this, SecondActivity::class.java)
            intent.putExtra("extra_data", data)
            startActivity(intent)
        }
    }
}
在SecondActivity中将传递的数据取出,并打印出来,代码如下所示:
package com.example.project3

import android.content.Intent
import android.os.Bundle
import android.util.Log
import android.widget.Button
import androidx.activity.ComponentActivity
import androidx.appcompat.app.AppCompatActivity

class SecondActivity : AppCompatActivity() {
    override fun onCreate(savedInstanceState: Bundle?) {
        super.onCreate(savedInstanceState)
        setContentView(R.layout.activity_second)
        val extraData = intent.getStringExtra("extra_data")
        Log.d("SecondActivity", "extra data is $extraData")
    }
}
跳转效果如下:
可以看出和之前基本相同
但是在logcat中可以看到传值:

1.3了解Activity的生命周期
Activity类中定义了7个回调方法,覆盖了Activity生命周期的每一个环节。
onCreate(): 此方法会在Activity首次创建时被系统调用。在此阶段,您应当执行Activity的初始化工作,例如加载用户界面布局、初始化变量、设置监听器等。这是配置Activity界面的关键步骤。
onStart(): 当Activity从不可见状态变为可见状态时,会触发此方法。尽管此时Activity对用户可见,但尚未准备好与用户交互。
onResume(): 此方法在Activity准备完毕,可以开始与用户交互之前被调用。当Activity位于任务栈顶且处于活动状态时,这个方法将被执行。此时,应用可以响应用户输入。
onPause(): 当系统准备启动另一个Activity或恢复一个已存在的Activity时,会调用此方法。在此方法中,建议释放占用CPU的资源,并保存关键数据。但需注意,该方法的执行应迅速,以避免影响新Activity的及时显示和交互。
onStop(): 当Activity完全不可见时,会触发此方法。与onPause()不同的是,如果新启动的Activity是一个对话框风格的界面,那么原Activity会执行onPause(),但onStop()则不会执行,因为原Activity仍部分可见。
onDestroy(): 在Activity被销毁并释放其占用的资源之前,系统会调用此方法。一旦执行完此方法,Activity的状态将变为“已销毁”,且不可再被使用。
onRestart(): 如果Activity从停止状态回到运行状态,即用户重新回到了这个Activity,那么在它再次变为可见之前,系统会调用此方法。这标志着Activity的重新启动过程开始。
以上7个方法中除了onRestart()方法,其他都是两两相对的,从而又可以将Activity分为以下3种生存期。
完整生存期:Activity的完整生存期始于onCreate()方法的调用,终于onDestroy()方法的执行。在这一阶段,Activity经历了从创建到销毁的整个过程。通常,onCreate()方法中会完成Activity的各种初始化设置,如加载布局、初始化变量等,而onDestroy()方法则用于执行清理工作,如释放资源,以确保Activity被销毁时不会遗留任何可能导致内存泄漏的对象。
可见生存期:Activity的可见生存期从onStart()方法开始,到onStop()方法结束。在这个期间,Activity对用户是可见的,即使它可能暂时无法响应用户的操作。这个阶段的开始和结束是管理用户可见资源的关键时刻。开发者通常会在onStart()中加载必要的资源,以确保当Activity变为可见时,用户界面能够正确显示。相反,在onStop()方法中,会释放这些资源,以优化内存使用,特别是当Activity不再可见时。
前台生存期:Activity的前台生存期是指从onResume()方法被调用开始,到onPause()方法执行结束的这一段时间。在这个阶段,Activity处于活动状态,可以响应用户的操作。这是用户与应用程序交互最频繁的状态,因此,确保Activity在这个状态下的性能和响应性至关重要。开发者需要确保在这一阶段处理好用户输入,并及时更新用户界面以反映用户的操作。
2.1创建一个Service,用于在后台执行长时间运行的任务
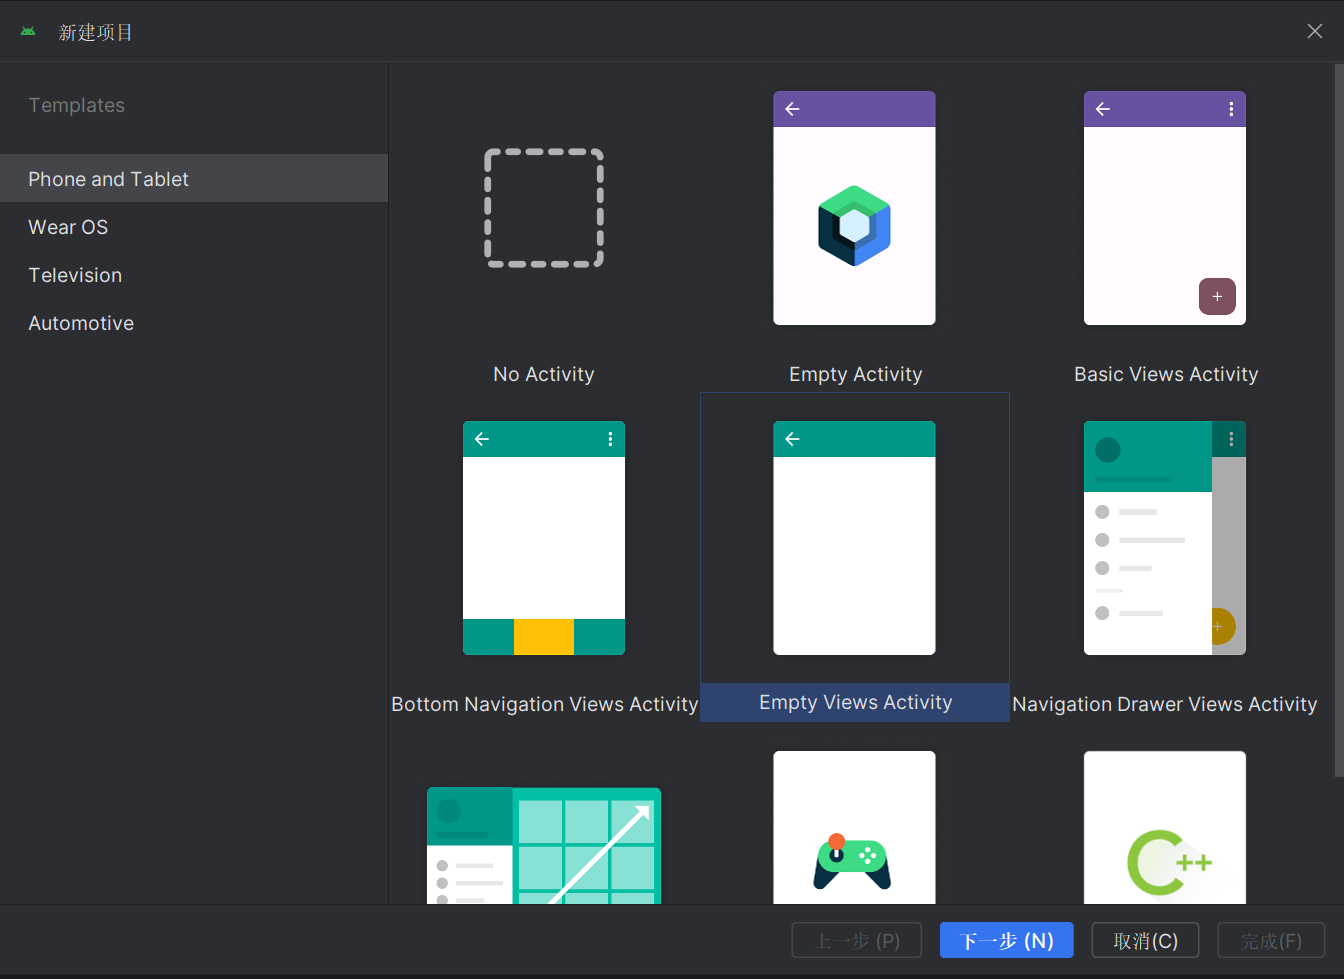
新建一个Empty Views Activity
2.2通过Intent启动和停止Service
按照书上的提示修改代码:
创建MyService.kt并修改代码
package com.example.project3

import android.app.Service
import android.content.Intent
import android.os.IBinder
import android.util.Log

class MyService : Service() {
    override fun onBind(intent: Intent): IBinder {
        TODO("Return the communication channel to the service.")
    }
    override fun onCreate() {
        super.onCreate()
        Log.d("MyService", "onCreate executed")
    }
    override fun onStartCommand(intent: Intent, flags: Int, startId: Int): Int {
        Log.d("MyService", "onStartCommand executed")
        return super.onStartCommand(intent, flags, startId)
    }
    override fun onDestroy() {
        super.onDestroy()
        Log.d("MyService", "onDestroy executed")
    }
}
Mainactivity
package com.example.project3

import android.content.Intent
import androidx.appcompat.app.AppCompatActivity
import android.os.Bundle
import android.widget.Button

class MainActivity:AppCompatActivity(){
    override fun onCreate(savedInstanceState:Bundle?){
        super.onCreate(savedInstanceState)
        setContentView(R.layout.activity_main)
        val startServiceBtn: Button = findViewById(R.id.startServiceBtn)
        startServiceBtn.setOnClickListener {
            val intent = Intent(this, MyService::class.java)
            startService(intent)// 启动 Service
        }
        val stopServiceBtn:Button = findViewById(R.id.stopServiceBtn)
        stopServiceBtn.setOnClickListener{
            val intent = Intent(this, MyService::class.java)
            stopService(intent)// 停止Service
        }
    }
}
activity_main.xml
<?xml version="1.0" encoding="utf-8"?>
<LinearLayout xmlns:android="http://schemas.android.com/apk/res/android"
    android:orientation="vertical"
    android:layout_width="match_parent"
    android:layout_height="match_parent">
    <Button
        android:id="@+id/startServiceBtn"
        android:layout_width="match_parent"
        android:layout_height="wrap_content"
        android:text="Start Service" />
    <Button
        android:id="@+id/stopServiceBtn"
        android:layout_width="match_parent"
        android:layout_height="wrap_content"
        android:text="Stop Service" />
</LinearLayout>
效果如视频和截图所示(电脑录屏不知为何用不了,所以只能logcat截屏):

可以看到运行成功了
2.3实现Service与Activity之间的通信
还是按照书上的步骤,修改代码
修改后的代码如下:
MyService
package com.example.project3

import android.app.Service
import android.content.Intent
import android.os.Binder
import android.os.IBinder
import android.util.Log

class MyService : Service() {
    private val mBinder = DownloadBinder()
    class DownloadBinder : Binder() {
        fun startDownload() {
            Log.d("MyService", "startDownload executed")
        }
        fun getProgress(): Int {
            Log.d("MyService", "getProgress executed")
            return 0
        }
    }
    override fun onBind(intent: Intent): IBinder {
        return mBinder
    }
    override fun onCreate() {
        super.onCreate()
        Log.d("MyService", "onCreate executed")
    }
    override fun onStartCommand(intent: Intent, flags: Int, startId: Int): Int {
        Log.d("MyService", "onStartCommand executed")
        return super.onStartCommand(intent, flags, startId)
    }
    override fun onDestroy() {
        super.onDestroy()
        Log.d("MyService", "onDestroy executed")
    }
}
MainActivity
package com.example.project3

import android.content.ComponentName
import android.content.Context
import android.content.Intent
import android.content.ServiceConnection
import androidx.appcompat.app.AppCompatActivity
import android.os.Bundle
import android.os.IBinder
import android.widget.Button

class MainActivity:AppCompatActivity(){
    lateinit var downloadBinder: MyService.DownloadBinder
    private val connection = object : ServiceConnection {
        override fun onServiceConnected(name: ComponentName, service: IBinder) {
            downloadBinder = service as MyService.DownloadBinder
            downloadBinder.startDownload()
            downloadBinder.getProgress()
        }
        override fun onServiceDisconnected(name: ComponentName) {
        }
    }
    override fun onCreate(savedInstanceState:Bundle?){
        super.onCreate(savedInstanceState)
        setContentView(R.layout.activity_main)
        val startServiceBtn: Button = findViewById(R.id.startServiceBtn)
        startServiceBtn.setOnClickListener {
            val intent = Intent(this, MyService::class.java)
            startService(intent)// 启动 Service
        }
        val stopServiceBtn:Button = findViewById(R.id.stopServiceBtn)
        stopServiceBtn.setOnClickListener{
            val intent = Intent(this, MyService::class.java)
            stopService(intent)// 停止Service
        }
        val bindServiceBtn:Button = findViewById(R.id.bindServiceBtn)
        bindServiceBtn.setOnClickListener {
            val intent = Intent(this, MyService::class.java)
            bindService(intent, connection, Context.BIND_AUTO_CREATE) // 绑定Service
        }
        val unbindServiceBtn:Button = findViewById(R.id.unbindServiceBtn)
        unbindServiceBtn.setOnClickListener {
            unbindService(connection) // 解绑Service
        }

    }
}
xml文件
<?xml version="1.0" encoding="utf-8"?>
<LinearLayout xmlns:android="http://schemas.android.com/apk/res/android"
    android:orientation="vertical"
    android:layout_width="match_parent"
    android:layout_height="match_parent">
    <Button
        android:id="@+id/startServiceBtn"
        android:layout_width="match_parent"
        android:layout_height="wrap_content"
        android:text="Start Service" />
    <Button
        android:id="@+id/stopServiceBtn"
        android:layout_width="match_parent"
        android:layout_height="wrap_content"
        android:text="Stop Service" />
    <Button
        android:id="@+id/bindServiceBtn"
        android:layout_width="match_parent"
        android:layout_height="wrap_content"
        android:text="Bind Service" />
    <Button
        android:id="@+id/unbindServiceBtn"
        android:layout_width="match_parent"
        android:layout_height="wrap_content"
        android:text="Unbind Service" />
</LinearLayout>
运行效果如视频和截图所示:

新建一个项目,命名为:project3
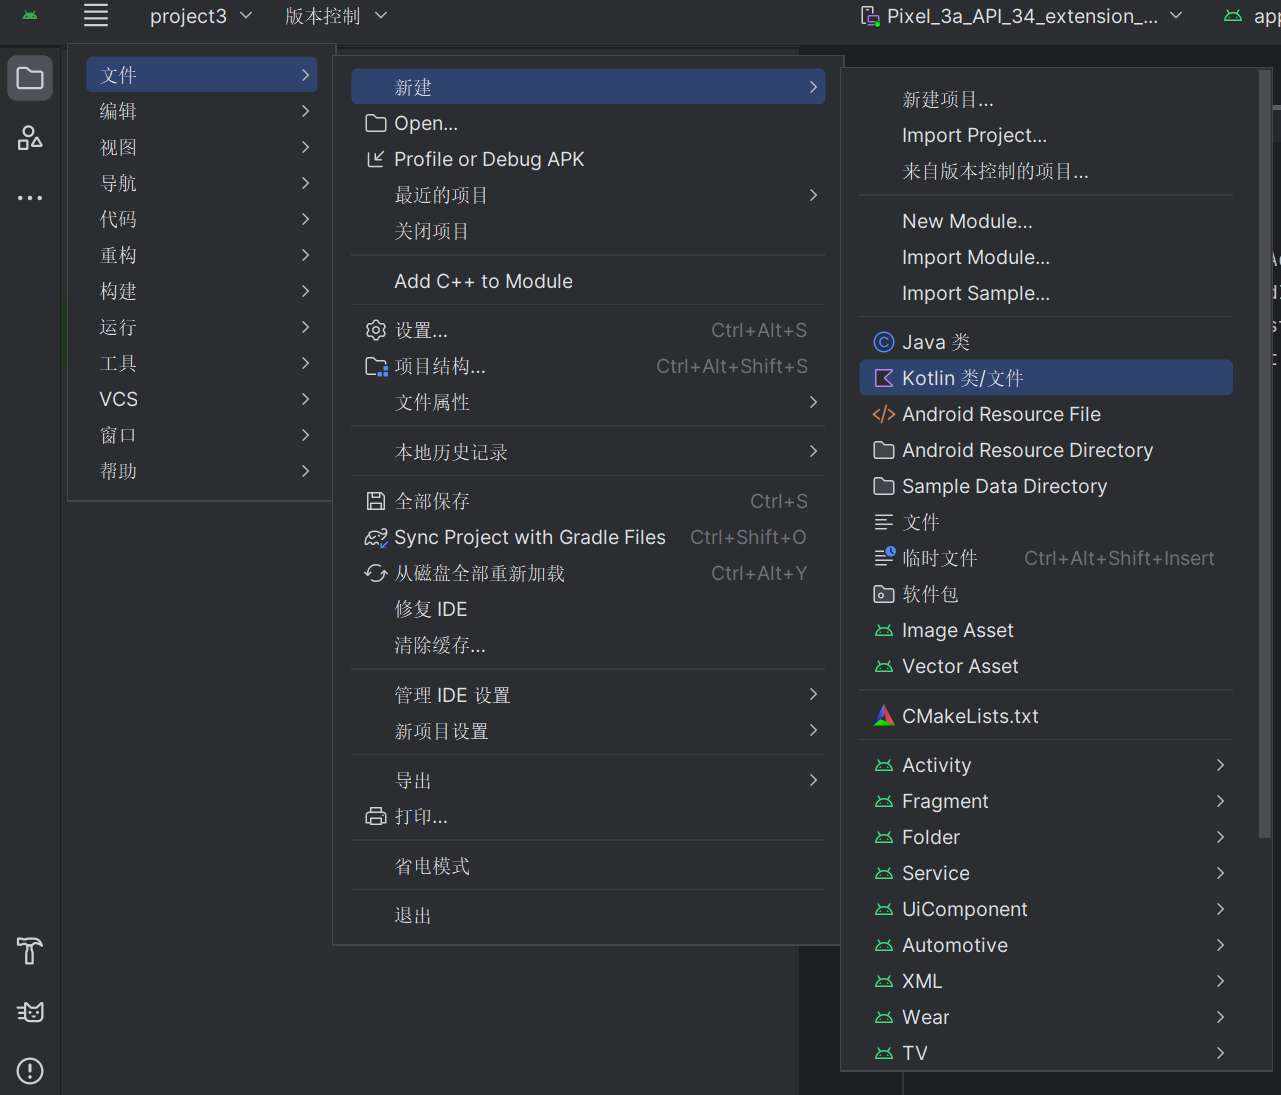
按照书上的提示,创建三个类:
ActivityCollector类用于管理所有的Activity
BaseActivity类作为所有Activity的父类
LoginActivity类来作为登录界面
创建类的方式如图:
之后跟着书上的步骤修改代码,如下为最终代码结果:
ActivityCollector.kt
package com.example.project3

import android.app.Activity

object ActivityCollector {
    private val activities = ArrayList<Activity>()
    fun addActivity(activity: Activity) {
        activities.add(activity)
    }
    fun removeActivity(activity: Activity) {
        activities.remove(activity)
    }
    fun finishAll() {
        for (activity in activities) {
            if (!activity.isFinishing) {
                activity.finish()
            }
        }
        activities.clear()
    }
}
BaseActivity.kt
package com.example.project3

import android.content.BroadcastReceiver
import android.content.Context
import android.content.Intent
import android.content.IntentFilter
import android.os.Build
import android.os.Bundle
import androidx.annotation.RequiresApi
import androidx.appcompat.app.AlertDialog
import androidx.appcompat.app.AppCompatActivity

open class BaseActivity : AppCompatActivity() {
    private lateinit var private: ForceOfflineReceiver
    override fun onCreate(savedInstanceState: Bundle?) {
        super.onCreate(savedInstanceState)
        ActivityCollector.addActivity(this)
    }
    @RequiresApi(Build.VERSION_CODES.TIRAMISU)
    override fun onResume() {
        super.onResume()
        val intentFilter = IntentFilter()
        intentFilter.addAction("com.example.project3.FORCE_OFFLINE")
        private = ForceOfflineReceiver()
        if (Build.VERSION.SDK_INT >= Build.VERSION_CODES.O) {
            registerReceiver(private, intentFilter,Context.RECEIVER_EXPORTED)
        }
    }
    override fun onPause() {
        super.onPause()
        unregisterReceiver(private)
    }
    override fun onDestroy() {
        super.onDestroy()
        ActivityCollector.removeActivity(this)
    }
    inner class ForceOfflineReceiver : BroadcastReceiver() {
        override fun onReceive(context: Context, intent: Intent) {
            AlertDialog.Builder(context).apply {
                setTitle("Warning")
                setMessage("You are forced to be offline. Please try to login again.")
                setCancelable(false)
                setPositiveButton("OK") { _, _ ->
                    ActivityCollector.finishAll() // 销毁所有Activity
                    val i = Intent(context, LoginActivity::class.java)
                    context.startActivity(i) // 重新启动LoginActivity
                }
                show()
            }
        }
    }
}
LoginActivity.kt
package com.example.project3

import android.content.Intent
import android.os.Bundle
import android.widget.Button
import android.widget.EditText
import android.widget.Toast

class LoginActivity : BaseActivity() {
    override fun onCreate(savedInstanceState: Bundle?) {
        super.onCreate(savedInstanceState)
        setContentView(R.layout.activity_login)
        val login: Button = findViewById(R.id.login)
        val accountEdit: EditText = findViewById(R.id.accountEdit)
        val passwordEdit: EditText = findViewById(R.id.passwordEdit)
        login.setOnClickListener {
            val account = accountEdit.text.toString()
            val password = passwordEdit.text.toString()
            // 如果账号是admin且密码是123456,就认为登录成功
            if (account == "admin" && password == "123456") {
                val intent = Intent(this, MainActivity::class.java)
                startActivity(intent)
                finish()
            } else {
                Toast.makeText(this, "account or password is invalid",
                    Toast.LENGTH_SHORT).show()
            }
        }
    }
}
MainActivity.kt
package com.example.project3

import android.content.Intent
import android.os.Bundle
import android.widget.Button

class MainActivity : BaseActivity() {
    override fun onCreate(savedInstanceState: Bundle?) {
        super.onCreate(savedInstanceState)
        setContentView(R.layout.activity_main)
        val forceOffline: Button = findViewById(R.id.forceOffline)
        forceOffline.setOnClickListener {
            val intent = Intent("com.example.project3.FORCE_OFFLINE")
            sendBroadcast(intent)
        }
    }
}
activity_main.xml
<?xml version="1.0" encoding="utf-8"?>
<LinearLayout xmlns:android="http://schemas.android.com/apk/res/android"
    android:orientation="vertical"
    android:layout_width="match_parent"
    android:layout_height="match_parent" >
    <Button
        android:id="@+id/forceOffline"
        android:layout_width="match_parent"
        android:layout_height="wrap_content"
        android:text="Send force offline broadcast" />
</LinearLayout>
activity_login.xml
<?xml version="1.0" encoding="utf-8"?>
<LinearLayout xmlns:android="http://schemas.android.com/apk/res/android"
    android:orientation="vertical"
    android:layout_width="match_parent"
    android:layout_height="match_parent">
    <LinearLayout
        android:orientation="horizontal"
        android:layout_width="match_parent"
        android:layout_height="60dp">
        <TextView
            android:layout_width="90dp"
            android:layout_height="wrap_content"
            android:layout_gravity="center_vertical"
            android:textSize="18sp"
            android:text="Account:" />
        <EditText
            android:id="@+id/accountEdit"
            android:layout_width="0dp"
            android:layout_height="wrap_content"
            android:layout_weight="1"
            android:layout_gravity="center_vertical" />
    </LinearLayout>
    <LinearLayout
        android:orientation="horizontal"
        android:layout_width="match_parent"
        android:layout_height="60dp">
        <TextView
            android:layout_width="90dp"
            android:layout_height="wrap_content"
            android:layout_gravity="center_vertical"
            android:textSize="18sp"
            android:text="Password:" />
        <EditText
            android:id="@+id/passwordEdit"
            android:layout_width="0dp"
            android:layout_height="wrap_content"
            android:layout_weight="1"
            android:layout_gravity="center_vertical"
            android:inputType="textPassword" />
    </LinearLayout>
    <Button
        android:id="@+id/login"
        android:layout_width="200dp"
        android:layout_height="60dp"
        android:layout_gravity="center_horizontal"
        android:text="Login" />
</LinearLayout>
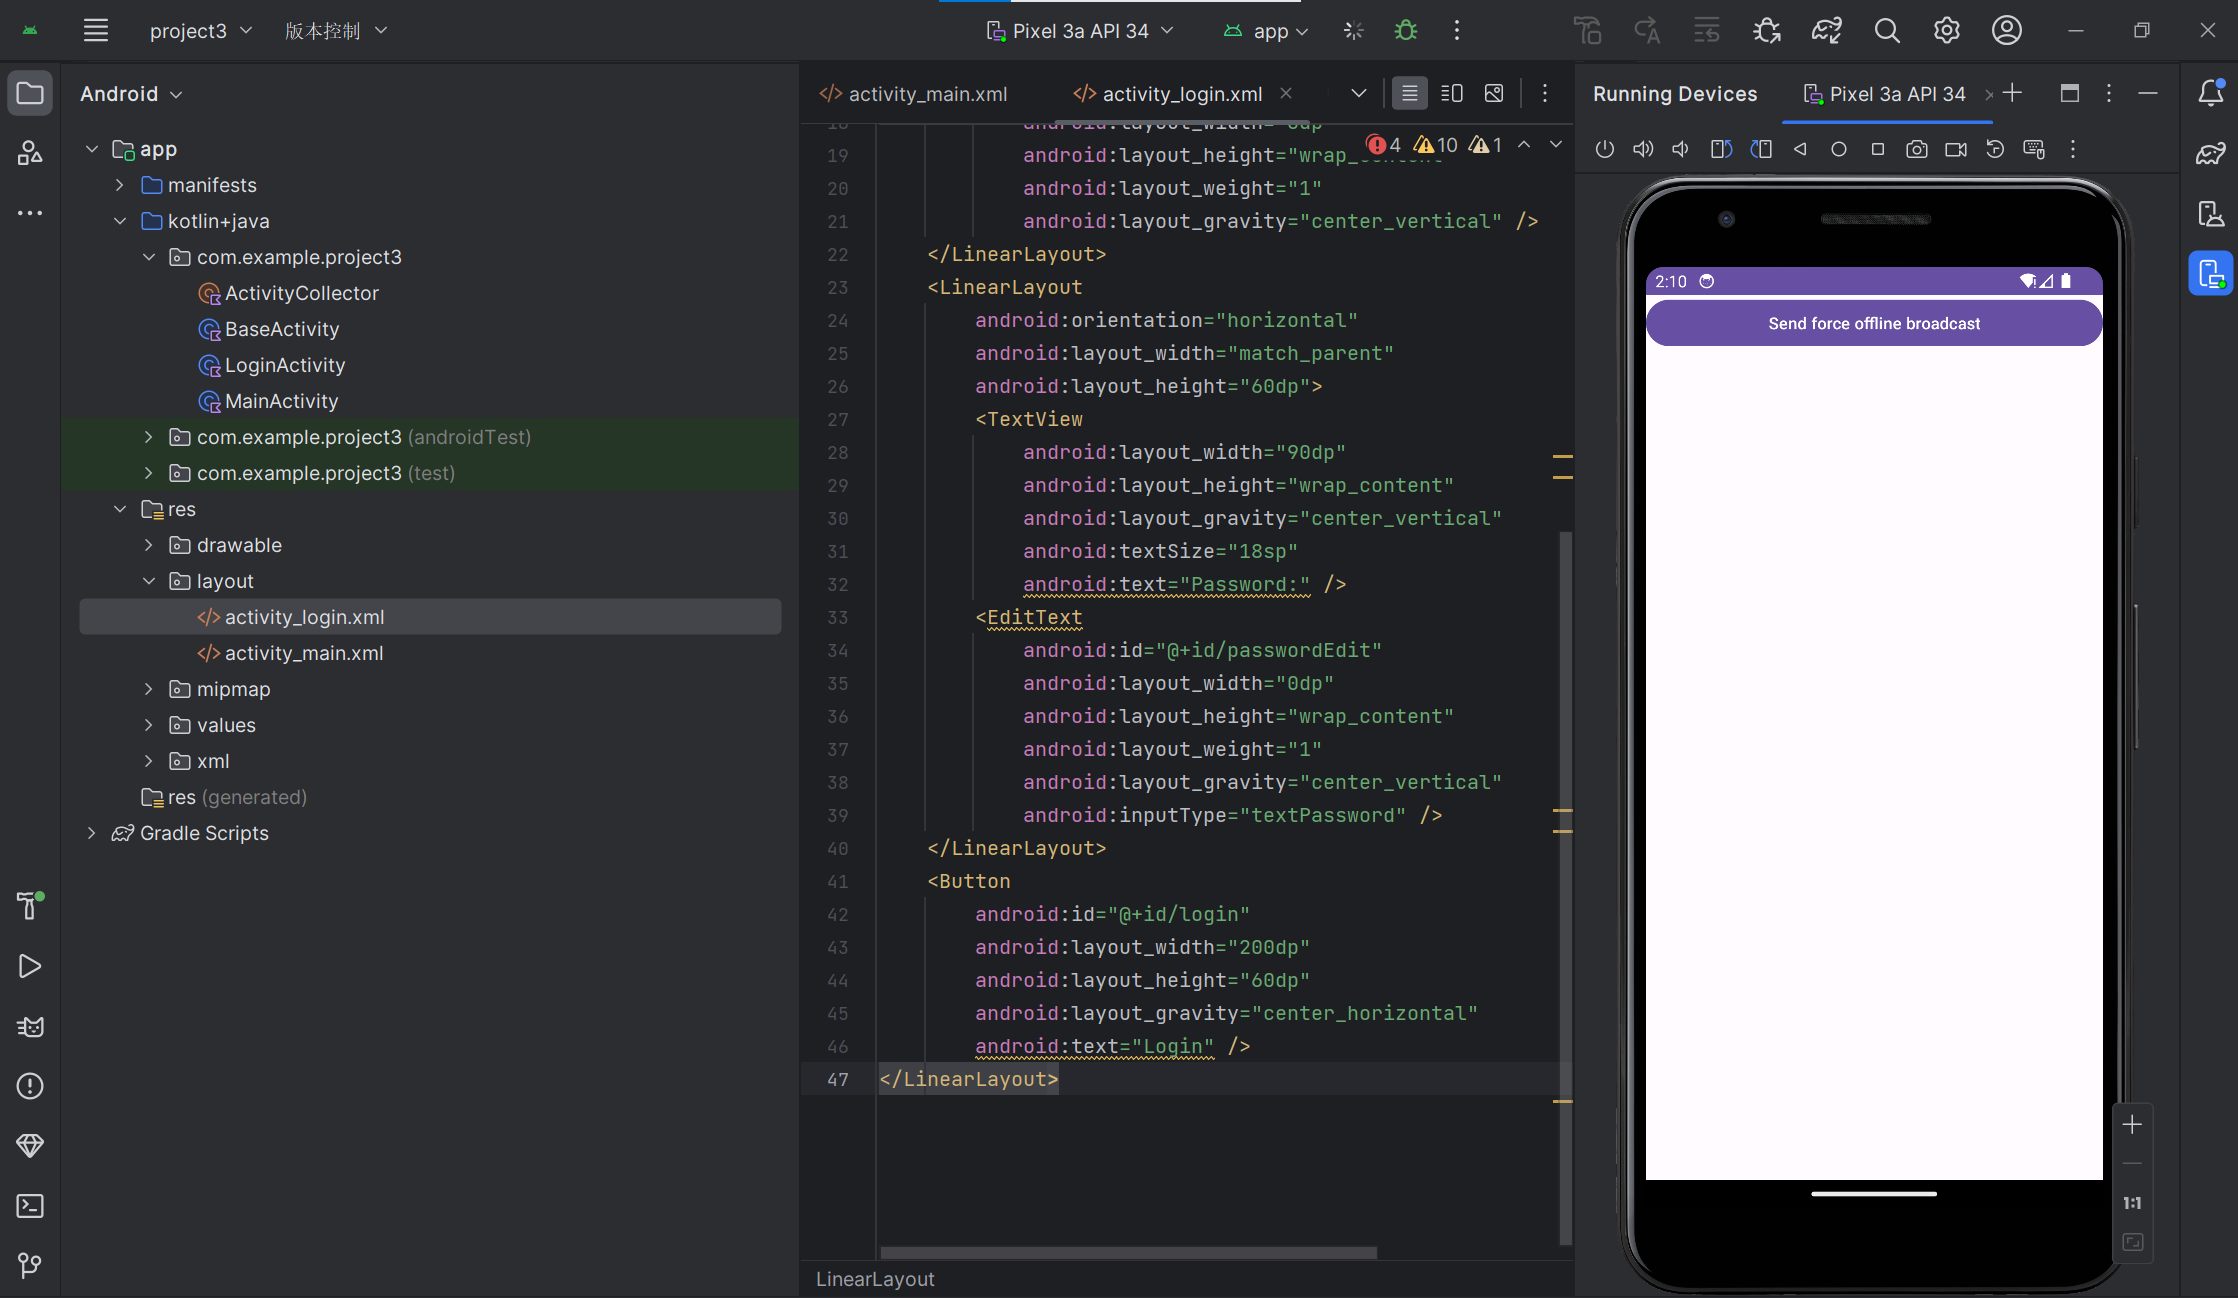
最终效果如下方:
4.1创建一个ContentProvider,用于共享数据给其他应用程序
首先先做一下准备工作,在虚拟机上创建两个联系人
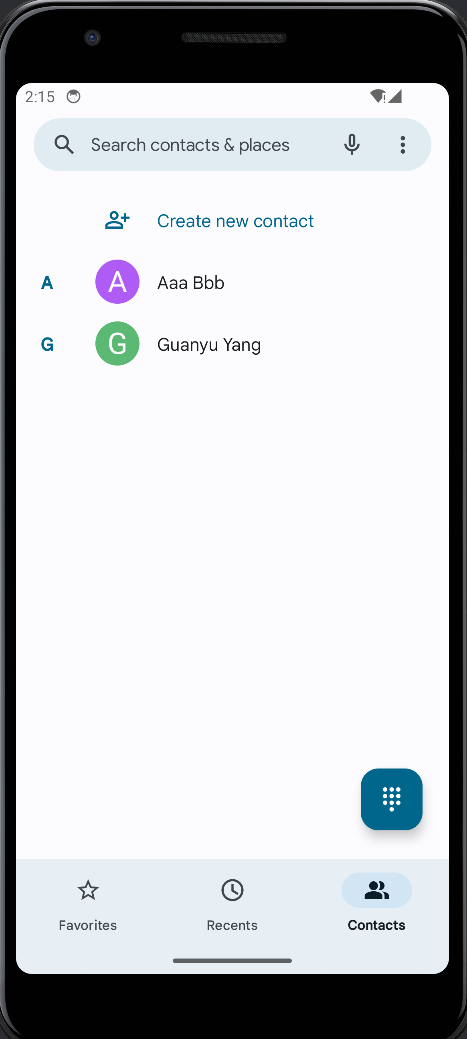
之后按照步骤修改各代码
MainActivity.kt
package com.example.project3

import android.annotation.SuppressLint
import android.content.pm.PackageManager
import androidx.appcompat.app.AppCompatActivity
import android.os.Bundle
import android.provider.ContactsContract
import android.widget.ArrayAdapter
import android.widget.ListView
import android.widget.Toast
import androidx.activity.ComponentActivity
import androidx.core.app.ActivityCompat
import androidx.core.content.ContextCompat

class MainActivity : ComponentActivity() {

    private val contactsList = ArrayList<String>()
    private lateinit var adapter: ArrayAdapter<String>

    override fun onCreate(savedInstanceState: Bundle?) {
        super.onCreate(savedInstanceState)
        setContentView(R.layout.activity_main)
        adapter = ArrayAdapter(this, android.R.layout.simple_list_item_1, contactsList)
        val contactsView: ListView = findViewById(R.id.contactsView)
        contactsView.adapter = adapter
        if (ContextCompat.checkSelfPermission(this, android.Manifest.permission.READ_CONTACTS)
            != PackageManager.PERMISSION_GRANTED) {
            ActivityCompat.requestPermissions(this, arrayOf(android.Manifest.permission.READ_CONTACTS), 1)
        } else {
            readContacts()
        }
    }

    override fun onRequestPermissionsResult(
        requestCode: Int,
        permissions: Array<out String>,
        grantResults: IntArray
    ) {
        super.onRequestPermissionsResult(requestCode, permissions, grantResults)
        when(requestCode){
            1->{
                if (grantResults.isNotEmpty()&&grantResults[0]==PackageManager.PERMISSION_GRANTED){
                    readContacts()
                }else{
                    Toast.makeText(this,"you denied the permisson",Toast.LENGTH_SHORT).show()
                }
            }
        }
    }
    @SuppressLint("Range")
    private fun readContacts() {
        // 查询联系人数据
        contentResolver.query(
            ContactsContract.CommonDataKinds.Phone.CONTENT_URI,
            null, null, null, null)?.apply {
            while (moveToNext()) {
                // 获取联系人姓名
                val displayName = getString(getColumnIndex(ContactsContract.CommonDataKinds.Phone.DISPLAY_NAME))
                // 获取联系人手机号
                val number = getString(getColumnIndex(ContactsContract.CommonDataKinds.Phone.NUMBER))
                contactsList.add("$displayName\\n$number")
            }
            adapter.notifyDataSetChanged()
            close()
        }
    }
}
activity_main.xml
<?xml version="1.0" encoding="utf-8"?>
<LinearLayout xmlns:android="http://schemas.android.com/apk/res/android"
    android:orientation="vertical"
    android:layout_width="match_parent"
    android:layout_height="match_parent">

    <ListView
        android:id="@+id/contactsView"
        android:layout_width="match_parent"
        android:layout_height="match_parent">

    </ListView>

</LinearLayout>
AndroidManifest.xml
<?xml version="1.0" encoding="utf-8"?>
<manifest xmlns:android="http://schemas.android.com/apk/res/android"
    xmlns:tools="http://schemas.android.com/tools">
    <uses-permission android:name="android.permission.READ_CONTACTS" />

    <application
        android:allowBackup="true"
        android:dataExtractionRules="@xml/data_extraction_rules"
        android:fullBackupContent="@xml/backup_rules"
        android:icon="@mipmap/ic_launcher"
        android:label="@string/app_name"
        android:roundIcon="@mipmap/ic_launcher_round"
        android:supportsRtl="true"
        android:theme="@style/Theme.Project3"
        tools:targetApi="31">
        <activity
            android:name=".MainActivity"
            android:exported="true">
            <intent-filter>
                <action android:name="android.intent.action.MAIN" />

                <category android:name="android.intent.category.LAUNCHER" />
            </intent-filter>
        </activity>
    </application>

</manifest>
运行效果如下方视频所示
问题1:实验做到一半Androidstudio的虚拟机死机了
问题1解决方案:重启了好几遍都无法正常打开虚拟设备,自己摸索着重新创建了一个新的虚拟设备。
通过亲身实践,我深刻领悟了每个组件的功能特性和运作方式,并掌握了如何在实际开发环境中巧妙运用它们来构建Android应用程序。在实验推进的过程中,我遭遇了一些挑战,但借助查阅相关资料和参考教材,我成功地克服了这些难题,并且对Android开发技术有了更为深刻的理解。
此次实验经历,使我对Android的四大核心组件有了更为清晰和深刻的认识,同时也显著增强了我的实践操作能力。在未来的实际项目开发中,我将能够更加熟练地运用这些组件,以期提升应用程序的整体质量和运行性能。

