


140
社区成员
 发帖
发帖 与我相关
与我相关 我的任务
我的任务
 分享
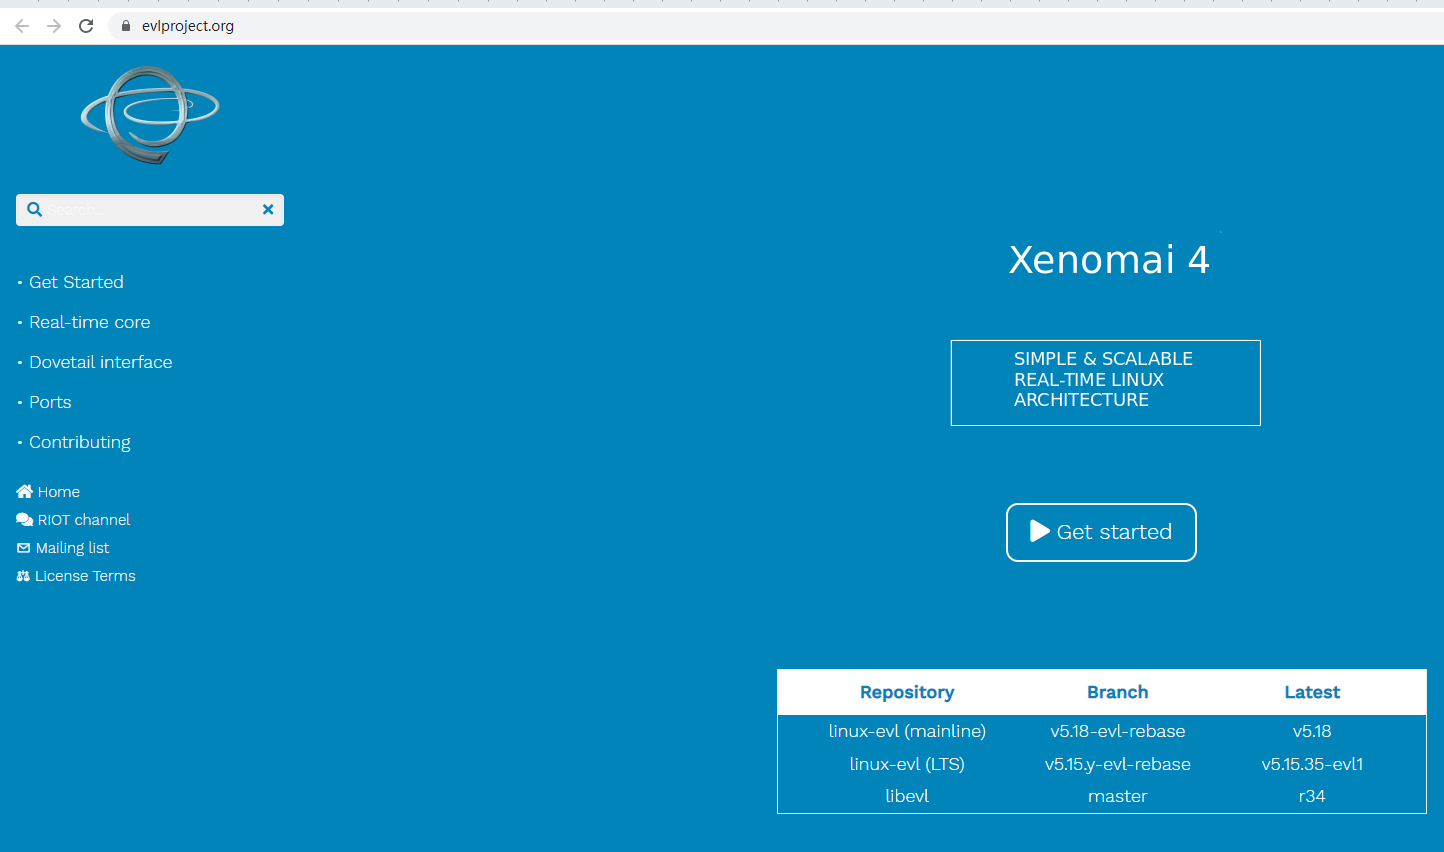
分享1.1 EVL/libevl内核源码获取
首先请登录xenomai4官网:https://evlproject.org/下载稳定版本:linux-evl-v5.15.18-evl1-rebase.tar.gz和libevl-r31.tar.gz。
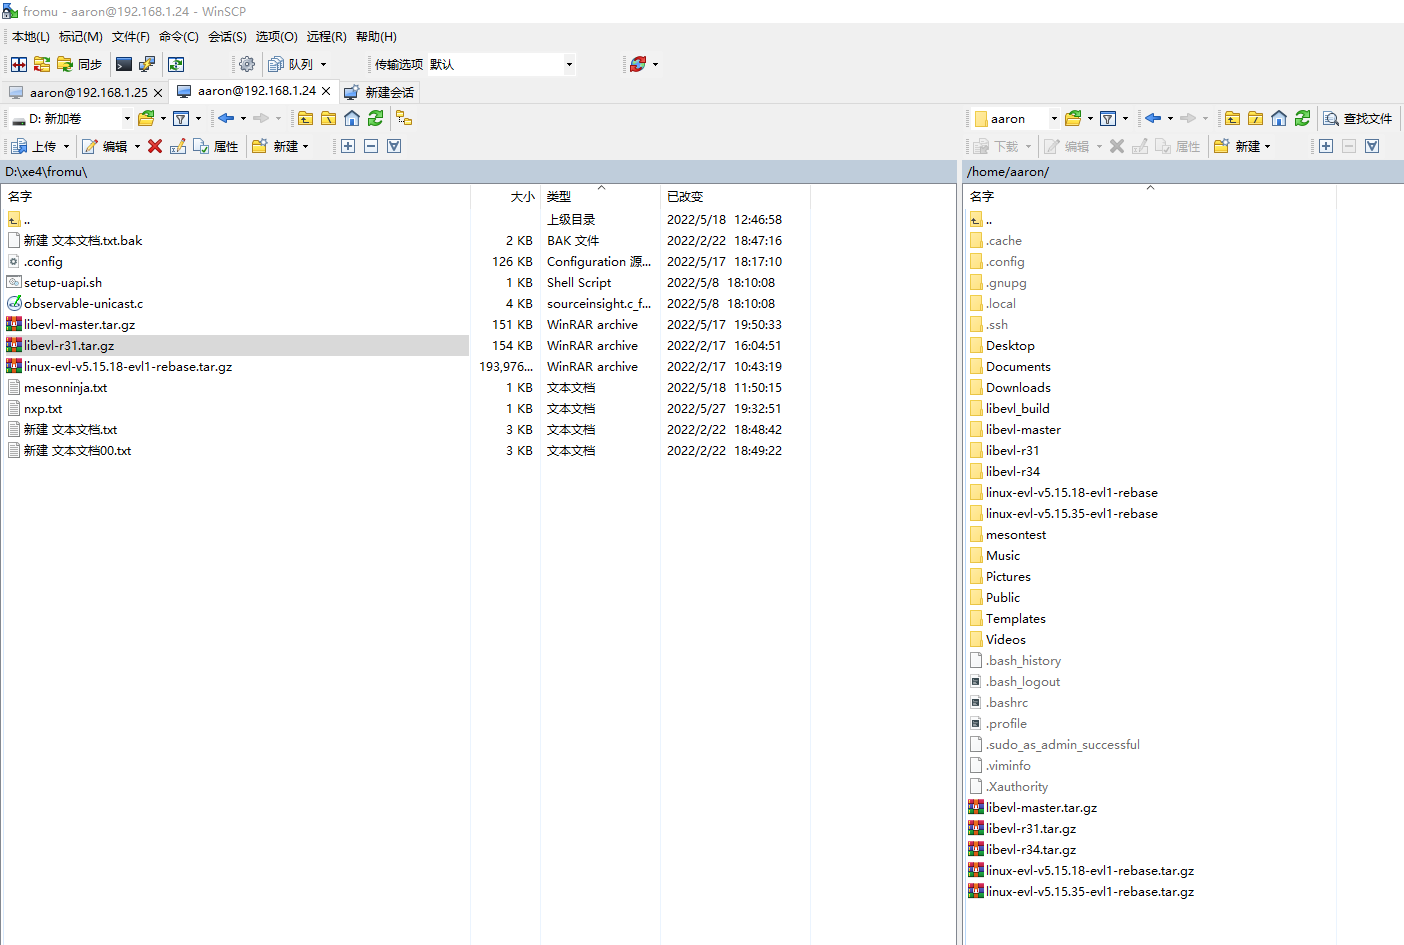
1.2 windows与linux之间传输文件工具WinSCP
通过winscp工具把本地windows磁盘上下载好的linux-evl-v5.15.18-evl1-rebase.tar.gz和libevl-r31.tar.gz上传到linux目录下:
1.3 内核配置选项注意事项
make menuconfig以后在生成的.config文件里面禁掉一下选项,否则会导致编译出错!
CONFIG_SYSTEM_TRUSTED_KEYS=""
CONFIG_SYSTEM_BLACKLIST_HASH_LIST=""
CONFIG_SYSTEM_REVOCATION_KEYS=""
CONFIG_MODULE_SIG_KEY="certs/1 signing_key.pem"
1.4 meson 编译libevl环境准备
1.4.1 meson Ninja概述
如何使用 Ninja 和 Meson 构建Linux下Build 编译程序这是两个很棒的构建工具。
如果说Ninja是linux下Make的替代品,那末Meson是CMake的替代品。
就像您使用CMake(创建CMakeLists.txt文件)生成Makefile文件然后使用make命令一样。
虽然您也可以使用 CMake for Ninja。您使用Meson(创建meson.ninja文件)生成ninja.build文件,然后使用ninja命令。
但是怎么做呢?
如何使用 Ninja 编译程序?
Ninja是一个专注于速度的小型构建系统。从本质上讲,Ninja 是Make的替代品。Ninja 被多个项目使用,其主要客户端为Google Chrome和Android,并且被大多数从事LLVM工作的开发人员使用。
与 Make 不同,必须使用“构建生成器”来生成 Ninja 构建文件。Gyp、CMake、Meson和gn是流行的构建管理软件工具,支持为 Ninja 创建构建文件。
该过程与Make的过程非常相似。
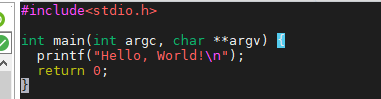
在C中编译单个文件:假设您在C :中有此代码( Hello, World!)
在此示例中,我们使用命令 [gcc]https://en.terminalroot.com.br/gnu-autotools-ultimate-tutorial-for-beginners/) 编译单个文件,vim main.c
#include<stdio.h>
int main(int argc, char **argv) {
printf("Hello, World!\n");
return 0;
}
![]()
要使用 Ninja 进行编译,您需要创建一个具有以下内容的 ** build.ninja ** 文件:vim build.ninja
![]()
rule cc
command = gcc -c -o $out $in
description = CC $out
rule link
command = gcc -o $out $in
description = LINK $out
build src.o: cc main.c
build demo-c: link src.o
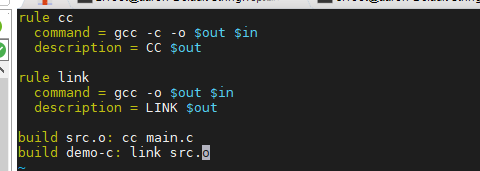
分析上面的文件,根据之前对Make的了解,我们注意到将要编译的文件我们定义为:main.c,临时文件我们称为src.o,最终的二进制文件我们命名为demo-c 。

现在,只需在您保存的目录中并通过命令行运行:

然后运行程序:

有几个选项,例如清理临时文件和其他选项,有关更多详细信息,请访问手册。
https://ninja-build.org/manual.html
下面我们用C++编译多个文件:
对于这个例子,我们将使用Dec2Bin ,这是一个在C++中将十进制转换为二进制的小程序。在这个例子中,我们使用命令g++来编译多个文件。有3 个文件,其中1 个只是一个.hpp库:
vim main.cpp
![]()
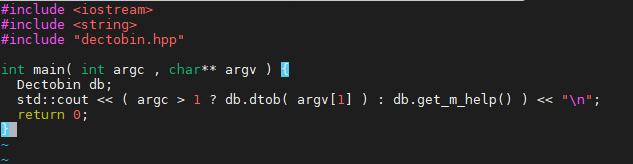
#include <iostream>
#include <string>
#include "dectobin.hpp"
int main( int argc , char** argv ) {
Dectobin db;
std::cout << ( argc > 1 ? db.dtob( argv[1] ) : db.get_m_help() ) << "\n";
return 0;
}
![]()
vim dectobin.hpp
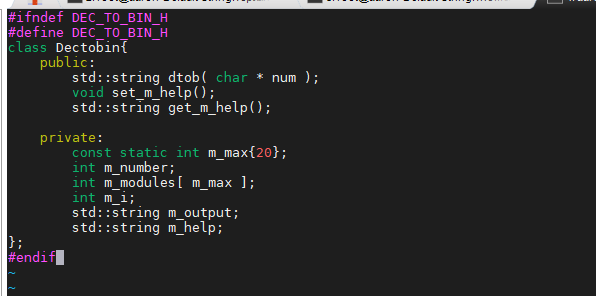
#ifndef DEC_TO_BIN_H
#define DEC_TO_BIN_H
class Dectobin{
public:
std::string dtob( char * num );
void set_m_help();
std::string get_m_help();
private:
const static int m_max{20};
int m_number;
int m_modules[ m_max ];
int m_i;
std::string m_output;
std::string m_help;
};
#endif
![]()
vim dectobin.cpp
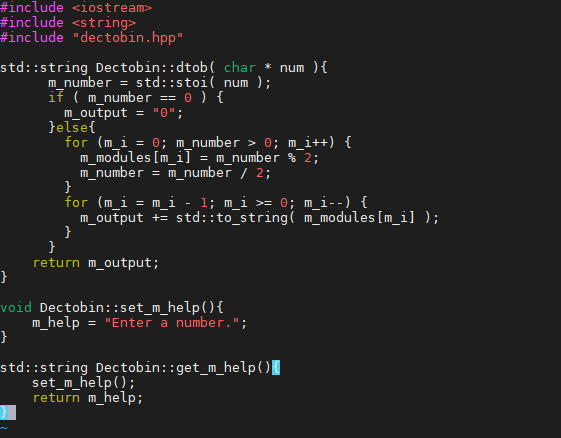
#include <iostream>
#include <string>
#include "dectobin.hpp"
std::string Dectobin::dtob( char * num ){
m_number = std::stoi( num );
if ( m_number == 0 ) {
m_output = "0";
}else{
for (m_i = 0; m_number > 0; m_i++) {
m_modules[m_i] = m_number % 2;
m_number = m_number / 2;
}
for (m_i = m_i - 1; m_i >= 0; m_i--) {
m_output += std::to_string( m_modules[m_i] );
}
}
return m_output;
}
void Dectobin::set_m_help(){
m_help = "Enter a number.";
}
std::string Dectobin::get_m_help(){
set_m_help();
return m_help;
}
与上一个方法相同,我们将创建一个文件build.ninja,仅具有以下设置:
![]()
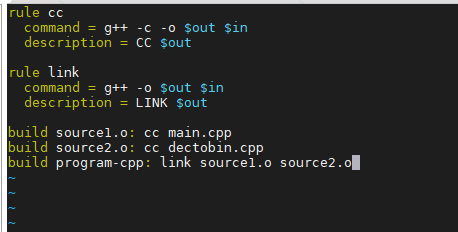
rule cc
command = g++ -c -o $out $in
description = CC $out
rule link
command = g++ -o $out $in
description = LINK $out
build source1.o: cc main.cpp
build source2.o: cc dectobin.cpp
build program-cpp: link source1.o source2.o
然后只需运行ninja命令,program-cpp文件将在同一目录中准备好。请参阅下图中的输出,我们使用程序将十进制数:8转换为二进制数:1000:
![]()
![]()
如何使用 Meson Build 编译程序?

Meson是一种软件工具,用于自动构建(编译)软件。他是ninja的前端。Meson 是在 Apache 许可证 2.0 下用 Python 编写的免费开源软件。
Meson支持语言C、C++、CUDA、D、Objective-C、Fortran、Java、C#、Rust 和 Vala,并有一种处理依赖关系的机制称为 Wrap。
Meson 支持 GNU Compiler Collection、Clang、Microsoft Visual Studio 等。
如何用Meson编译程序?
为了简单的理解,我们创建一个程序Hello, World!的示例。在C++中。假设您有以下文件:
![]()
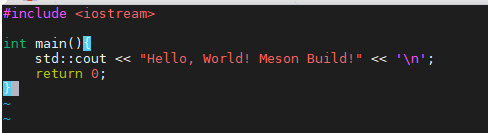
#include <iostream>
int main(){
std::cout << "Hello, World! Meson Build!" << '\n';
return 0;
}
在与您的代码文件/项目相同的目录中,您应该创建一个名为meson.build的文件:vim meson.build
![]()
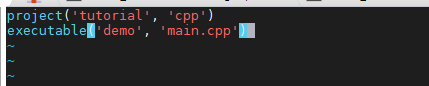
让我们创建文件:tutorial,语言是cpp (C++),最终的二进制文件的名称是:demo,我们要编译的文件是main.cpp。
完成后,下一步是运行命令:meson builddir

输出将如下所示:
aaron@aaron-virtual-machine:~/meson/cplusplushelloworld$ meson builddir
The Meson build system
Version: 0.53.2
Source dir: /home/aaron/meson/cplusplushelloworld
Build dir: /home/aaron/meson/cplusplushelloworld/builddir
Build type: native build
Project name: tutorial
Project version: undefined
C++ compiler for the host machine: c++ (gcc 9.4.0 "c++ (Ubuntu 9.4.0-1ubuntu1~20.04.1) 9.4.0")
C++ linker for the host machine: c++ ld.bfd 2.34
Host machine cpu family: x86_64
Host machine cpu: x86_64
Build targets in project: 1
Found ninja-1.10.0 at /usr/bin/ninja
它将创建一个名为builddir的目录,我们需要输入它来进行构建:ninja

之后只需运行生成的可执行文件:./demo

有关更多信息和详细信息,请参阅官方文档。
https://mesonbuild.com/Tutorial.html
接下来我们就要利用 meson ninja来编译运行xenomai4了
2.1 编译前的准备⼯作
要从源代码构建 Linux 内核,您需要几个工具:git、make、gcc、libssl-dev 和(可选)ctags、cscope 和/或 ncurses-dev。这些工具包在您的 Linux 发行版中可能被称为其他名称,因此您可能需要搜索该包。如果您“make menuconfig”或“make nconfig”,则使用 ncurses-dev 工具。
在 Ubuntu 上,您可以通过运行以下命令获得这些工具:
sudo apt-get install libncurses5-dev gcc make git exuberant-ctags bc libssl-dev
在 Fedora、Scientific Linux 和 CentOS 等基于 Red Hat 的系统上,您可以运行:
sudo yum install gcc make git ctags ncurses-devel openssl-devel
在基于 SUSE 的系统(如 SLES 和 Leap)上,您可以运行:
sudo zypper 在 git gcc ncurses-devel libopenssl-devel ctags cscope
2.2 编译内核与模块
如果您需要对配置进行任何更改,可以运行以下命令之一。这些需要安装 curses 工具。
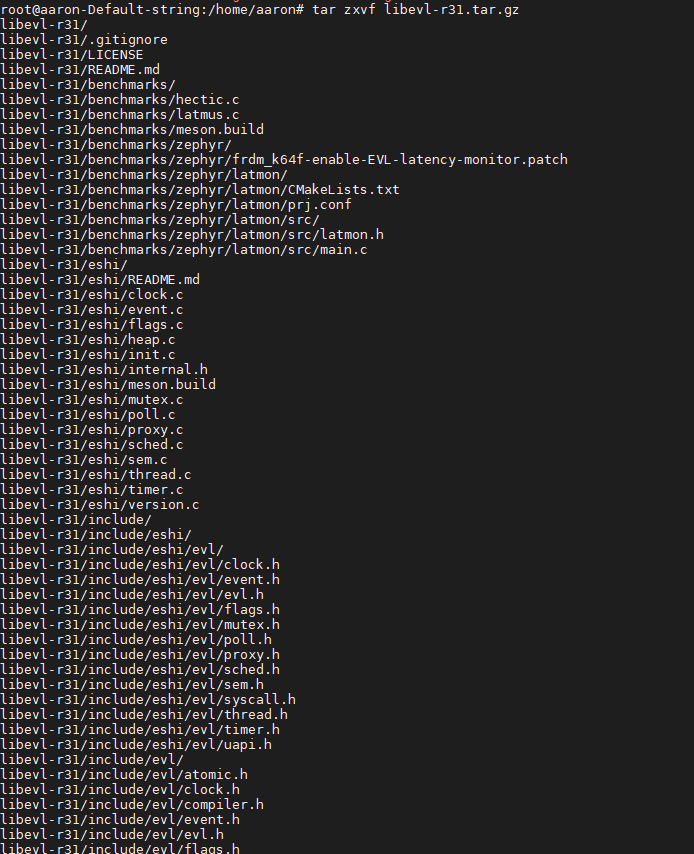
解压缩内核文件:
tar -zxvf linux-evl-v5.15.18-evl1-rebase.tar.gz
进入到内核解压缩目录:

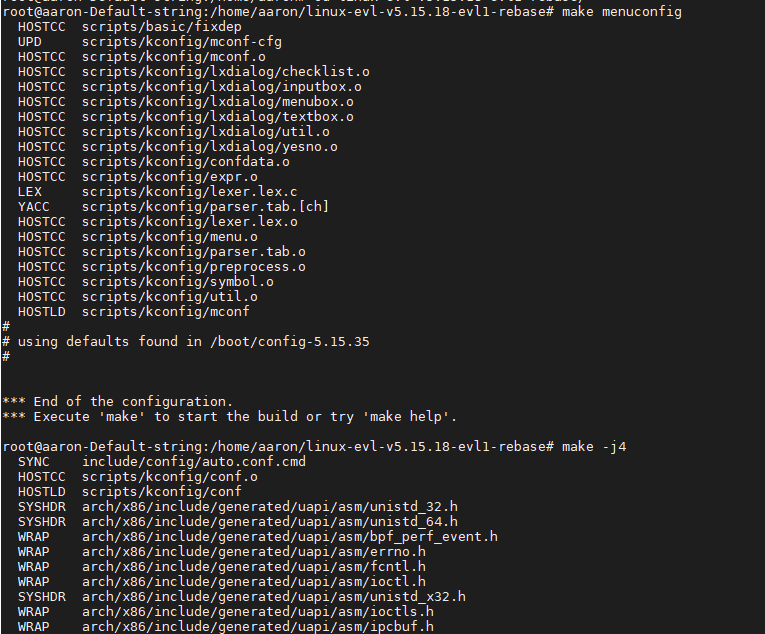
make menuconfig
或者
make nconfig
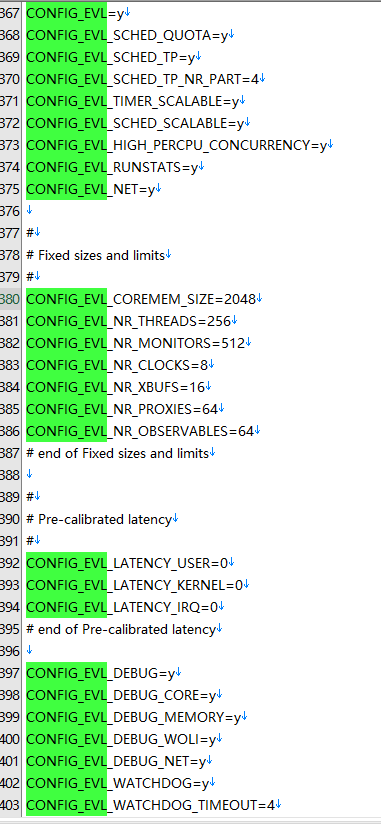
检查生成的.config文件是否包含了CONFIG_EVL配置选项,如果不包含需要重新编译配置!
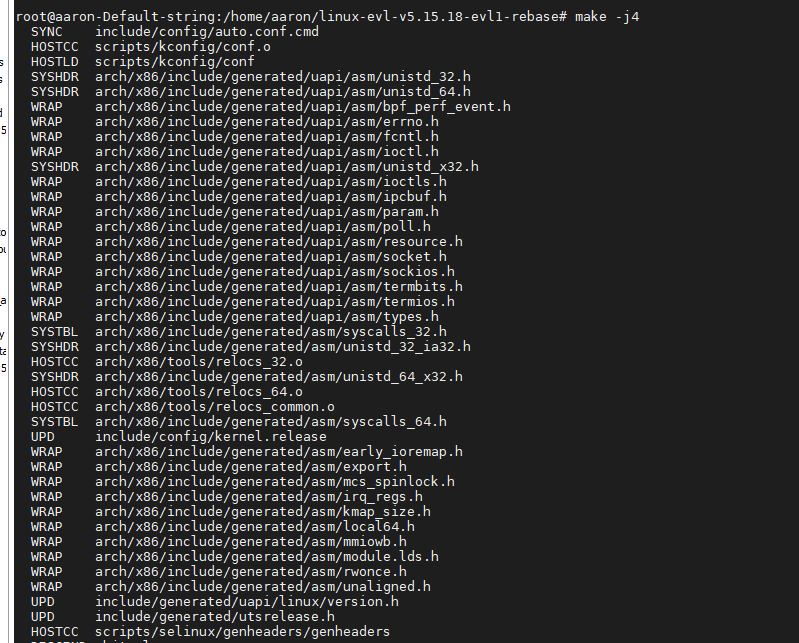
make成功!
接下来sudo make modules_install install
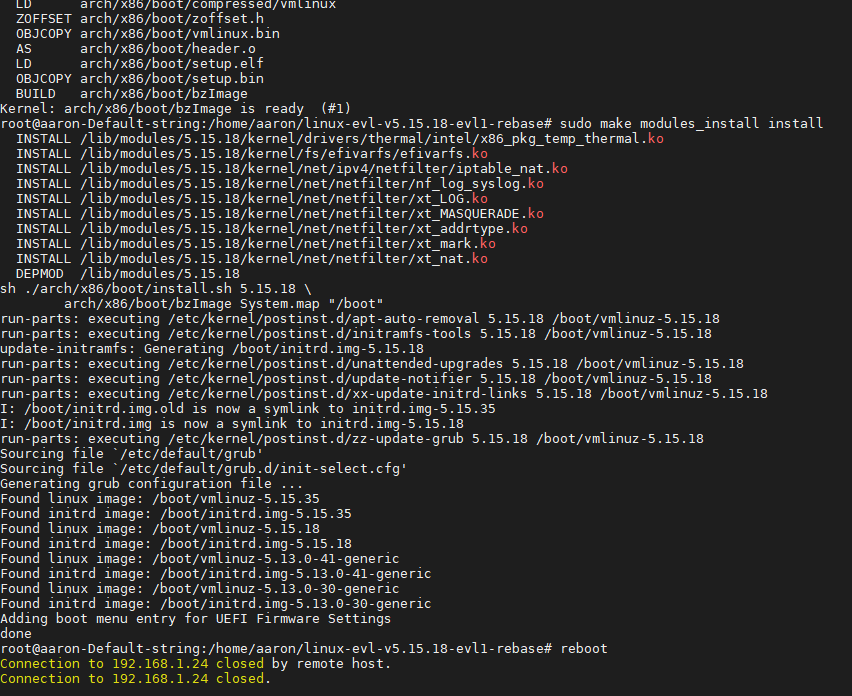
最后make install
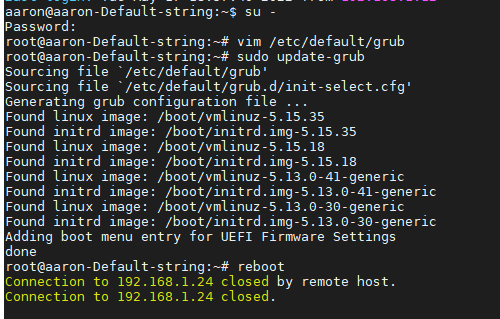
3.1 运行新编译的内核
sudo update-grub2
3.2 重启系统
3.3 检查新内核是否安装成功

dmesg | grep EVL

可以看到 EVL core 已经成功开启。
4.1 编译前的准备
首先安装先安装pip包管理工具
sudo apt-get install python3-pip
sudo apt-get install git
然后更新pip工具:
sudo pip3 install pip --upgrade
然后安装最新版本的meson工具和依赖的ninja工具:
sudo pip3 install meson
sudo pip3 install ninja
检查meson是否安装成功
meson --version

如果显示版本号说明meson安装成功!
解压缩libevl库源码包
4.2 配置
首先需要先明确配置格式:
meson setup -Dbuildtype=[编译类型] -Duapi=[EVL内核源码目录] [构造目录] [libevl源码目录]
其次确认好自己的evl内核目录路径,要创建编译目录/home/aaron/libevl_build,生成的目标路径等。
meson setup -Dbuildtype=release -Dprefix=/opt -Duapi=/home/aaron/linux-evl-v5.15.18-evl1-rebase /home/ aaron/libevl_build /home/aaron/libevl-r31 --reconfigure
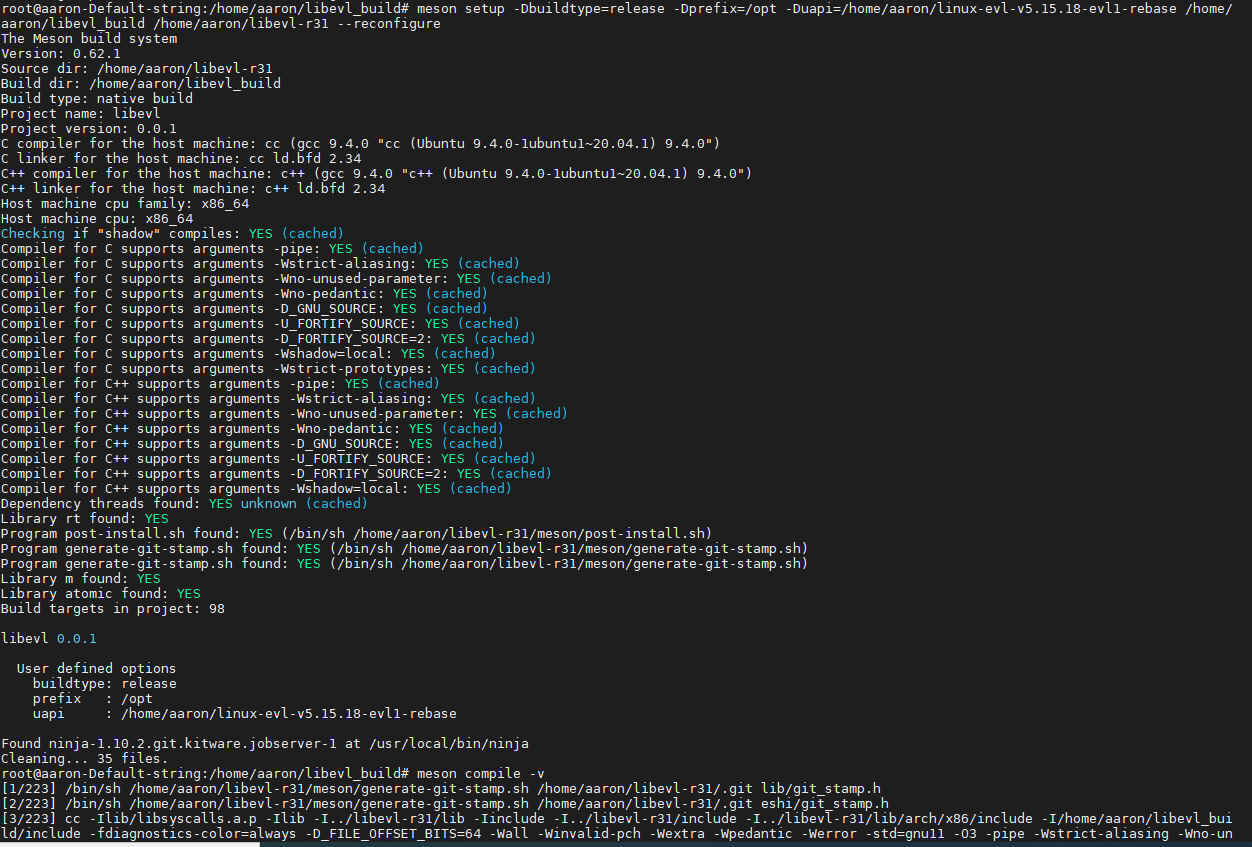
4.3 编译与安装
meson compile -v

root@aaron-Default-string:/home/aaron/libevl_build# sudo meson install

ninja: Entering directory `/home/aaron/libevl_build'
[2/18] Generating eshi/git_stamp.h with a custom command
Installing lib/libevl.so.0.0.1 to /opt/lib/x86_64-linux-gnu
Installing lib/libevl.a to /opt/lib/x86_64-linux-gnu
Installing eshi/libeshi.so.0.0.1 to /opt/lib/x86_64-linux-gnu
Installing eshi/libeshi.a to /opt/lib/x86_64-linux-gnu
Installing benchmarks/latmus to /opt/bin
Installing benchmarks/hectic to /opt/bin
Installing utils/evl to /opt/bin
Installing utils/evl-ps to /opt/libexec
Installing utils/evl-check to /opt/libexec
Installing tests/basic-xbuf to /opt/tests
Installing tests/clock-timer-periodic to /opt/tests
Installing tests/clone-fork-exec to /opt/tests
Installing tests/detach-self to /opt/tests
Installing tests/duplicate-element to /opt/tests
Installing tests/element-visibility to /opt/tests
Installing tests/fpu-preload to /opt/tests
Installing tests/fpu-stress to /opt/tests
Installing tests/heap-torture to /opt/tests
Installing tests/mapfd to /opt/tests
Installing tests/monitor-deadlock to /opt/tests
Installing tests/monitor-event to /opt/tests
Installing tests/monitor-flags to /opt/tests
Installing tests/monitor-pi to /opt/tests
Installing tests/monitor-pi-deadlock to /opt/tests
Installing tests/monitor-pp-dynamic to /opt/tests
Installing tests/monitor-pp-lower to /opt/tests
Installing tests/monitor-pp-nested to /opt/tests
Installing tests/monitor-pp-pi to /opt/tests
Installing tests/monitor-pp-raise to /opt/tests
Installing tests/monitor-pp-tryenter to /opt/tests
Installing tests/monitor-pp-weak to /opt/tests
Installing tests/monitor-steal to /opt/tests
Installing tests/monitor-wait-multiple to /opt/tests
Installing tests/observable-hm to /opt/tests
Installing tests/observable-inband to /opt/tests
Installing tests/observable-master to /opt/tests
Installing tests/observable-onchange to /opt/tests
Installing tests/observable-oob to /opt/tests
Installing tests/observable-race to /opt/tests
Installing tests/observable-thread to /opt/tests
Installing tests/poll-close to /opt/tests
Installing tests/poll-flags to /opt/tests
Installing tests/poll-many to /opt/tests
Installing tests/poll-multiple to /opt/tests
Installing tests/poll-nested to /opt/tests
Installing tests/poll-observable-inband to /opt/tests
Installing tests/poll-observable-oob to /opt/tests
Installing tests/poll-sem to /opt/tests
Installing tests/poll-xbuf to /opt/tests
Installing tests/proxy-echo to /opt/tests
Installing tests/proxy-eventfd to /opt/tests
Installing tests/proxy-pipe to /opt/tests
Installing tests/proxy-poll to /opt/tests
Installing tests/sched-quota-accuracy to /opt/tests
Installing tests/sched-tp-accuracy to /opt/tests
Installing tests/sem-close-unblock to /opt/tests
Installing tests/sem-timedwait to /opt/tests
Installing tests/sem-wait to /opt/tests
Installing tests/simple-clone to /opt/tests
Installing tests/stax-lock to /opt/tests
Installing tests/stax-warn to /opt/tests
Installing tests/thread-mode-bits to /opt/tests
Installing tests/fault to /opt/tests
Installing tests/ring-spray to /opt/tests
Installing tests/clock-timer-periodic.eshi to /opt/tests/eshi
Installing tests/detach-self.eshi to /opt/tests/eshi
Installing tests/heap-torture.eshi to /opt/tests/eshi
Installing tests/monitor-event.eshi to /opt/tests/eshi
Installing tests/monitor-wait-multiple.eshi to /opt/tests/eshi
Installing tests/monitor-flags.eshi to /opt/tests/eshi
Installing tests/poll-nested.eshi to /opt/tests/eshi
Installing tests/poll-sem.eshi to /opt/tests/eshi
Installing tests/proxy-eventfd.eshi to /opt/tests/eshi
Installing tests/proxy-pipe.eshi to /opt/tests/eshi
Installing tests/sem-timedwait.eshi to /opt/tests/eshi
Installing tests/sem-wait.eshi to /opt/tests/eshi
Installing tidbits/oob-net-icmp to /opt/bin
Installing tidbits/oob-spi to /opt/bin
Installing /home/aaron/libevl-r31/include/evl/atomic.h to /opt/include/evl
Installing /home/aaron/libevl-r31/include/evl/clock.h to /opt/include/evl
Installing /home/aaron/libevl-r31/include/evl/compiler.h to /opt/include/evl
Installing /home/aaron/libevl-r31/include/evl/event.h to /opt/include/evl
Installing /home/aaron/libevl-r31/include/evl/evl.h to /opt/include/evl
Installing /home/aaron/libevl-r31/include/evl/flags.h to /opt/include/evl
Installing /home/aaron/libevl-r31/include/evl/heap.h to /opt/include/evl
Installing /home/aaron/libevl-r31/include/evl/list.h to /opt/include/evl
Installing /home/aaron/libevl-r31/include/evl/mutex.h to /opt/include/evl
Installing /home/aaron/libevl-r31/include/evl/observable.h to /opt/include/evl
Installing /home/aaron/libevl-r31/include/evl/poll.h to /opt/include/evl
Installing /home/aaron/libevl-r31/include/evl/proxy.h to /opt/include/evl
Installing /home/aaron/libevl-r31/include/evl/ring_ptr.h to /opt/include/evl
Installing /home/aaron/libevl-r31/include/evl/sched.h to /opt/include/evl
Installing /home/aaron/libevl-r31/include/evl/sem.h to /opt/include/evl
Installing /home/aaron/libevl-r31/include/evl/syscall.h to /opt/include/evl
Installing /home/aaron/libevl-r31/include/evl/thread.h to /opt/include/evl
Installing /home/aaron/libevl-r31/include/evl/timer.h to /opt/include/evl
Installing /home/aaron/libevl-r31/include/evl/tube.h to /opt/include/evl
Installing /home/aaron/libevl-r31/include/evl/xbuf.h to /opt/include/evl
Installing /home/aaron/libevl-r31/include/evl/atomic.h to /opt/include/eshi
Installing /home/aaron/libevl-r31/include/evl/heap.h to /opt/include/eshi
Installing /home/aaron/libevl-r31/include/evl/list.h to /opt/include/eshi
Installing /home/aaron/libevl-r31/include/eshi/evl/clock.h to /opt/include/eshi
Installing /home/aaron/libevl-r31/include/eshi/evl/event.h to /opt/include/eshi
Installing /home/aaron/libevl-r31/include/eshi/evl/evl.h to /opt/include/eshi
Installing /home/aaron/libevl-r31/include/eshi/evl/flags.h to /opt/include/eshi
Installing /home/aaron/libevl-r31/include/eshi/evl/mutex.h to /opt/include/eshi
Installing /home/aaron/libevl-r31/include/eshi/evl/poll.h to /opt/include/eshi
Installing /home/aaron/libevl-r31/include/eshi/evl/proxy.h to /opt/include/eshi
Installing /home/aaron/libevl-r31/include/eshi/evl/sched.h to /opt/include/eshi
Installing /home/aaron/libevl-r31/include/eshi/evl/sem.h to /opt/include/eshi
Installing /home/aaron/libevl-r31/include/eshi/evl/syscall.h to /opt/include/eshi
Installing /home/aaron/libevl-r31/include/eshi/evl/thread.h to /opt/include/eshi
Installing /home/aaron/libevl-r31/include/eshi/evl/timer.h to /opt/include/eshi
Installing /home/aaron/libevl-r31/include/eshi/evl/uapi.h to /opt/include/eshi
Installing /home/aaron/libevl_build/include/uapi/evl/xbuf.h to /opt/include/uapi/evl
Installing /home/aaron/libevl_build/include/uapi/evl/signal.h to /opt/include/uapi/evl
Installing /home/aaron/libevl_build/include/uapi/evl/fcntl.h to /opt/include/uapi/evl
Installing /home/aaron/libevl_build/include/uapi/evl/devices/latmus.h to /opt/include/uapi/evl
Installing /home/aaron/libevl_build/include/uapi/evl/devices/gpio.h to /opt/include/uapi/evl
Installing /home/aaron/libevl_build/include/uapi/evl/devices/spidev.h to /opt/include/uapi/evl
Installing /home/aaron/libevl_build/include/uapi/evl/devices/hectic.h to /opt/include/uapi/evl
Installing /home/aaron/libevl_build/include/uapi/evl/sched.h to /opt/include/uapi/evl
Installing /home/aaron/libevl_build/include/uapi/evl/thread.h to /opt/include/uapi/evl
Installing /home/aaron/libevl_build/include/uapi/evl/poll.h to /opt/include/uapi/evl
Installing /home/aaron/libevl_build/include/uapi/evl/syscall.h to /opt/include/uapi/evl
Installing /home/aaron/libevl_build/include/uapi/evl/types.h to /opt/include/uapi/evl
Installing /home/aaron/libevl_build/include/uapi/evl/observable.h to /opt/include/uapi/evl
Installing /home/aaron/libevl_build/include/uapi/evl/mutex.h to /opt/include/uapi/evl
Installing /home/aaron/libevl_build/include/uapi/evl/factory.h to /opt/include/uapi/evl
Installing /home/aaron/libevl_build/include/uapi/evl/net/sched.h to /opt/include/uapi/evl
Installing /home/aaron/libevl_build/include/uapi/evl/net/socket.h to /opt/include/uapi/evl
Installing /home/aaron/libevl_build/include/uapi/evl/proxy.h to /opt/include/uapi/evl
Installing /home/aaron/libevl_build/include/uapi/evl/control.h to /opt/include/uapi/evl
Installing /home/aaron/libevl_build/include/uapi/evl/clock.h to /opt/include/uapi/evl
Installing /home/aaron/libevl_build/include/uapi/evl/monitor.h to /opt/include/uapi/evl
Installing /home/aaron/libevl_build/include/uapi/evl/trace.h to /opt/include/uapi/evl
Installing /home/aaron/libevl_build/meson-private/evl.pc to /opt/lib/x86_64-linux-gnu/pkgconfig
Installing /home/aaron/libevl-r31/utils/evl-gdb to /opt/libexec
Installing /home/aaron/libevl-r31/utils/evl-help to /opt/libexec
Installing /home/aaron/libevl-r31/utils/evl-start to /opt/libexec
Installing /home/aaron/libevl-r31/utils/evl-stop to /opt/libexec
Installing /home/aaron/libevl-r31/utils/evl-test to /opt/libexec
Installing /home/aaron/libevl-r31/utils/evl-trace to /opt/libexec
Installing /home/aaron/libevl-r31/utils/trace.evl to /opt/libexec
Installing /home/aaron/libevl-r31/utils/trace.irq to /opt/libexec
Installing /home/aaron/libevl-r31/utils/trace.timer to /opt/libexec
Installing /home/aaron/libevl-r31/utils/kconf-checklist.evl to /opt/libexec
Installing symlink pointing to libevl.so.0.0.1 to /opt/lib/x86_64-linux-gnu/libevl.so.0
Installing symlink pointing to libevl.so.0 to /opt/lib/x86_64-linux-gnu/libevl.so
Installing symlink pointing to libeshi.so.0.0.1 to /opt/lib/x86_64-linux-gnu/libeshi.so.0
Installing symlink pointing to libeshi.so.0 to /opt/lib/x86_64-linux-gnu/libeshi.so
Running custom install script '/bin/sh /home/aaron/libevl-r31/meson/post-install.sh'
4.4 检查是否安装成功
sudo su
# export PATH=$PATH:/opt/bin
# export LD_LIBRARY_PATH=$LD_LIBRARY_PATH:/opt/lib
# evl test
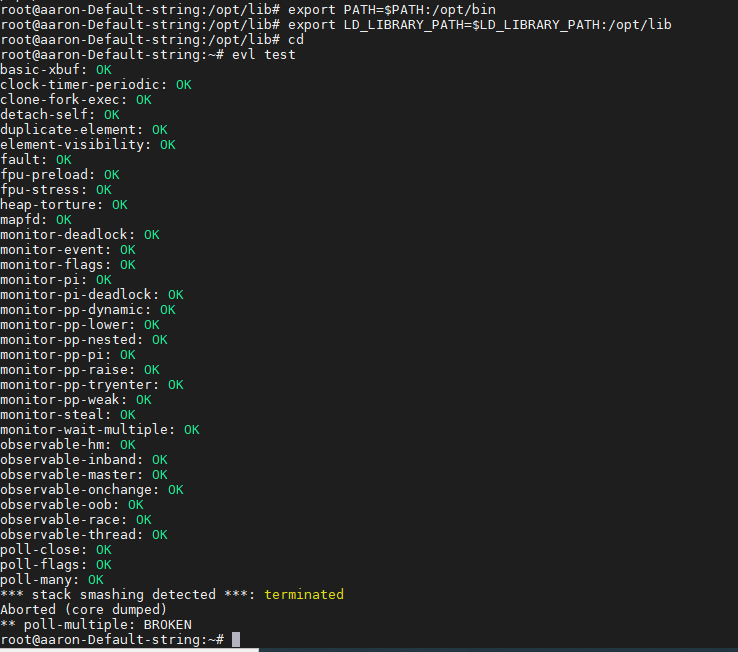
root@aaron-Default-string:/opt/lib# export PATH=$PATH:/opt/bin
root@aaron-Default-string:/opt/lib# export LD_LIBRARY_PATH=$LD_LIBRARY_PATH:/opt/lib
root@aaron-Default-string:/opt/lib# cd
root@aaron-Default-string:~# evl test
basic-xbuf: OK
clock-timer-periodic: OK
clone-fork-exec: OK
detach-self: OK
duplicate-element: OK
element-visibility: OK
fault: OK
fpu-preload: OK
fpu-stress: OK
heap-torture: OK
mapfd: OK
monitor-deadlock: OK
monitor-event: OK
monitor-flags: OK
monitor-pi: OK
monitor-pi-deadlock: OK
monitor-pp-dynamic: OK
monitor-pp-lower: OK
monitor-pp-nested: OK
monitor-pp-pi: OK
monitor-pp-raise: OK
monitor-pp-tryenter: OK
monitor-pp-weak: OK
monitor-steal: OK
monitor-wait-multiple: OK
observable-hm: OK
observable-inband: OK
observable-master: OK
observable-onchange: OK
observable-oob: OK
observable-race: OK
observable-thread: OK
poll-close: OK
poll-flags: OK
poll-many: OK
*** stack smashing detected ***: terminated
Aborted (core dumped)
** poll-multiple: BROKEN
root@aaron-Default-string:~#
查看evl依赖那些库:
root@aaron-Default-string:/opt/bin# ldd evl
linux-vdso.so.1 (0x00007fff6758a000)
libevl.so.0 => /opt/lib/x86_64-linux-gnu/libevl.so.0 (0x00007f1b8a142000)
libpthread.so.0 => /lib/x86_64-linux-gnu/libpthread.so.0 (0x00007f1b8a11f000)
libc.so.6 => /lib/x86_64-linux-gnu/libc.so.6 (0x00007f1b89f2d000)
/lib64/ld-linux-x86-64.so.2 (0x00007f1b8a16b000)
接着就可以测试 latency:
root@aaron-Default-string:/opt/bin# ./latmus
warming up on CPU0 (not isolated)...
RTT| 00:00:01 (user, 1000 us period, priority 98, CPU0-noisol)
RTH|----lat min|----lat avg|----lat max|-overrun|---msw|---lat best|--lat worst
RTD| 2.225| 2.309| 5.755| 0| 0| 2.225| 5.755
RTD| 1.805| 1.857| 4.794| 0| 0| 1.805| 5.755
RTD| -1.602| 2.130| 15.951| 0| 0| -1.602| 15.951
RTD| 1.797| 1.869| 4.047| 0| 0| -1.602| 15.951
RTD| 1.793| 1.847| 3.657| 0| 0| -1.602| 15.951
RTD| 1.766| 1.827| 2.765| 0| 0| -1.602| 15.951
RTD| 1.783| 2.187| 3.752| 0| 0| -1.602| 15.951
RTD| 1.796| 1.993| 4.160| 0| 0| -1.602| 15.951
RTD| 1.799| 1.845| 3.323| 0| 0| -1.602| 15.951
RTD| 1.782| 1.844| 2.859| 0| 0| -1.602| 15.951
RTD| -1.714| 2.055| 7.935| 0| 0| -1.714| 15.951
RTD| 1.785| 1.931| 4.483| 0| 0| -1.714| 15.951
RTD| 1.777| 1.831| 3.338| 0| 0| -1.714| 15.951
RTD| 1.776| 1.841| 2.826| 0| 0| -1.714| 15.951
RTD| 1.784| 2.182| 4.286| 0| 0| -1.714| 15.951
RTD| 1.788| 2.282| 4.079| 0| 0| -1.714| 15.951
RTD| 1.784| 1.847| 3.515| 0| 0| -1.714| 15.951
RTD| 1.791| 1.845| 2.910| 0| 0| -1.714| 15.951
RTD| 1.778| 2.185| 3.882| 0| 0| -1.714| 15.951
RTD| 1.780| 1.849| 3.667| 0| 0| -1.714| 15.951
RTD| 1.772| 1.841| 3.221| 0| 0| -1.714| 15.951
---|-----------|-----------|-----------|--------|------|-------------------------
RTS| -1.714| 1.974| 15.951| 0| 0| 00:00:21/00:00:21
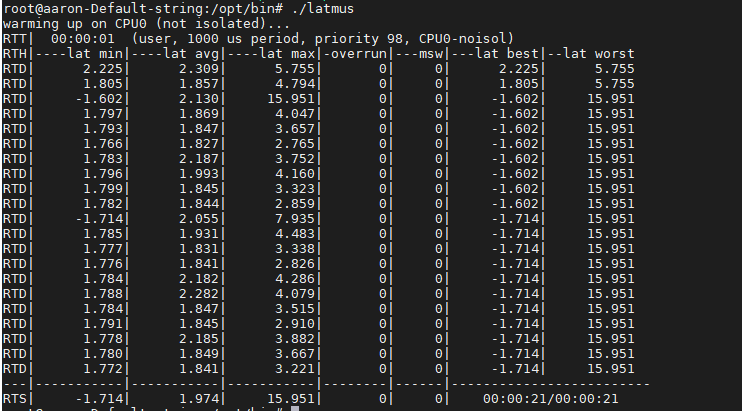
平均2us,最差15.9us
软硬件环境:
处理器:root@aaron-Default-string:~# lscpu
Architecture: x86_64
CPU op-mode(s): 32-bit, 64-bit
Byte Order: Little Endian
Address sizes: 39 bits physical, 48 bits virtual
CPU(s): 8
On-line CPU(s) list: 0-7
Thread(s) per core: 2
Core(s) per socket: 4
Socket(s): 1
NUMA node(s): 1
Vendor ID: GenuineIntel
CPU family: 6
Model: 94
Model name: Intel(R) Core(TM) i7-6700 CPU @ 3.40GHz
Stepping: 3
CPU MHz: 3400.000
CPU max MHz: 4000.0000
CPU min MHz: 800.0000
BogoMIPS: 6799.81
Virtualization: VT-x
L1d cache: 128 KiB
L1i cache: 128 KiB
L2 cache: 1 MiB
L3 cache: 8 MiB
NUMA node0 CPU(s): 0-7
Vulnerability Itlb multihit: Processor vulnerable
Vulnerability L1tf: Mitigation; PTE Inversion
Vulnerability Mds: Mitigation; Clear CPU buffers; SMT vulnerable
Vulnerability Meltdown: Mitigation; PTI
Vulnerability Spec store bypass: Mitigation; Speculative Store Bypass disabled via prctl and seccomp
Vulnerability Spectre v1: Mitigation; usercopy/swapgs barriers and __user pointer sanitization
Vulnerability Spectre v2: Mitigation; Full generic retpoline, IBPB conditional, IBRS_FW, STIBP conditional, RSB filling
Vulnerability Srbds: Mitigation; Microcode
Vulnerability Tsx async abort: Mitigation; TSX disabled
Flags: fpu vme de pse tsc msr pae mce cx8 apic sep mtrr pge mca cmov pat pse36 clflush dts acpi mmx fxsr sse sse2 ss ht tm pbe syscall nx pdpe1gb rdtscp lm constant_tsc art arch_perfmon pebs bts
rep_good nopl xtopology nonstop_tsc cpuid aperfmperf pni pclmulqdq dtes64 monitor ds_cpl vmx smx est tm2 ssse3 sdbg fma cx16 xtpr pdcm pcid sse4_1 sse4_2 x2apic movbe popcnt tsc_deadline_t
imer aes xsave avx f16c rdrand lahf_lm abm 3dnowprefetch cpuid_fault epb invpcid_single pti ssbd ibrs ibpb stibp tpr_shadow vnmi flexpriority ept vpid ept_ad fsgsbase tsc_adjust bmi1 avx2
smep bmi2 erms invpcid mpx rdseed adx smap clflushopt intel_pt xsaveopt xsavec xgetbv1 xsaves dtherm ida arat pln pts hwp hwp_notify hwp_act_window hwp_epp md_clear flush_l1d
root@aaron-Default-string:~#
操作系统:Ubuntu20.04.4

您好,问一下,meson setup -Dbuildtype=[编译类型] -Duapi=[EVL内核源码目录] [构造目录] [libevl源码目录]这里:
meson setup -Dbuildtype=release -Dprefix=/opt -Duapi=/home/xxx/linux-evl-v5.15.64-evl1-rebase /home/xxx/libevl_build /home/xxx/libevl-r38 --reconfigure
提示:
Directory does not contain a valid build tree:
/home/xxx/libevl_build。
meson版本0.63.3。libevl_build是个空文件夹。


evl test 时
*** stack smashing detected ***: terminated
Aborted (core dumped)
** poll-multiple: BROKEN
是什么意思啊


