


488
社区成员
 发帖
发帖 与我相关
与我相关 我的任务
我的任务
 分享
分享简单说,爬虫就是获取网页并提取和保存信息的自动化程序
简单的几个步骤:
1.获取网页
2.提取数据 -- css选择器、Xpath、正则
3.保存数据
4.自动化
在安全方面可以起到的作用有:资产收集、信息收集 --> 进行漏洞扫描
学爬虫要学三个主要的东西:
1.urllib
2.requests
3.httpx
它是python内置的http请求库
它主要有四个模块
request模块:最基本的http请求模块
error模块:异常处理模块
parse模块:工具模块-->提供url的处理方法
robotparse模块:识别robots.txt
#! usr/bin/env python

import urllib.request

# 发送请求
def load_baidu_data():
    url = 'http://www.baidu.com'
    # 使用urllib的request方法里面的urlopen方法去请求百度
    response = urllib.request.urlopen(url)
    # print(response.code)

    data = response.read()
    # 将获取到的数据转化成字符串
    # 之前获取的是byte传输
    # 我们需要把这些byte转化成字符串
    str_data = data.decode('utf-8')
    # print(str_data)
    # 将数据写入文件
    with open("baidu.html","w",encoding="utf-8") as f:
        f.write(str_data)


load_baidu_data()
我们可以向百度发送get请求
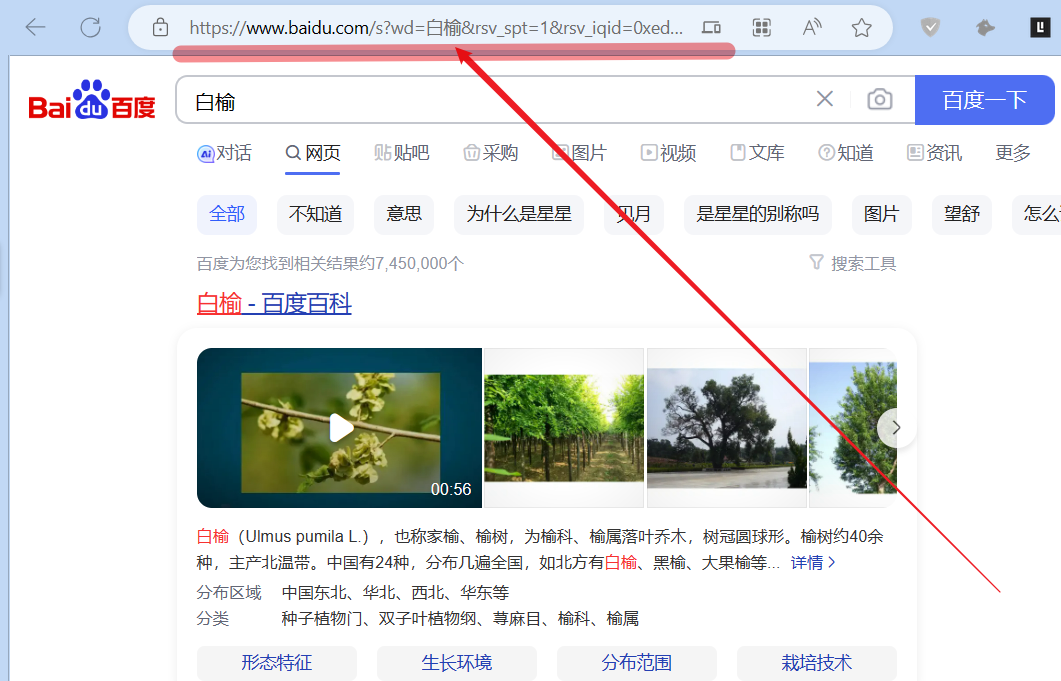
我们可以写一个简单的代码来模拟这个搜索的过程
#! usr/bin/env python

import urllib.request
# 引入工具模块对参数进行编码
import urllib.parse
# 导入字符串模块后续进行转码需要使用
import string

# 发送get请求
def load_baidu_data():
    url = 'http://www.baidu.com/s?wd='
    # url + search_data  url的拼接
    name = "沉沉"

    new_url = url + name
    # 网址里面包含了汉字,需要进行转码
    # 本处的转码使用quote方法
    # new_url是要转码的URL或字符串。
    # safe=string.printable参数指定了在编码过程中要视为安全的字符范围
    # 这里使用string.printable表示所有可打印字符都被视为安全字符,不进行编码。
    # 因此,只有非可打印字符会在最终编码的URL中进行百分号编码。
    encode_url= urllib.parse.quote(new_url,safe=string.printable)
    # print(encode_url)
    # http://www.baidu.com/s?wd=%E6%B2%89%E6%B2%89
    response = urllib.request.urlopen(encode_url)
    # print(response.code)
    data = response.read().decode('utf-8')
    # print(data)
    # 将获取到的文件写入保存
    with open("baidu-chenchen.html","w",encoding="utf-8") as f:
        f.write(data)

load_baidu_data()
PS:单个参数用quote,但是多个参数尽量用urlencode
我们访问网页的时候,往往并不是一个参数就可以满足我们的需要的
例如我们百度 孙悟空 ,在页面的下面点击翻页,可以发现有一个pn参数会随着页数的不同而不断的变化
#! usr/bin/env python

import urllib.request
import urllib.parse
import string

# 多个参数
def load_baidu_data():
    url = 'http://www.baidu.com/s?'
    params = {
        "wd":"孙悟空",
        "pn":"80"
    }
    query_str = urllib.parse.urlencode(params)
    # print(query_str)
    # wd=%E5%AD%99%E6%82%9F%E7%A9%BA&pn=80
    final_url = url + query_str
    response = urllib.request.urlopen(final_url)
    data = response.read().decode('utf-8')
    print(data)

load_baidu_data()
我们使用urlencode对多个参数进行拼接,成功形成一个多参数的get请求
只需要在原来的基础上添加data可选参数就行
#! usr/bin/env python

import urllib.request
import urllib.parse

# 定义url
url = 'http://httpbin.org/post'

# 创建要发送的数据表单
data = {
    'hello':'world',
    'hobby':'read'
}

# data要进行编码
data_encode = urllib.parse.urlencode(data).encode('utf-8')
# 为什么要加上encode('utf-8')
# 因为加上编码可以转化成byte进行传输
# 后续再进行解码就可以转化成str
reponse = urllib.request.urlopen(url=url,data=data_encode)

print(reponse.read().decode('utf-8'))
用于设置请求超时的参数,以秒为单位
以上面post的代码为例,一般项目中都会加上异常处理机制,将超时之后的报错转化成可视化的错误,而不是直接终止代码的运行,提升了代码的健壮性
#! usr/bin/env python

import urllib.request
import urllib.parse
import urllib.error

# 定义url
url = 'http://httpbin.org/post'

# 创建要发送的数据表单
data = {
    'hello':'world',
    'hobby':'read'
}

# data要进行编码
data_encode = urllib.parse.urlencode(data).encode('utf-8')
# 为什么要加上encode('utf-8')
# 因为加上编码可以转化程byte进行传输
# 后续再进行解码就可以转化成str

try:
    reponse = urllib.request.urlopen(url=url,data=data_encode,timeout=0.1)
except urllib.error.URLError as e:
    print("连接超时!")
连接超时!
首先我们思考一个问题:爬虫的核心是什么?
答:爬虫的核心就是模拟用户的行为!
想要自定义请求头,我们必须了解urlopen究竟是怎么调用这些数据的,深入底层进行探究
由于源码复杂,我直接提取出我们在底层中需要用到的类Request
class Request:

    def __init__(self, url, data=None, headers={},
                 origin_req_host=None, unverifiable=False,
                 method=None):
        self.full_url = url
        self.headers = {}
        self.unredirected_hdrs = {}
        self._data = None
        self.data = data
        self._tunnel_host = None
        for key, value in headers.items():
            self.add_header(key, value)
        if origin_req_host is None:
            origin_req_host = request_host(self)
        self.origin_req_host = origin_req_host
        self.unverifiable = unverifiable
        if method:
            self.method = method
self.headers = {}
for key, value in headers.items():
            self.add_header(key, value)
可以看到这些,一个是初始化的参数,一个是添加header的方法。
#! usr/bin/env python

import urllib.request
import urllib.parse
import urllib.error

# 定义url
url = 'http://httpbin.org/post'

# 自定义request  添加一个user-agent
header = {
    "User-Agent":"Mozilla/5.0 (Windows NT 10.0; Win64; x64) AppleWebKit/537.36 (KHTML, like Gecko) Chrome/117.0.0.0 Safari/537.36 Edg/117.0.2045.31"
}

req = urllib.request.Request(url=url,headers=header,method='POST')
reponse = urllib.request.urlopen(req)
print(reponse.read().decode('utf-8'))
{
  "args": {},
  "data": "",
  "files": {},
  "form": {},
  "headers": {
    "Accept-Encoding": "identity",
    "Content-Length": "0",
    "Host": "httpbin.org",
    "User-Agent": "Mozilla/5.0 (Windows NT 10.0; Win64; x64) AppleWebKit/537.36 (KHTML, like Gecko) Chrome/117.0.0.0 Safari/537.36 Edg/117.0.2045.31",
    "X-Amzn-Trace-Id": "Root=1-6506b0ac-3be5f9614bd873900bf3a88b"
  },
  "json": null,
  "origin": "222.76.49.157",
  "url": "http://httpbin.org/post"
}
#! usr/bin/env python

import urllib.request
import urllib.parse
import random

# 定义url
url = 'http://httpbin.org/post'

# 每次请求都换不同的user-agent
def get_ua():
    first_num = random.randint(55, 76)
    third_num = random.randint(0, 3800)
    fourth_num = random.randint(0,140)

    os_type = [
        '(Windows NT 6.1; WOW64)', '(Windows NT 10.0; WOW64)', '(X11; Linux x86_64)',
        '(Macintosh; Intel Mac OS X 10_14_5)'
    ]

    chrome_version = 'Chrome/{}.0.{}.{}'.format(first_num, third_num, fourth_num)

    user_agent = ' '.join(
        ['Mozilla/5.0', random.choice(os_type), 'AppleWebKit/537.36',
                   '(KHTML, like Gecko)', chrome_version, 'Safari/537.36']
    )

    return user_agent

user_agent = get_ua()
# print(user_agent)
req = urllib.request.Request(url=url,method='POST')
# 使用add_header方法添加user-agent
req.add_header("User-Agent",user_agent)
response = urllib.request.urlopen(req)
print(response.read().decode('utf-8'))
{
  "args": {},
  "data": "",
  "files": {},
  "form": {},
  "headers": {
    "Accept-Encoding": "identity",
    "Content-Length": "0",
    "Host": "httpbin.org",
    "User-Agent": "Mozilla/5.0 (X11; Linux x86_64) AppleWebKit/537.36 (KHTML, like Gecko) Chrome/61.0.425.89 Safari/537.36",
    "X-Amzn-Trace-Id": "Root=1-6506b728-2f547b266ce9d2046af58860"
  },
  "json": null,
  "origin": "222.76.49.157",
  "url": "http://httpbin.org/post"
}
HTTPHandler 是 urllib.request 模块中的一个类,用于处理 HTTP 请求。它提供了对 HTTP 请求的基本处理功能,包括创建和发送请求、处理响应等。
在使用 urllib 发送 HTTP 请求时,可以通过创建 HTTPHandler 对象并将其传递给 OpenerDirector 对象(例如 build_opener 方法创建的 opener)来自定义处理程序。
一些常见的用途包括:
#! usr/bin/env python

import urllib.request
import urllib.parse
import urllib.error

def handler_open():
    # 定义url
    url = 'http://httpbin.org/get'
    # 创建自己的opener
    # urlopen实际上调用的方法是opener的open方法
    handler = urllib.request.HTTPHandler()
    opener = urllib.request.build_opener(handler)
    response = opener.open(url)
    print(response.read().decode('utf-8'))

handler_open()
{
  "args": {},
  "headers": {
    "Accept-Encoding": "identity",
    "Host": "httpbin.org",
    "User-Agent": "Python-urllib/3.10",
    "X-Amzn-Trace-Id": "Root=1-6506c070-154831716a644a565d88a372"
  },
  "origin": "222.76.49.157",
  "url": "http://httpbin.org/get"
}
分为免费的IP代理和付费的IP代理
代理的类型:
透明:对方可以知道我们的IP
匿名:对方不知道我们的IP,但是知道我们使用了代理
高匿:对方不知道我们的IP,而且不知道我们使用了代理
#! usr/bin/env python

import urllib.request
import urllib.parse
import urllib.error

def handler_open():
    # 定义url
    url = 'http://httpbin.org/get'
    # 添加代理 ip 端口
    proxy = {
        "http":"http://49.7.11.187:80"
    }

    # 创建代理处理器
    proxy_handler = urllib.request.ProxyHandler(proxy)
    # 创建自己的opener
    opener = urllib.request.build_opener(proxy_handler)
    response = opener.open(url)
    print(response.read().decode('utf-8'))

handler_open()
{
  "args": {},
  "headers": {
    "Accept-Encoding": "identity",
    "Host": "httpbin.org",
    "User-Agent": "Python-urllib/3.10",
    "X-Amzn-Trace-Id": "Root=1-6506e822-050b09ca19f3e97439213c2c"
  },
  "origin": "49.7.11.187",
  "url": "http://httpbin.org/get"
}
#! usr/bin/env python

import urllib.request
import urllib.parse
import random

# 定义url
url = 'http://httpbin.org/get'

# 每次请求都换不同的user-agent
def get_proxy():
    proxy_list = [
        '120.79.16.132:80','120.197.219.82:9091','60.210.40.190:9091',
        '153.101.67.170:9002','49.7.11.187:80','125.94.219.96:9091'
    ]

    proxy = 'http://' + random.choice(proxy_list)

    return proxy

proxy = {
    'http':get_proxy()
}
# print(proxy)
proxy_handler = urllib.request.ProxyHandler(proxy)
# 创建自己的opener
opener = urllib.request.build_opener(proxy_handler)
response = opener.open(url)
print(response.read().decode('utf-8'))
{
  "args": {},
  "headers": {
    "Accept-Encoding": "identity",
    "Host": "httpbin.org",
    "User-Agent": "Python-urllib/3.10",
    "X-Amzn-Trace-Id": "Root=1-6506e807-2e70c71a0d2b2e92011d6dda"
  },
  "origin": "222.76.49.157",
  "url": "http://httpbin.org/get"
}
本处我们会使用到
HTTPBasicAuthHandler(用户基本的身份验证处理)
HTTPPasswordMgWithDefaultRealm(经常和authhandler一起出现)
本次用于测试的网站:
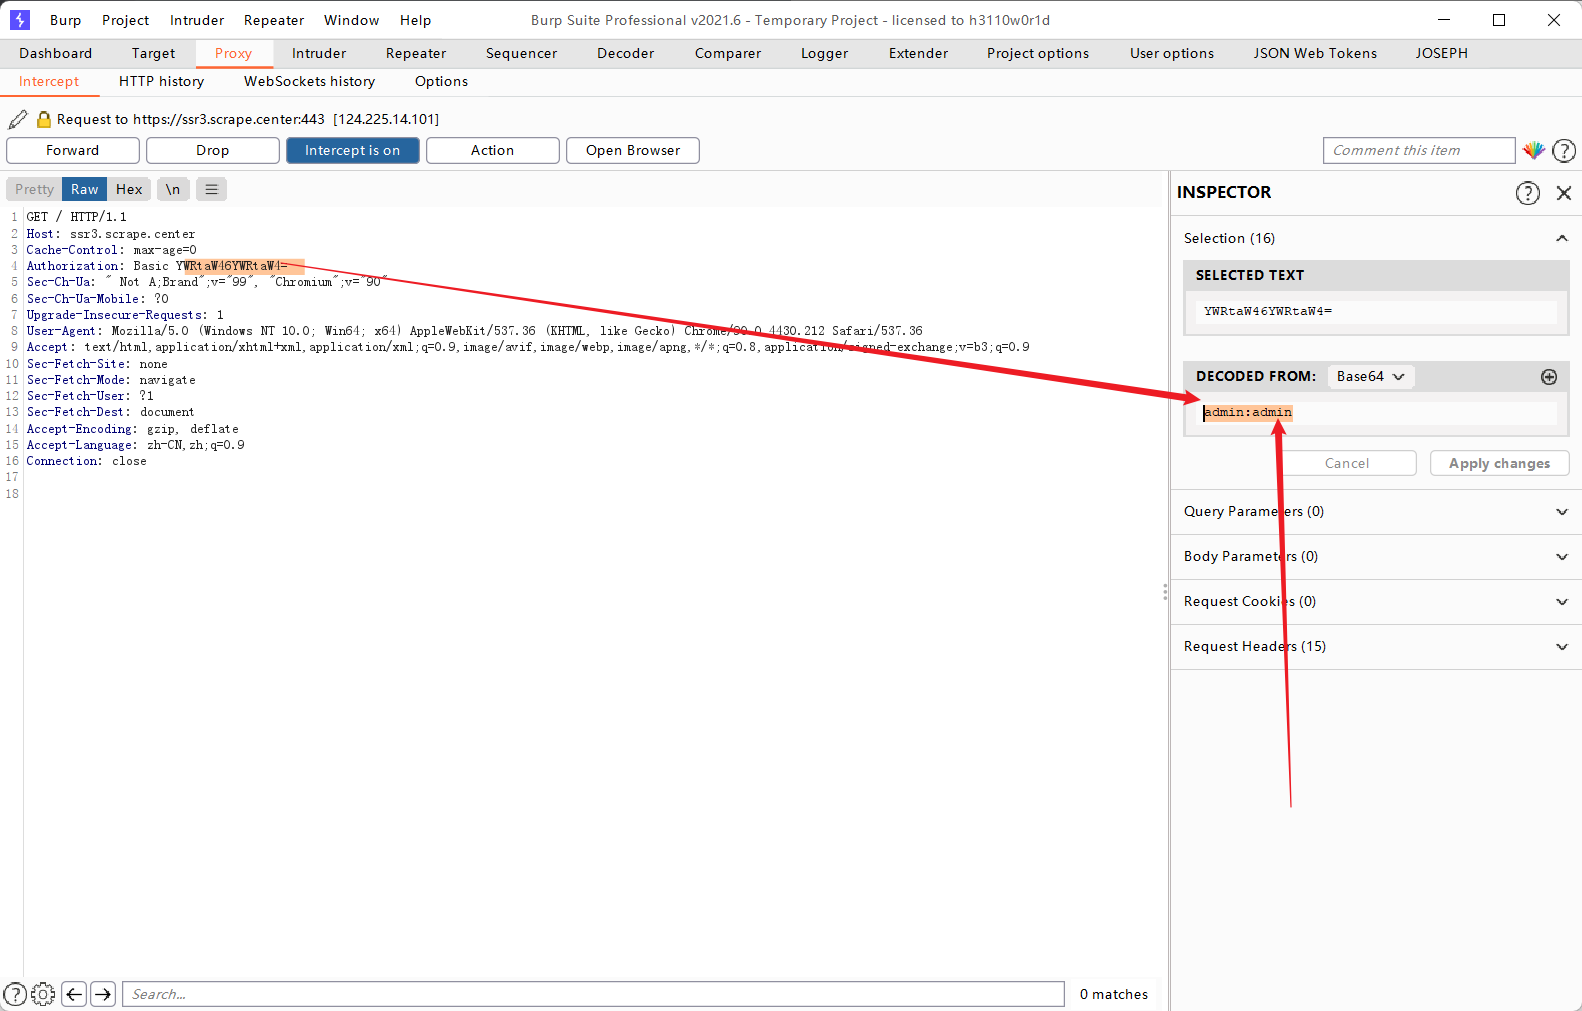
访问这个网站是需要用户名和密码的,用户名和密码都是admin
#! /usr/bin/env python

import urllib.request
from urllib.parse import urlparse

# 定义函数:授权登录
def authLogin():
    url = 'http://ssr3.scrape.center'

    # 指定用户名和密码
    username = 'admin'
    password = 'admin'

    # 创建一个密码管理器
    password_mgr = urllib.request.HTTPPasswordMgrWithDefaultRealm()

    # 添加进目标url以及用户名和密码
    # 为什么第一个参数填None
    # 填None表示默认的域名,如果想对不同的域名添加不同的凭证,那么就可以将None改成对应的域名
    password_mgr.add_password(None,url,username,password)

    # 创建一个基本的密码认证处理器并将密码管理器传递给它
    handler = urllib.request.HTTPBasicAuthHandler(password_mgr)
    # 创建网络请求的构造器
    opener = urllib.request.build_opener(handler)
    response = opener.open(url)
    print(response.read().decode('utf-8'))

authLogin()
本处成功通过账号密码的添加请求并登录了该网页,完成了授权登录。
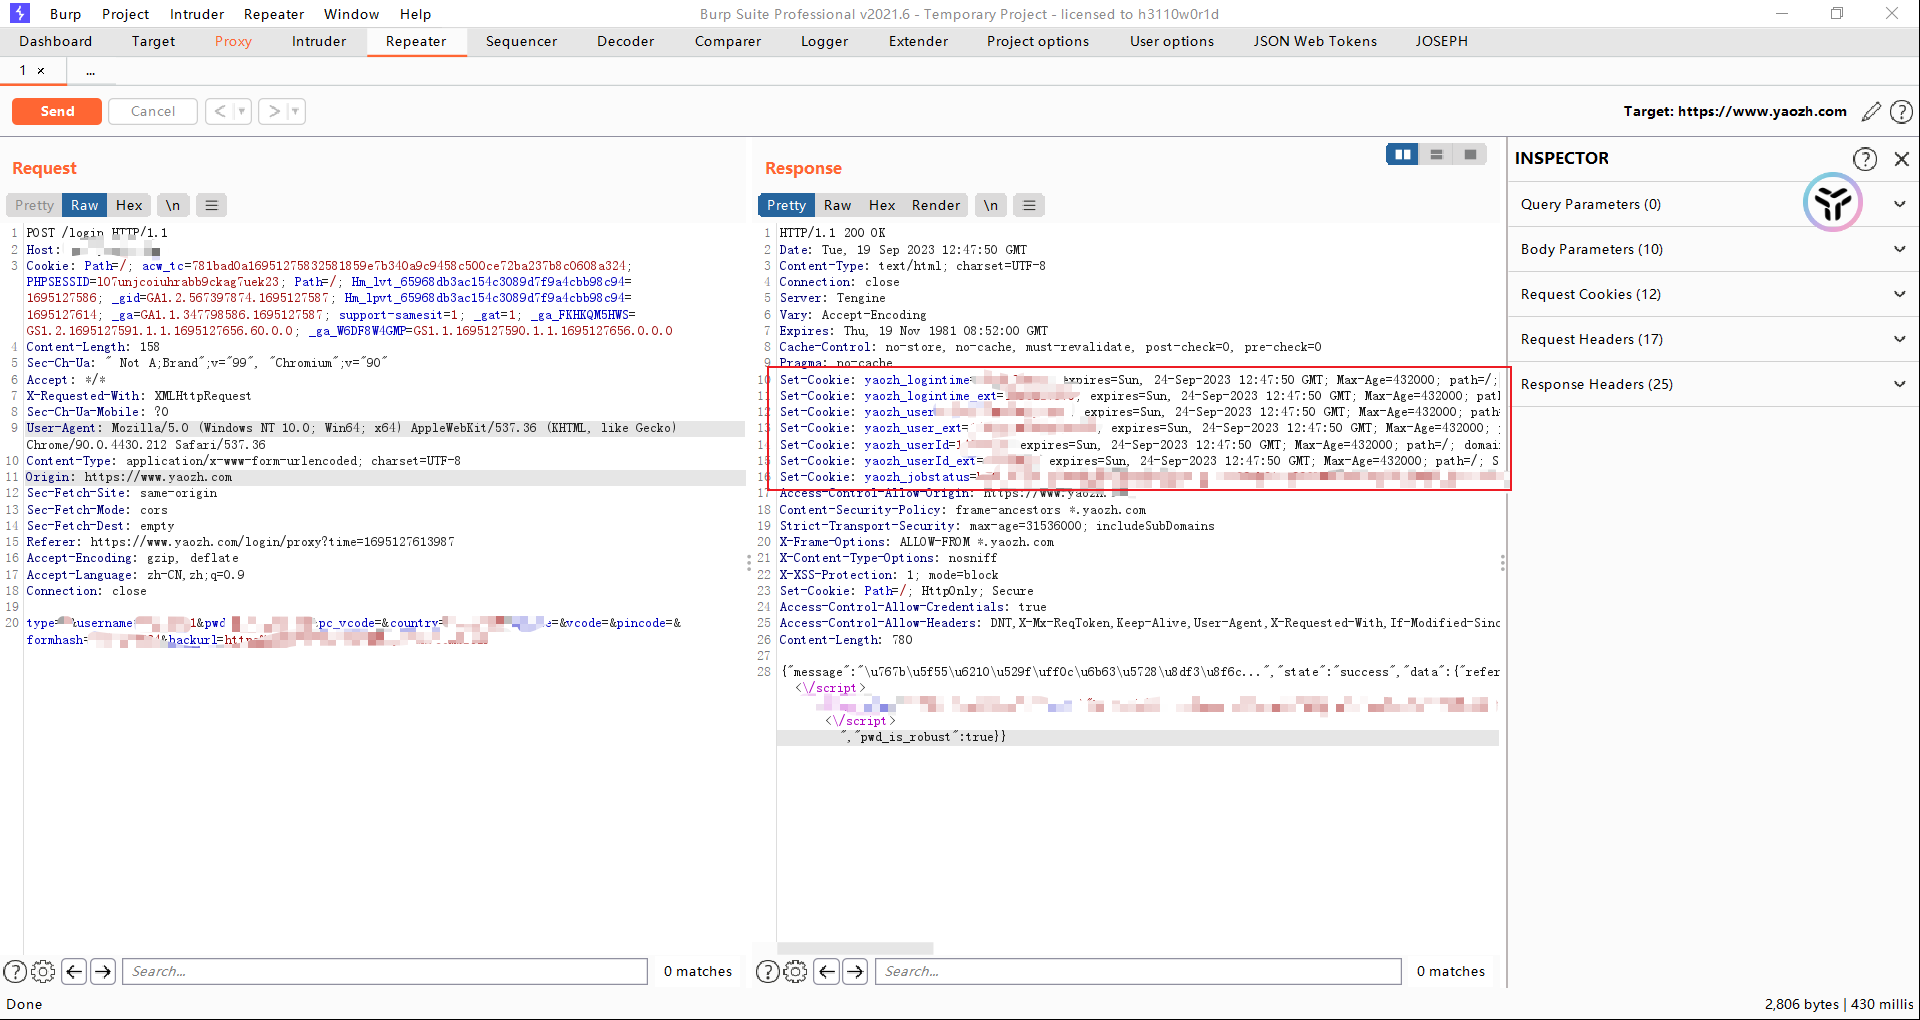
抓包软件:Burp Suite
访问之前的网站,第一次请求是不带参数的
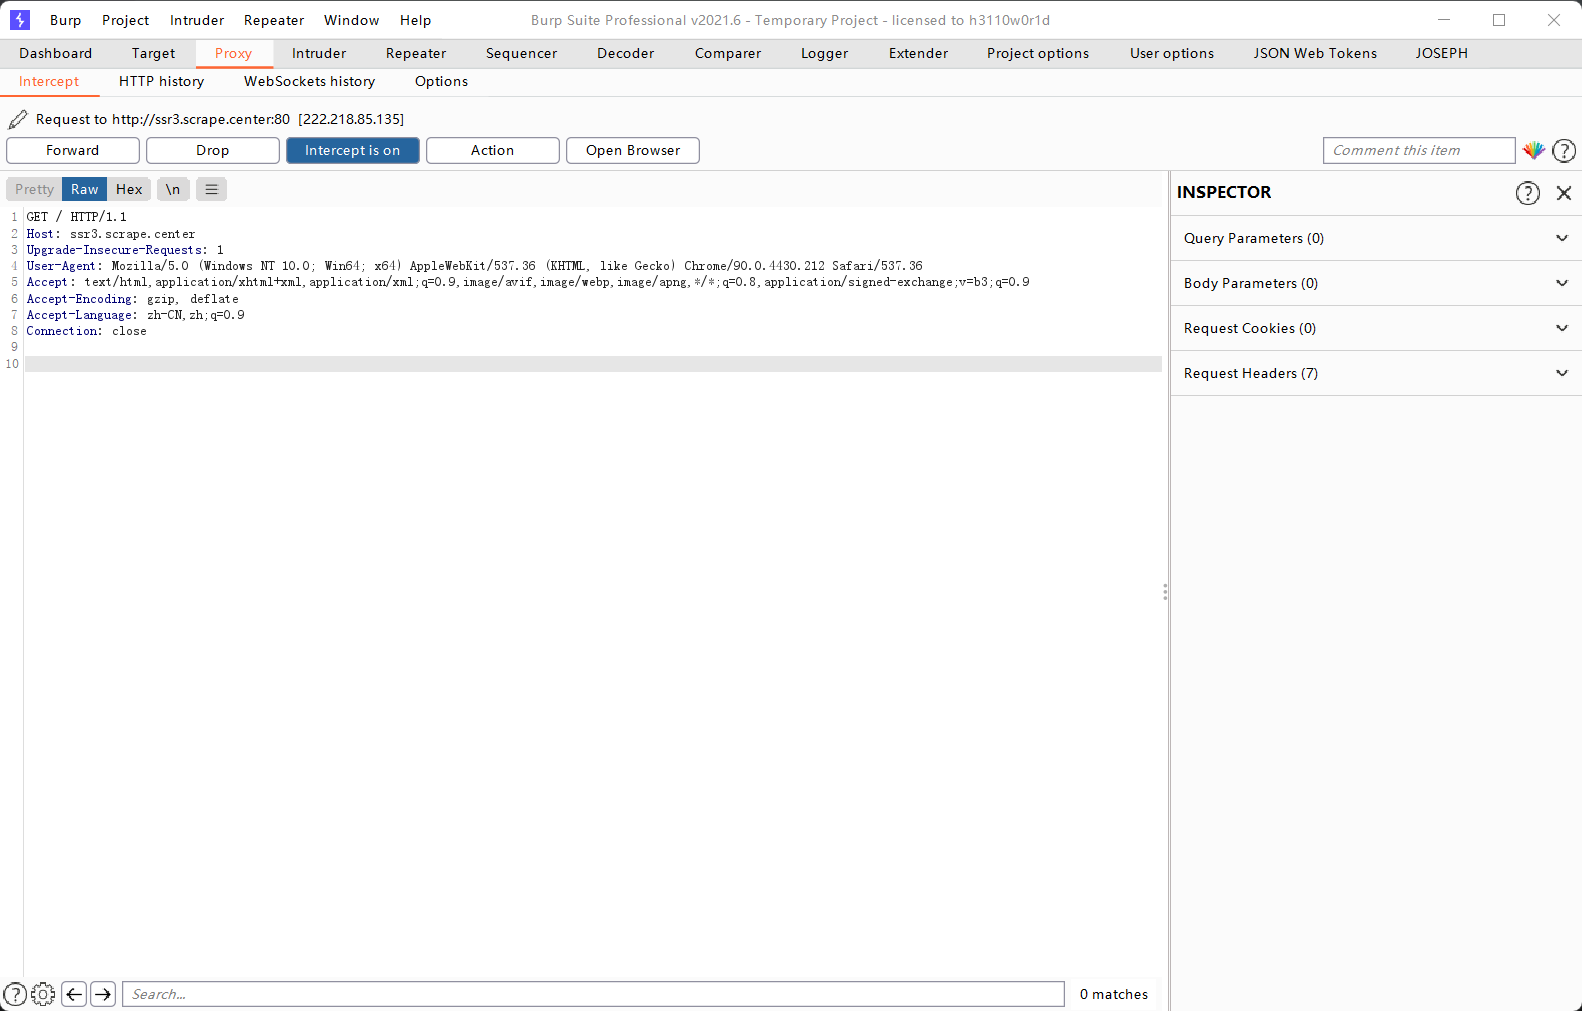
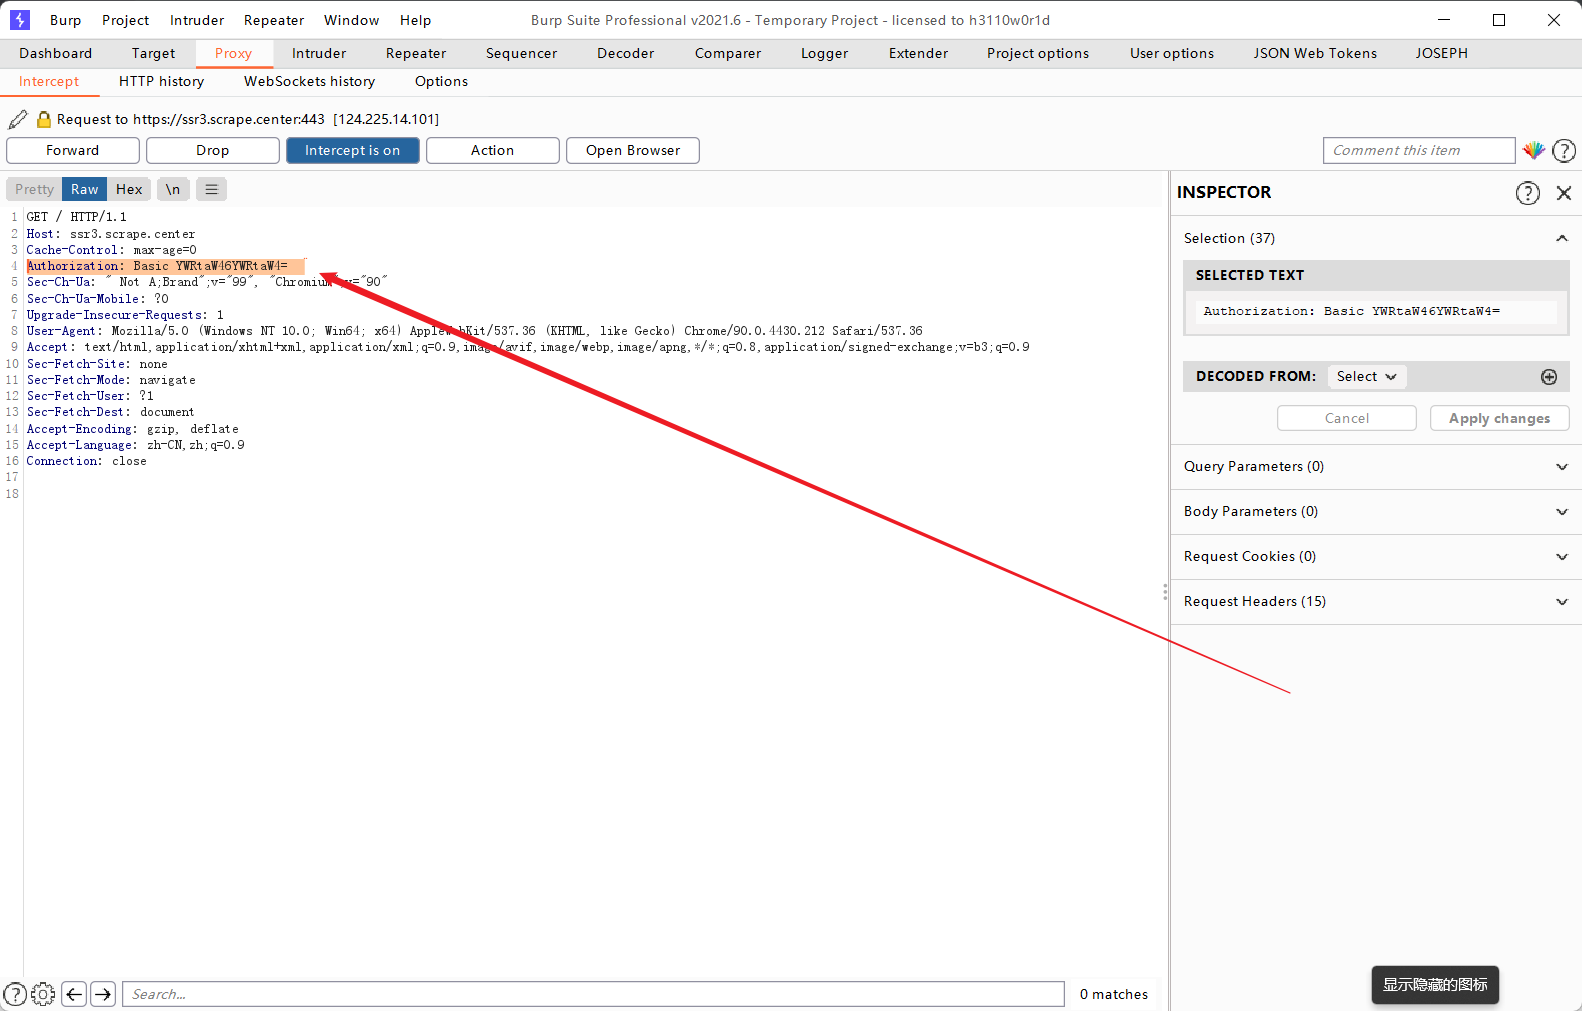
删除这个参数之后又会回到输入账号密码的页面,添加这个参数就可以直接进入网站。
对于后面那一段加密密文可以看出来是base64的加密,尝试解密,发现是登录的账号和密码
尝试不带Authorization参数
#! /usr/bin/env python

import urllib.request
from urllib.parse import urlparse

# 定义函数:授权登录
def authLogin():
    url = 'http://ssr3.scrape.center'
    header = {
        "User-Agent":"Mozilla/5.0 (Windows NT 10.0; Win64; x64) AppleWebKit/537.36 (KHTML, like Gecko) Chrome/90.0.4430.212 Safari/537.36"
    }
    req = urllib.request.Request(url=url,headers=header)
    response = urllib.request.urlopen(req)
    print(response.read().decode('utf-8'))

authLogin()
urllib.error.HTTPError: HTTP Error 401: Authorization Required
出现未授权的错误
我们手动添加参数,就可以访问成功了
#! /usr/bin/env python

import urllib.request
from urllib.parse import urlparse

# 定义函数:授权登录
def authLogin():
    url = 'http://ssr3.scrape.center'
    header = {
        "User-Agent":"Mozilla/5.0 (Windows NT 10.0; Win64; x64) AppleWebKit/537.36 (KHTML, like Gecko) Chrome/90.0.4430.212 Safari/537.36",
        "Authorization": "Basic YWRtaW46YWRtaW4="
    }
    req = urllib.request.Request(url=url,headers=header)
    response = urllib.request.urlopen(req)
    print(response.read().decode('utf-8'))

authLogin()
我们这边使用一个测试网站来演示
先注册一个账号,然后退出账号清除cookie,再一次使用BP的内置浏览器打开网页,输入刚刚注册的账号,抓包。
这就是cookie大体的工作原理。
处理cookie相关的handler就是 cookiejar
下面处理一个保存百度的cookie
#! /usr/bin/env python

import urllib.request
import http.cookiejar

#定义保存cookie的文件
filename = 'cookies.txt'
cookie = http.cookiejar.MozillaCookieJar(filename=filename)
handler = urllib.request.HTTPCookieProcessor(cookie)
opener = urllib.request.build_opener(handler)
response = opener.open('http://www.baidu.com')

cookie.save(ignore_discard=True,ignore_expires=True)
MozillaCookieJar,你可以在Python中轻松地读取和操作Mozilla浏览器的cookie文件,以便进行自动化的Web请求和脚本编写。ignore_discard参数是一个布尔值,表示是否保存即将过期的cookie。如果设置为True,则所有的cookie都会被保存到文件中,即使其"discard"属性为True(表示即将过期)。如果设置为False,则忽略"discard"为True的cookie,默认为False。ignore_expires参数也是一个布尔值,表示是否保存已经过期的cookie。如果设置为True,则所有的cookie都会被保存到文件中,即使其"expires"属性指定了过期时间。如果设置为False,则忽略已经过期的cookie,默认为False。# Netscape HTTP Cookie File
# http://curl.haxx.se/rfc/cookie_spec.html
# This is a generated file! Do not edit.
.baidu.com TRUE / FALSE 1726665294 BAIDUID E632D5566826400C3C8D42A83A8FBA33:FG=1
.baidu.com TRUE / FALSE 3842612941 BIDUPSID E632D5566826400C7D8FFB2F09971A77
.baidu.com TRUE / FALSE 3842612941 PSTM 1695129294
上面讲的是保存cookie
使用LWPCookieJar可以读取和保存cookie,保存成libwww-perl(LWP)格式的cookie文件
#! /usr/bin/env python

import urllib.request
import http.cookiejar

# 定义保存cookie的文件
filename = 'cookies.txt'
# cookie = http.cookiejar.MozillaCookieJar(filename=filename)
cookie = http.cookiejar.LWPCookieJar(filename=filename)
handler = urllib.request.HTTPCookieProcessor(cookie)
opener = urllib.request.build_opener(handler)
response = opener.open('http://www.baidu.com')

cookie.save(ignore_discard=True,ignore_expires=True)
下面可以看到就是LWP的格式
#LWP-Cookies-2.0
Set-Cookie3: BAIDUID="BF948ABE46D598FB269BEFF5D1C7918A:FG=1"; path="/"; domain=".baidu.com"; path_spec; domain_dot; expires="2024-09-18 13:21:44Z"; comment=bd; version=0
Set-Cookie3: BIDUPSID=BF948ABE46D598FBAA55F0512A7768C1; path="/"; domain=".baidu.com"; path_spec; domain_dot; expires="2091-10-07 16:35:51Z"; version=0
Set-Cookie3: PSTM=1695129703; path="/"; domain=".baidu.com"; path_spec; domain_dot; expires="2091-10-07 16:35:51Z"; version=0
下面讲一下读取cookie
filename = 'cookies.txt'
# 读取cookie
cookie = http.cookiejar.LWPCookieJar()
cookie.load(filename=filename,ignore_discard=True,ignore_expires=True)
handler = urllib.request.HTTPCookieProcessor(cookie)
opener = urllib.request.build_opener(handler)
response = opener.open('http://www.baidu.com')
print(response.read().decode('utf-8'))
# 成功请求
目标:先使用账号密码进行登录,然后我们获取该网站的cookie,再利用cookie进行登录
这边我们先对抓取到的数据包进行数据提取,将需要的登录参数全部提取出来
type=0&username=baiyu001&pwd=Baiyu123456&pc_vcode=&country=86_zh-CN&mobile=&vcode=&pincode=&formhash=79A5413D4B&backurl=https%253A%252F%252Fwww.yaozh.com%252F
然后编写代码进行处理
#! /usr/bin/env python
import urllib.request
import http.cookiejar
import urllib.parse
# 1.使用账号密码登录网站
# 登录的url
url = 'https://www.yaozh.com/login'
# 相关登录参数
login_data = {
"type":"0",
"username":"baiyu001",
"pwd":"Baiyu123456",
"pc_vcode":"",
"country":"86_zh-CN",
"mobile":"",
"vcode":"",
"pincode":"",
"formhash":"79A5413D4B",
"backurl":"https%253A%252F%252Fwww.yaozh.com%252F"
}
# 发送登录请求 POST
cookie = http.cookiejar.CookieJar()
handler = urllib.request.HTTPCookieProcessor(cookie)
opener = urllib.request.build_opener(handler)
# 添加请求头
headers = {
"User-Agent":"Mozilla/5.0 (Windows NT 10.0; Win64; x64) AppleWebKit/537.36 (KHTML, like Gecko) Chrome/90.0.4430.212 Safari/537.36",
}
# 转码
login_str = urllib.parse.urlencode(login_data).encode('utf-8')
req = urllib.request.Request(url=url,headers=headers,data=login_str)
# 如果登录成功 cookiejar会自动保存cookie
opener.open(req)
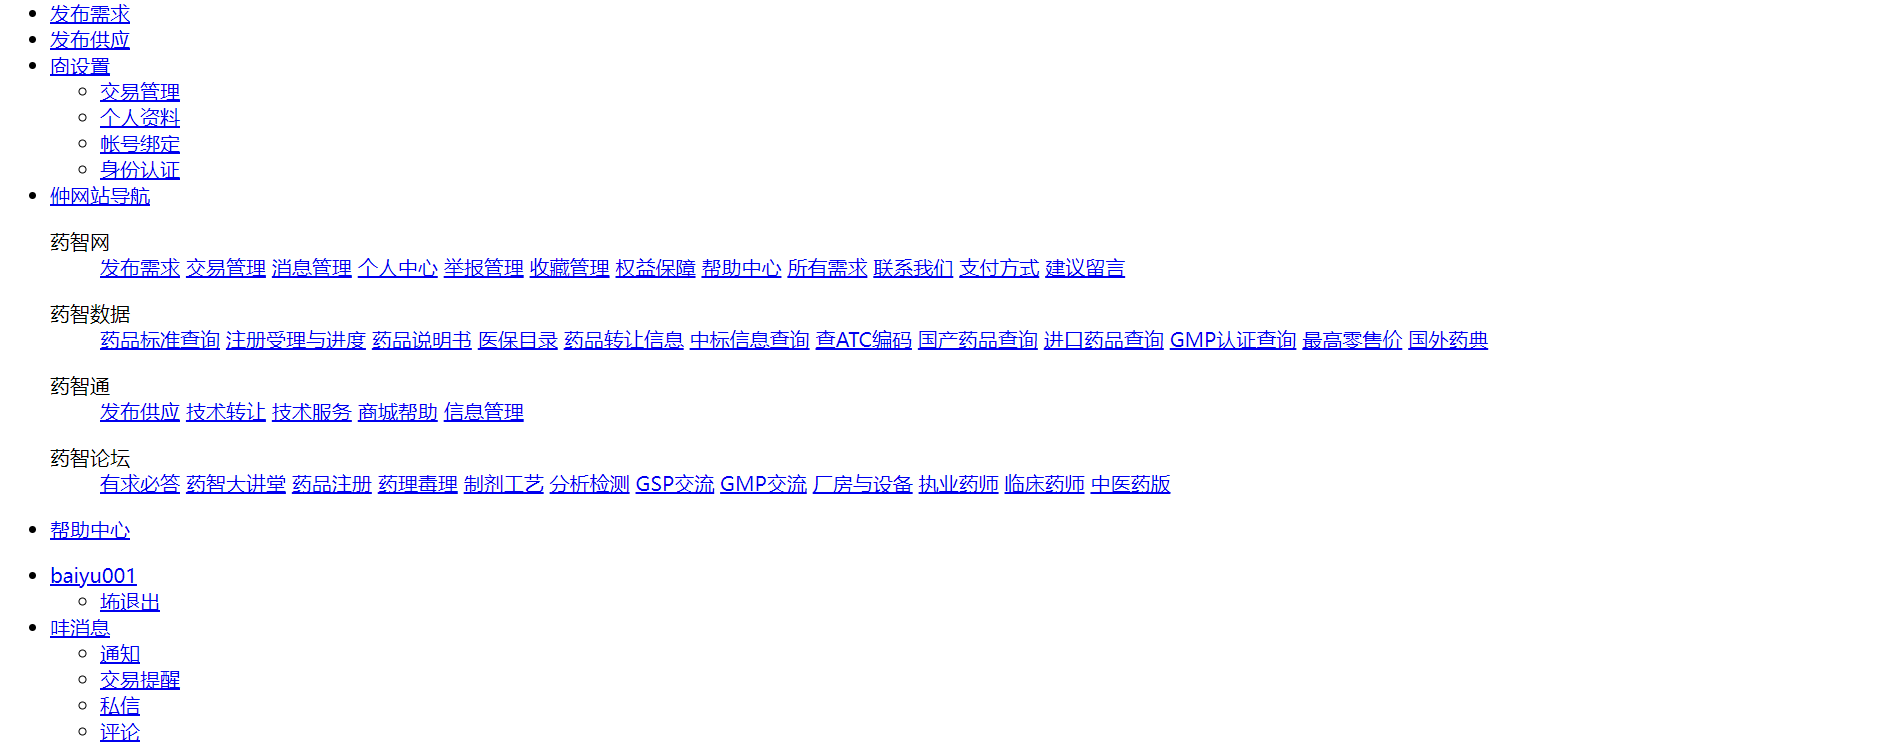
# 带着cookie去访问未登录就无法访问的页面
login_url = 'https://www.yaozh.com/member/'
req2 = urllib.request.Request(login_url,headers=headers)
response = opener.open(login_url)
# 将网页写入文件
with open('cookie1.html','wb') as f:
f.write(response.read())
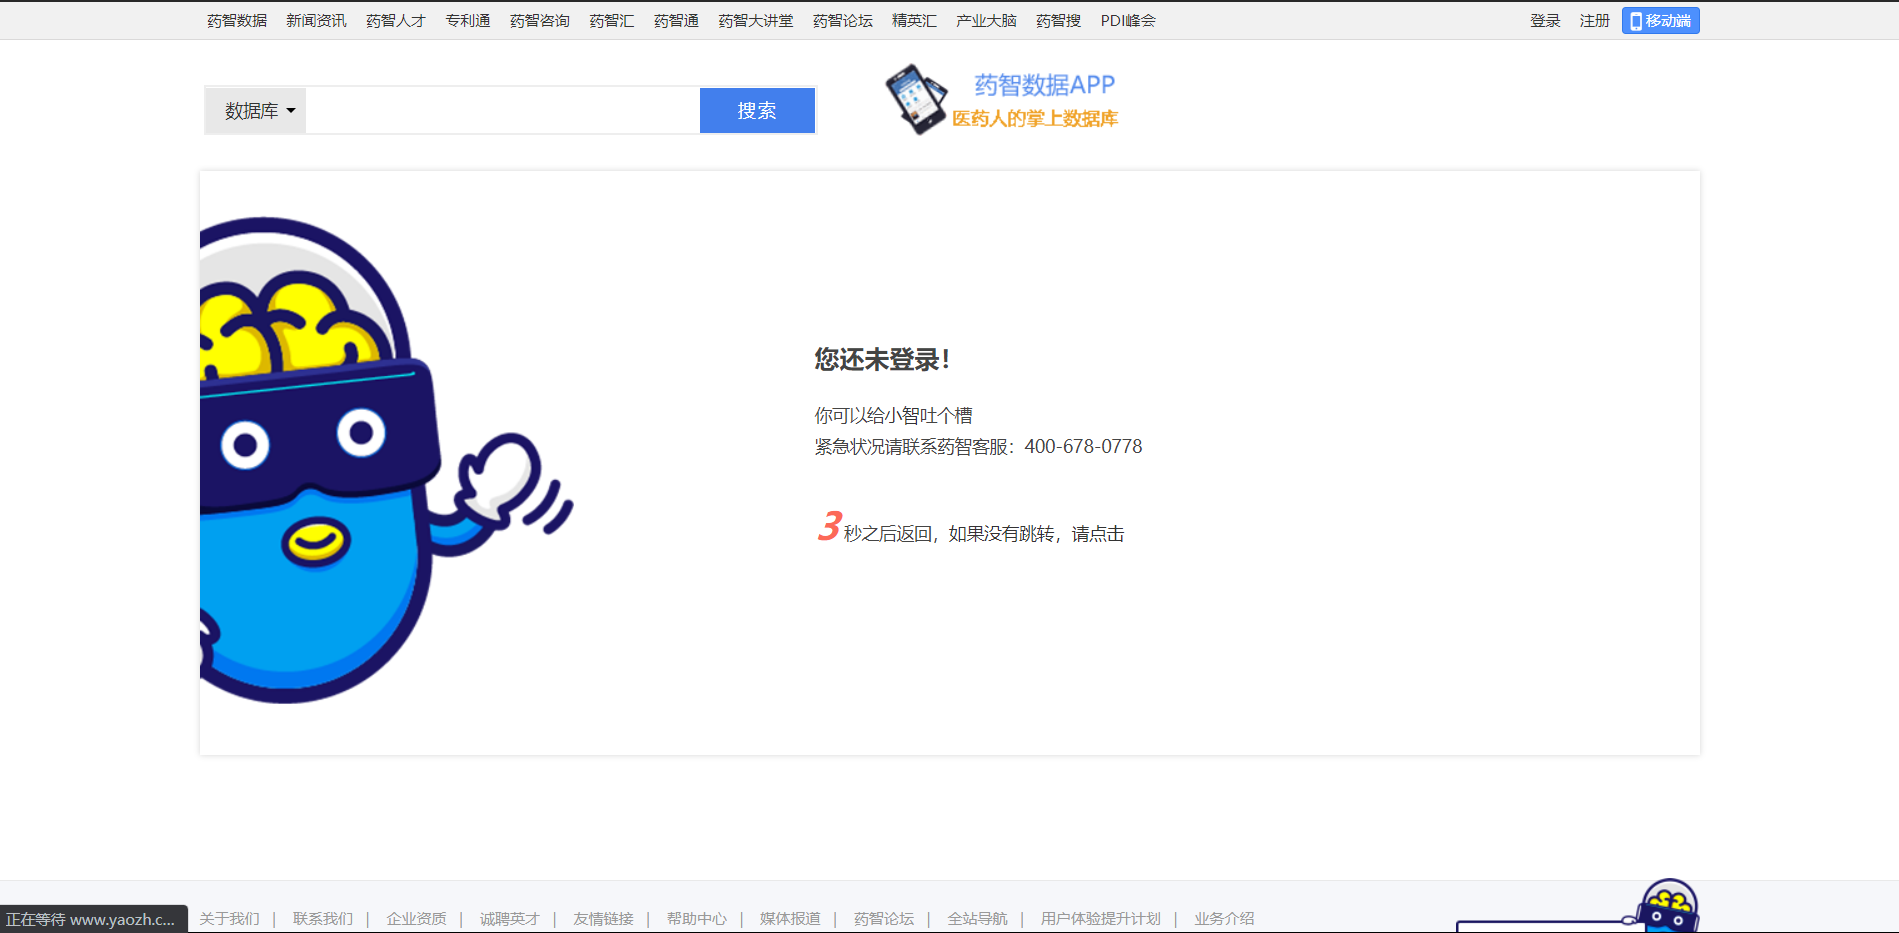
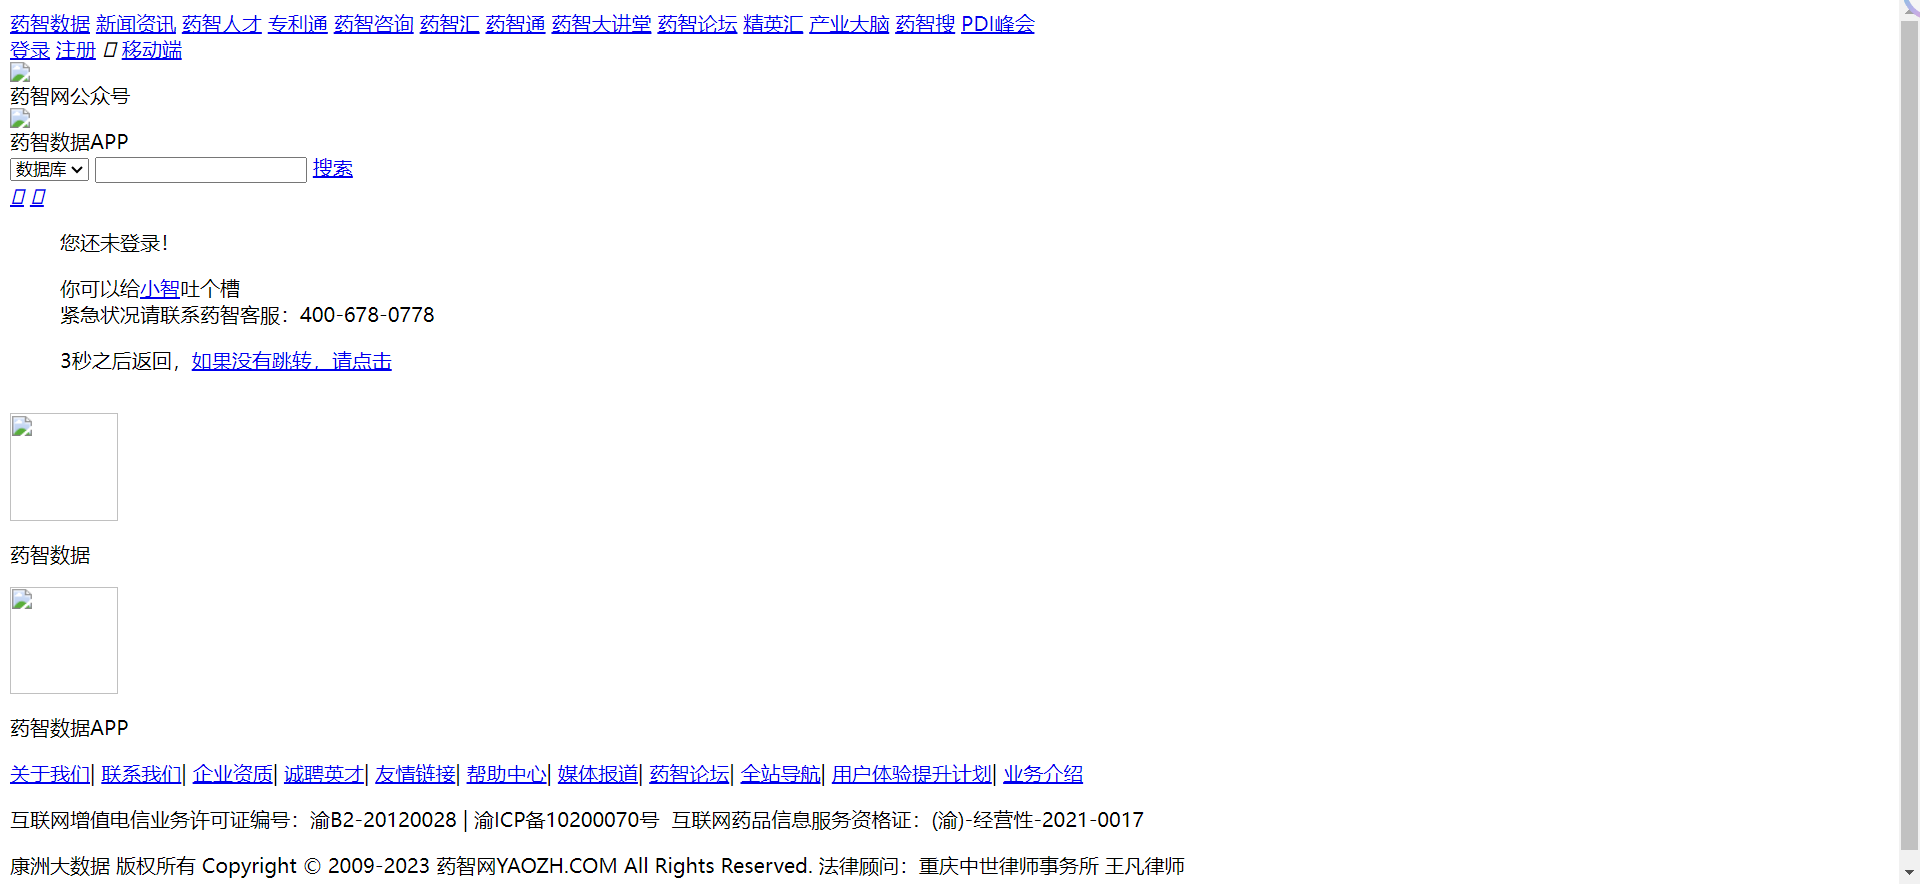
未进行登录无法访问的网页
#! /usr/bin/env python

import urllib.request
import http.cookiejar
import urllib.parse

# 1.使用账号密码登录网站
# 登录的url
url = 'https://www.yaozh.com/login'
# 相关登录参数
login_data = {
    "type":"0",
    "username":"baiyu001",
    "pwd":"Baiyu123456",
    "pc_vcode":"",
    "country":"86_zh-CN",
    "mobile":"",
    "vcode":"",
    "pincode":"",
    "formhash":"79A5413D4B",
    "backurl":"https%253A%252F%252Fwww.yaozh.com%252F"
}

# 发送登录请求  POST
cookie = http.cookiejar.CookieJar()
handler = urllib.request.HTTPCookieProcessor(cookie)
opener = urllib.request.build_opener(handler)
# 添加请求头
headers = {
    "User-Agent":"Mozilla/5.0 (Windows NT 10.0; Win64; x64) AppleWebKit/537.36 (KHTML, like Gecko) Chrome/90.0.4430.212 Safari/537.36",
}
# 转码
login_str = urllib.parse.urlencode(login_data).encode('utf-8')
req = urllib.request.Request(url=url,headers=headers,data=login_str)
# 如果登录成功 cookiejar会自动保存cookie
opener.open(req)

# 带着cookie去访问未登录就无法访问的页面
login_url = 'https://www.yaozh.com/member/'

req2 = urllib.request.Request(login_url,headers=headers)
# 上面的代码跟之前一样,但是下面这个response是使用新开的opener,没有储存cookie,获取到的网页就是未登录状态
response = urllib.request.urlopen(login_url)
# 将网页写入文件
with open('cookie2.html','wb') as f:
    f.write(response.read())
之前我们写代码的时候,总是会出现各种报错,说明我们的代码经受不住考验,健壮性太低。
我们可以通过抛出urllib.error模块中的错误,来解决问题
urlerror继承自OSError
简单写一个不存在页面的请求
#! /usr/bin/env python

import urllib
from urllib import request,error

try:
    url = 'https://www.yaozh.com/asgdoab'
    response = urllib.request.urlopen(url)
    print(response.read().decode('utf-8'))

except error.URLError as e:
    # 抛出错误的原因
    print(e.reason)
Not Found
程序抛出Not Found,但是整个代码并没有因为遇到错误而终止,这就是已经提升了我们代码的健壮性。
还有其他的错误模块
例如
HTTPError专门用来处理HTTP的请求(404、401....)。
使用到的是urlparse是python标准库中的一个模块,解析和操作url
标准的URL链接组成
scheme://netloc/path;params?query#fragment
scheme:协议,常见的有http or https
netloc:网络位置 host
params:路径
query:查询参数
fragment:片段 常常用于内部导航
#! usr/bin/env python

from urllib.parse import urlparse

url = 'http://www.baidu.com/index.html;user?id=0#comment'

# result = urlparse(url=url)

# # print(type(result),result)
# print(result.scheme)
# # http
# print(result.netloc)
# # www.baidu.com
# print(result.path)
# # /index.html
# print(result.query)
# # id=0
# print(result.params)
# # user
# print(result.fragment)
# # comment

result = urlparse(url=url,scheme='https',allow_fragments=False)\
# 将allow_fragments设置为False的时候,就会将fragment忽略掉
print(result.scheme)
print(result.fragment)
会使用到的库是urlunparse,作用是组合参数
#! usr/bin/env python

from urllib.parse import urlunparse

data = ['http','www.baidu.com','index.html','user','id=0','comment']
url = urlunparse(data)
print(url)
http://www.baidu.com/index.html;user?id=0#comment
urlsplit库,作用将url拆分不同的部分,不会解析 参数(user) 部分
urlunsplit库,作用是将url的参数合并成一个完整的url,同样不会合成user参数。
#! usr/bin/env python

from urllib.parse import urlunparse
from urllib.parse import urlsplit,urlunsplit

data = ['http','www.baidu.com','index.html','user','id=0','comment']
url = urlunparse(data)
# print(url)

split_url = urlsplit(url=url)
# 返回的是一个元组类型
# 可以使用索引来获取
# print(split_url.scheme)
# print(split_url[0])
# print(split_url.netloc)
# print(split_url.path)
# print(split_url.query)
# print(split_url.fragment)
# http
# http
# www.baidu.com
# /index.html;user
# id=0
# comment

# urlunsplit
data1 = ['http','www.baidu.com','index.html','id=0','comment']
url = urlunsplit(data1)
print(url)
# http://www.baidu.com/index.html?id=0#comment
urljoin库,作用是将一个相对的url转化成一个绝对的url
base 基本url,通常是一个绝对的url
url,这个是相对的url
allow_fragments控制是否忽略fragment参数
#! usr/bin/env python

from urllib.parse import urljoin

base_url = 'http://www.baidu.com'
relative_url = '/path/to/xxx'

final_url = urljoin(base=base_url,url=relative_url,allow_fragments=False)
print(final_url)
# http://www.baidu.com/path/to/xxx
print(urljoin(base='http://www.baidu.com',url='PAF.html'))
# http://www.baidu.com/PAF.html
print(urljoin(base='http://www.baidu.com',url='http://www.mashibing.com/FAQ.html'))
# 两个域名冲突的话会根据后面的域名进行显示
# http://www.mashibing.com/FAQ.html
print(urljoin(base='http://www.baidu.com?wd=aaa',url='?user=1#comment'))
# 参数以后面的为准
# http://www.baidu.com?user=1#comment
结论:base_url提供了三项内容scheme、netloc和path。如果这三项在新的链接里面不存在,就予以补充;如果新的连接存在,就是用新的链接的部分。而base_url中的params、query和fragment是不起作用的。
parse_qs库,作用是get参数的序列化
#! usr/bin/env python

from urllib.parse import parse_qs,parse_qsl

query = 'name=handsomeMan&age=18'
print(parse_qs(query))
# 序列化
# {'name': ['handsomeMan'], 'age': ['18']}
parse_qsl库,作用是将get参数转化成元组组成的列表
# parse_qsl
print(parse_qsl(query))
# [('name', 'handsomeMan'), ('age', '18')]
quote库,将参数进行编码
unquote库,将参数进行解码
# quote
keyword = "美女"
url = 'https://www.baidu.com/s?wd=' + quote(keyword)
print(url)
# https://www.baidu.com/s?wd=%E7%BE%8E%E5%A5%B3
print(unquote(url))
# https://www.baidu.com/s?wd=美女
robot协议又称作爬虫协议,用于告诉爬虫或搜索引擎,哪些不可以爬取,哪些可以爬取。
一般保存于robots.txt(一般这个文件位于根目录下)
类似这种格式
User-agent: *(爬虫的名字)
Disallow: /baidu
Disallow: /s?
Disallow: /ulink?
Disallow: /link?
Disallow: /home/news/data/
Allow: /bh
Disallow表示不允许,Allow表示允许爬取。
通过robots.txt有时候可以发现敏感信息泄露。(中危 or 低危)
robotparser就是专门用于解析robots.txt的库
#! /usr/bin/env python

from urllib.robotparser import RobotFileParser


# User-agent: Googlebot
# Disallow: /appview/
# Disallow: /login
# Disallow: /logout
# Disallow: /resetpassword
# Disallow: /terms
# Disallow: /search
# Allow: /search-special
# Disallow: /notifications
# Disallow: /settings
# Disallow: /inbox
# Disallow: /admin_inbox
# Disallow: /*?guide*


# 创建一个RobotFileParser对象用于解析robots.txt
robot_parse = RobotFileParser()
robot_parse.set_url('https://www.zhihu.com/robots.txt')

# 读取并且解析robots.txt
robot_parse.read()

# 检查是否可以爬取特定的url
user_agent = 'Googlebot'
check_url1 = 'https://www.zhihu.com/notifications'

# can_fetch
# Disallow
if robot_parse.can_fetch(user_agent, check_url1):
    print('Yes I got it.')
else:
    print("No I can't.")
# No I can't.

# Allow
check_url2 = 'https://www.zhihu.com/'
if robot_parse.can_fetch(user_agent, check_url2):
    print('Yes I got it.')
else:
    print("No I can't.")
# Yes I got it.
GET请求
r = requests.get(url=url)
print(r.text)
{
  "args": {},
  "headers": {
    "Accept": "*/*",
    "Accept-Encoding": "gzip, deflate",
    "Host": "httpbin.org",
    "User-Agent": "python-requests/2.28.1",
    "X-Amzn-Trace-Id": "Root=1-650e4ddc-738e19f31d9a8c1305b666fa"
  },
  "origin": "222.76.49.129",
  "url": "http://httpbin.org/get"
}
添加参数的GET请求
data = {
    'name':'handsomeMan',
    'age':'18',
}
r = requests.get(url=url,params=data)
print(r.text)
{
  "args": {
    "age": "18",
    "name": "handsomeMan"
  },
  "headers": {
    "Accept": "*/*",
    "Accept-Encoding": "gzip, deflate",
    "Host": "httpbin.org",
    "User-Agent": "python-requests/2.28.1",
    "X-Amzn-Trace-Id": "Root=1-650e4e85-40f780675c0acc5946037e6f"
  },
  "origin": "222.76.49.129",
  "url": "http://httpbin.org/get?name=handsomeMan&age=18"
}
POST请求
r = requests.post(url='http://httpbin.org/post',data=data)
print(r.text)
{
  "args": {},
  "data": "",
  "files": {},
  "form": {
    "age": "18",
    "name": "handsomeMan"
  },
  "headers": {
    "Accept": "*/*",
    "Accept-Encoding": "gzip, deflate",
    "Content-Length": "23",
    "Content-Type": "application/x-www-form-urlencoded",
    "Host": "httpbin.org",
    "User-Agent": "python-requests/2.28.1",
    "X-Amzn-Trace-Id": "Root=1-650e4f0f-75ef0a1220a4f2cc51af5665"
  },
  "json": null,
  "origin": "222.76.49.129",
  "url": "http://httpbin.org/post"
}
其他请求
r = requests.put(url='http://httpbin.org/put')
r = requests.delete(url='http://httpbin.org/delete')
r = requests.head(url='http://httpbin.org/head')
r = requests.options(url='http://httpbin.org/options')
添加请求头
headers = {
    'User-Agent':'Mozilla/5.0 (Windows NT 10.0; Win64; x64; rv:109.0) Gecko/20100101 Firefox/117.0',
}

r = requests.get(url=url,headers=headers)
print(r.text)
{
  "args": {},
  "headers": {
    "Accept": "*/*",
    "Accept-Encoding": "gzip, deflate",
    "Host": "httpbin.org",
    "User-Agent": "Mozilla/5.0 (Windows NT 10.0; Win64; x64; rv:109.0) Gecko/20100101 Firefox/117.0",
    "X-Amzn-Trace-Id": "Root=1-650e50f0-06db767f1fc24e78714a3c7a"
  },
  "origin": "222.76.49.129",
  "url": "http://httpbin.org/get"
}
文件上传
#! /usr/bin/env python

import requests

url = 'http://httpbin.org/post'
file = {'file':open('result.png','rb')}
r = requests.post(url=url,files=file)
print(r.text)
# 成功上传
requestcookiejar
#! /usr/bin/env python

import requests
from requests.cookies import RequestsCookieJar

url = 'http://www.zhihu.com'
Cookie = 'BAIDUID=30C55DC5C7083D7246D99C6060281691:FG=1; BIDUPSID=30C55DC5C7083D72A6C018B886E01924; PSTM=1695431415; BA_HECTOR=208k2480a0al8k8g2k21a40j1igseno1p; BDORZ=FFFB88E999055A3F8A630C64834BD6D0; ZFY=hGSnq1bjGUI4dDHa:BbCYSKk2YGRTMArY25rB0wWMOj8:C; BAIDU_WISE_UID=wapp_1695456721312_92; RT="z=1&dm=baidu.com&si=2794a4d0-4d90-47a0-b9c7-ea50b6e2c006&ss=lmvr5lby&sl=3&tt=23t&bcn=https%3A%2F%2Ffclog.baidu.com%2Flog%2Fweirwood%3Ftype%3Dperf&ld=35i&ul=h3jw&hd=h3nd"; arialoadData=false; BDRCVFR[Fc9oatPmwxn]=aeXf-1x8UdYcs; PSINO=6; H_PS_PSSID=39329_39366_39354_39399_39352_39407_39097_39411_39438_39359_39233_39403_26350_22160_39430; delPer=0'
# 创建一个空的RequestsCookieJar来保存cookies
jar = requests.cookies.RequestsCookieJar()

headers = {
    'User-Agent':'Mozilla/5.0 (Windows NT 10.0; Win64; x64; rv:109.0) Gecko/20100101 Firefox/117.0',
}

# 遍历分割cookies字符串,将每一个cookie的键值对添加到cookiejar中
for cookie in Cookie.split(';'):
    key, value = cookie.split('=',1)
    jar.set(key, value)

# 发送请求并且附带cookies和header
r = requests.get(url=url,headers=headers,cookies=jar)
with open('cookiejar_test.html','wb') as f:
    f.write(r.content)
request_session
#! /usr/bin/env python

import requests

# r1 = requests.get('http://httpbin.org/cookies/set/number/123456')
# print(r1.text)
# # {
# #   "cookies": {
# #     "number": "123456"
# #   }
# # }
# r2 = requests.get('http://httpbin.org/cookies')
# print(r2.text)
# # {
# #   "cookies": {}
# # }
# # 说明两次的请求是完全独立的

# 创建一个session
s = requests.Session()

# 向网站发送get并且设置cookie
s.get('http://httpbin.org/cookies/set/number/123456')
# 再次发送请求,获取当前会话里的cookie
r = s.get('http://httpbin.org/cookies')
print(r.text)
# {
#   "cookies": {
#     "number": "123456"
#   }
# }
ssl证书校验
有时候我们经常会看到这种情况
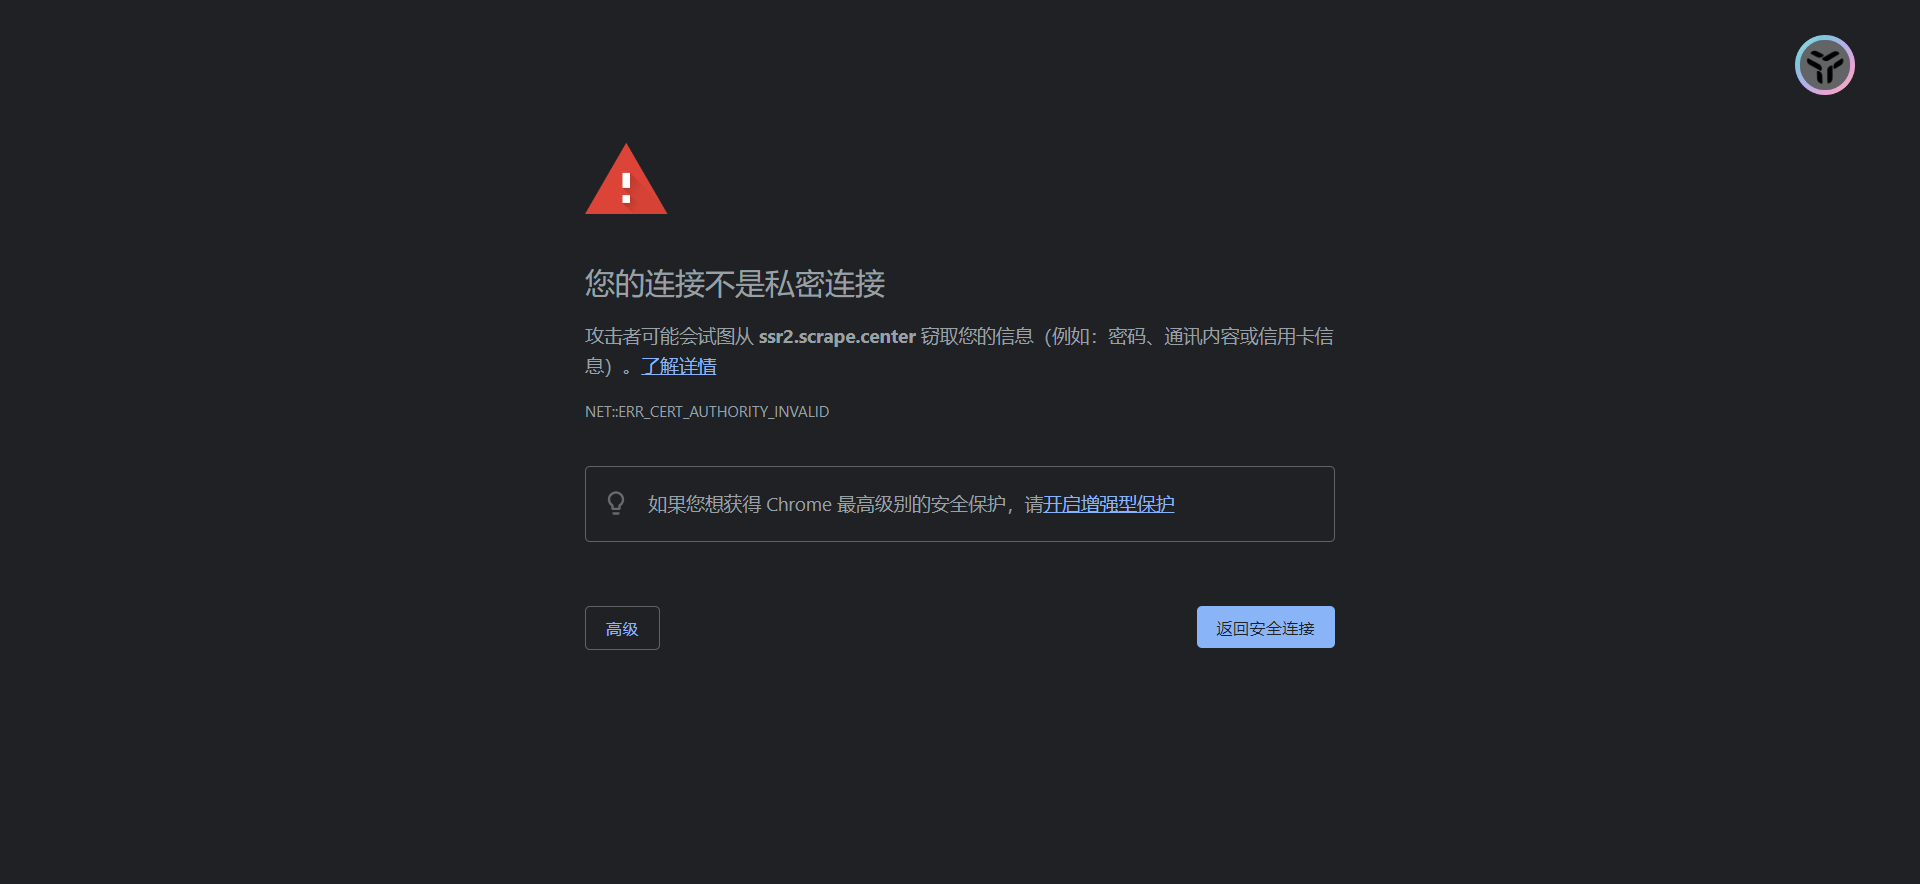
#! /usr/bin/env python

import requests

# verify设置值为 False 忽略掉证书校验的错误
# 若没有设置值为False,那么就会出现SSLError
r = requests.get('https://ssr2.scrape.center/',verify=False)
print(r.text)
身份认证
使用httpbasicAuth来进行身份的认证
#! /usr/bin/env python

import requests
from requests.auth import HTTPBasicAuth

r = requests.get('https://ssr3.scrape.center/',verify=False,auth=HTTPBasicAuth('admin','admin'))
print(r.text)
代理配置
#! /usr/bin/env python

import random
import requests


proxy_list = {
    'http':'http://112.250.110.172:9091',
    'http':'http://120.234.135.251:9002',
}

r = requests.get('http://httpbin.org/get',proxies=proxy_list)
print(r.text)

# socks
# proxies = 'http':scok5://username:password@host:port
# requests.get('http://www.baidu.com',proxies=proxies)
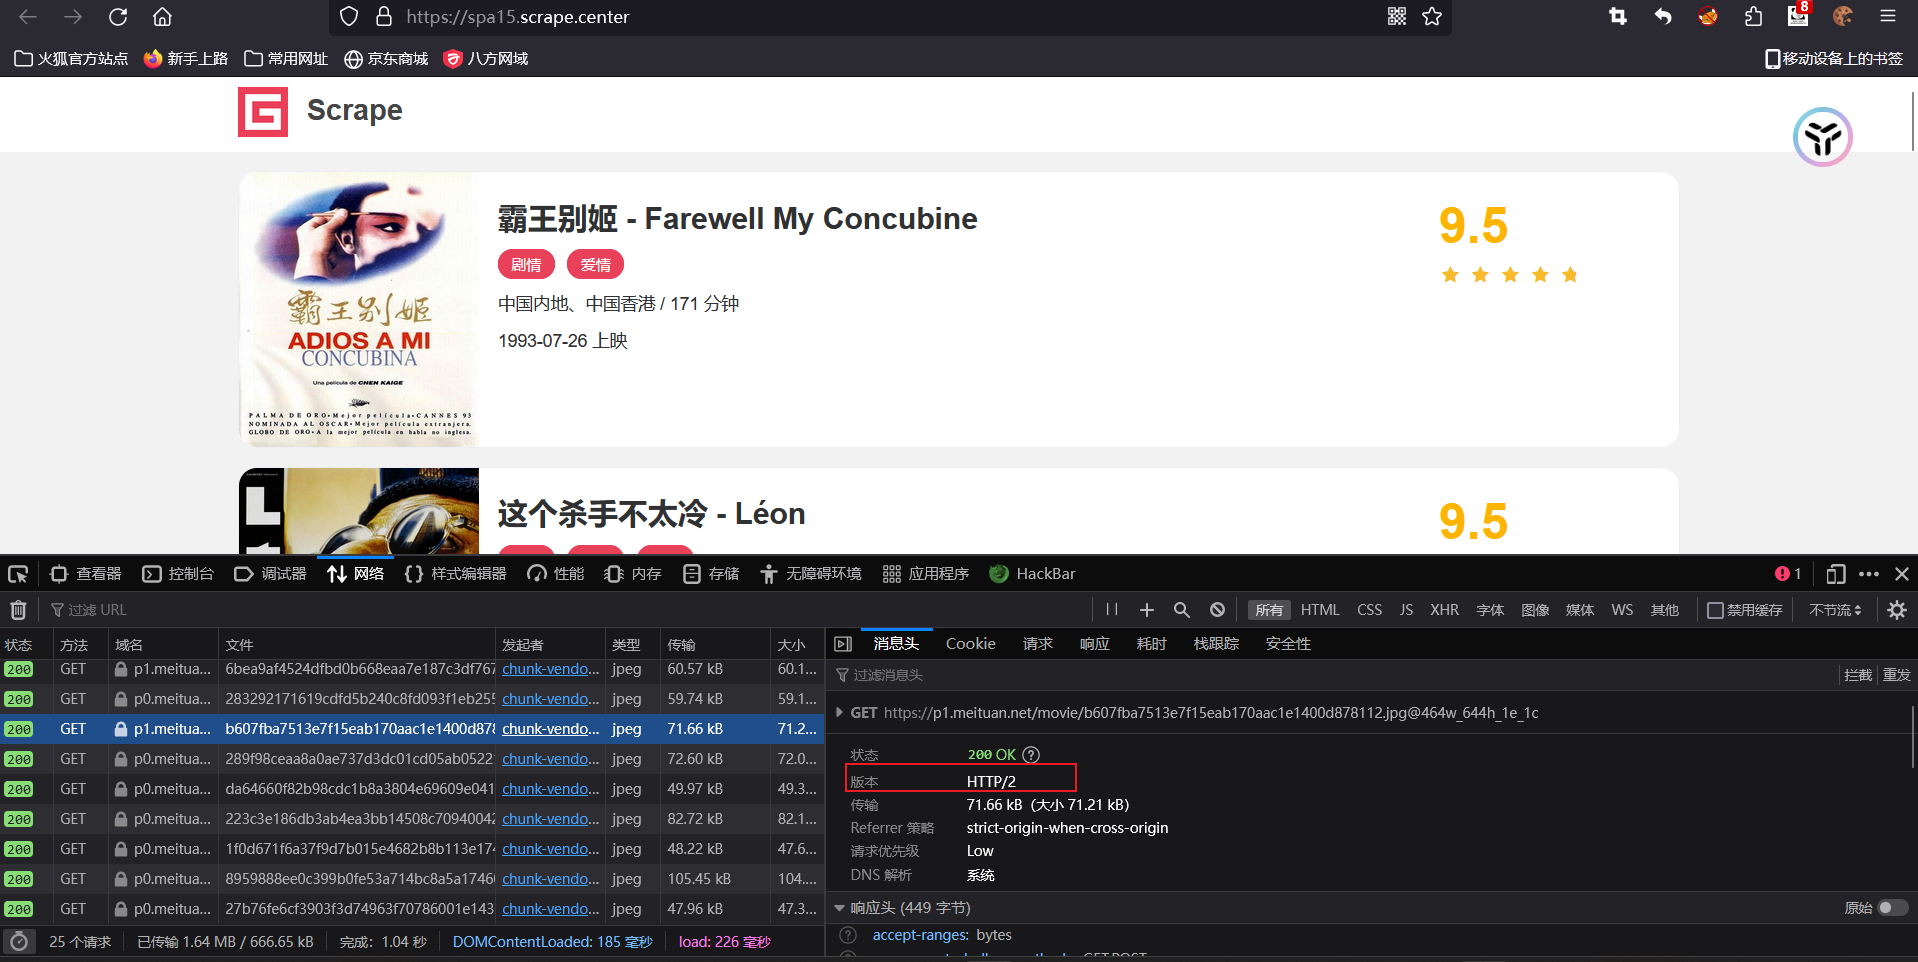
根据前面的知识,我们已经可以爬取80%的网站,但是这些网站大多是http 1.1的版本,对于http 2.0的版本我们还是无法进行爬取。
所以我们引出httpx,这个就是专门针对http 2.0进行的进一步深入。
我们来看一个2.0的协议
首先,先安装httpx库
pip install httpx
使用requests请求就会出现错误(与HTTP1.1没有兼容的网站就会出现这种问题)
#! /usr/bin/env python

import requests

url = 'https://spa16.scrape.center'
response = requests.get(url)
print(response.text)
# 出现报错
url = 'https://spa16.scrape.center/'
headers = {
    'User-Agent':'Mozilla/5.0 (Windows NT 10.0; Win64; x64) AppleWebKit/537.36 (KHTML, like Gecko) Chrome/117.0.0.0 Safari/537.36',
}
response = httpx.get(url=url,headers=headers)
print(response.text)
直接请求还是会出现错误的,我们需要对这个库进行一些配置。
支持http2.0还需要安装2.0的支持
pip install "httpx[http2]"
再配置一下
client = httpx.Client(http2=True)
成功请求
#! /usr/bin/env python

import httpx

url = 'https://spa16.scrape.center/'
headers = {
    'User-Agent':'Mozilla/5.0 (Windows NT 10.0; Win64; x64) AppleWebKit/537.36 (KHTML, like Gecko) Chrome/117.0.0.0 Safari/537.36',
}
client = httpx.Client(http2=True)
response = client.get(url=url,headers=headers)
print(response.text)
post请求与之前的requests库类似,这边不详细赘述。
要爬取一个网站,我们要先对我们需要的目标进行梳理,然后再根据网页的结构,爬取我们想要的信息,并将信息保存到本地。
1.进入列表页,顺着列表爬取每个详情页
2.利用正则来提取海报、名称、类别、上映时间、评分、剧情简介
3.将爬取的内容保存下来
logging模块
首先我们要先了解一下logging模块
logging模块是用于记录日志,方便调试
日志级别:
DEBUG:用于详细的调试信息,通常用于开发和故障排查

INFO:提供一般信息,表明应用程序正在正常运行

WARNING:表示潜在的问题或异常情况,但不会中断应用程序。

ERROR:指示错误发生,可能会导致应用程序部分失败

CRITICAL:指示严重错误,可能会导致应用程序完全失败
#! /usr/bin/env pythpn

import logging

# 配置日志记录器
# 第一种方式
# level指定记录日志的级别
logging.basicConfig(level=logging.DEBUG,filename='app.log',
                    format='%(asctime)s - %(levelname)s - %(message)s')
# format:指定输出的格式
loger = logging.getLogger("myapp")
loger.debug("这是一条debug信息")
loger.info("这是一条info信息")
loger.warning("这是一条warning信息")
loger.error("这是一条error信息")
loger.critical("这是一条critical信息")
2023-09-24 17:06:34,383 - DEBUG - 这是一条debug信息
2023-09-24 17:06:34,394 - INFO - 这是一条info信息
2023-09-24 17:06:34,394 - WARNING - 这是一条warning信息
2023-09-24 17:06:34,395 - ERROR - 这是一条error信息
2023-09-24 17:06:34,395 - CRITICAL - 这是一条critical信息
# 第二种方式
# 创建
loger = logging.getLogger("myapp")
loger.setLevel(logging.INFO)

# 显示在终端上
console_handler = logging.StreamHandler()
# 将ERROR级别的报错显示在终端上
console_handler.setLevel(logging.INFO)

# 显示在文件里
file_handler = logging.FileHandler("myapp.log")
file_handler.setLevel(logging.ERROR)
# 输出格式
formatter = logging.Formatter('%(asctime)s - %(levelname)s - %(message)s')
file_handler.setFormatter(formatter)
console_handler.setFormatter(formatter)

loger.addHandler(console_handler)
loger.addHandler(file_handler)

loger = logging.getLogger("myapp")
loger.debug("这是一条debug信息")
loger.info("这是一条info信息")
loger.warning("这是一条warning信息")
loger.error("这是一条error信息")
loger.critical("这是一条critical信息")
2023-09-24 17:21:32,228 - ERROR - 这是一条error信息
2023-09-24 17:21:32,229 - CRITICAL - 这是一条critical信息
正式开始项目
以下是总代码:
#! /usr/bin/env pythpn

import logging
import re
import requests
from urllib.parse import urljoin
import pymongo

mongo_client = pymongo.MongoClient("mongodb://192.168.11.133:27017/")
db = mongo_client["by_movies"]
collection = db["movies"]

# 日志部分
# 配置日志记录器
# 第一种方式
# level指定记录日志的级别
logging.basicConfig(level=logging.INFO,
                    format='%(asctime)s - %(levelname)s - %(message)s')

# 页面爬取
BASE_URL = 'https://ssr1.scrape.center'
TOTAL_PAGE = 10

# 抓取某一页面的内容
def scrape_index(page):
    index_url = f'{BASE_URL}/page/{page}'
    return scrape_page(index_url)

# 定义一个函数抓取网页的内容
def scrape_page(url):
    logging.info("正在抓取 %s.....",url)
    # 发起get请求
    try:
        response = requests.get(url)
        if response.status_code == 200:
            return response.text
        else:
            logging.error("抓取%s时返回无效的状态码%s",url,response.status_code)
    except requests.RequestException :
        # 如果发生异常,就会报错
        logging.error("抓取%s时发生异常",url,exc_info=True)
        # exc_info=True表示会在出现异常时,将错误信息和错误的类型等都会返回给我们

# 解析页面,并提取出详情页面的url
def parse_index(html):
    # 使用正则将链接提取出来
    pattern = re.compile('<a .* href="(.*?)".*?class="name">')
    items = re.findall(pattern,html)
    # print(items)
    if not items:
        return []
    for i in items:
        # 把相对链接转为绝对链接
        detail_url = urljoin(BASE_URL,i)
        # print(detail_url)
        logging.info("找到详情页面了,链接%s",detail_url)
        yield detail_url

def scrape_detail(html):
    return parse_detail(html)

def parse_detail(html):
    # 匹配图片的url
    cover_pattern = re.compile(
        'class="el-col.*?<img.*?src="(.*?)".*?class="cover">', re.S)
    # 使用if-else增加代码健壮性
    img_url = re.search(cover_pattern,html).group(1).split('@')[0] if re.search(cover_pattern,html) else None

    # 使用正则匹配类别
    category_pattern = re.compile(
        '<button.*?category.*?<span>(.*?)</span>.*?</button>', re.S)
    category_list = re.findall(category_pattern,html) if re.findall(category_pattern,html) else []

    # 使用正则匹配上映时间
    date_pattern = re.compile('(\d{4}-\d{2}-\d{2})\s?上映')
    date_result = re.search(date_pattern,html).group(1) if re.search(date_pattern,html) else None

    # 使用正则匹配评分
    score_pattern = re.compile('<p.*?score.*?>(.*?)</p>', re.S)
    score_result = float(re.search(score_pattern, html).group(1)) if re.search(score_pattern, html) else None
    # 使用正则匹配剧情简介
    drama_pattern = re.compile('<div.*?drama.*?>.*?<p.*?>(.*?)</p>', re.S)
    drama_result = re.search(drama_pattern,html).group(1).strip() if re.search(drama_pattern,html) else None

    # 匹配电影名称
    title_pattern = re.compile('<h2.*?>(.*?)</h2>')
    title_result = re.search(title_pattern,html).group(1).strip() if re.search(title_pattern,html) else None

    return {
        'image':img_url,
        'category':category_list,
        'date':date_result,
        'score':score_result,
        'drama':drama_result,
        'title':title_result,
    }

def save_data(data):
    collection.insert_one(data)
    logging.info("数据保存到mongodb成功!!!!")

def main():
    index_html = scrape_index(1)
    # print(index_html)
    detail_urls = parse_index(index_html)
    # print(list(detail_urls))
    for detail_url in list(detail_urls):
        # print(detail_url)
        detail_html = scrape_page(detail_url)
        # print(detail_html)
        data = parse_detail(detail_html)
        logging.info("获取到详细的数据 %s",data)
        logging.info("数据成功获取")
        save_data(data)

if __name__ == '__main__':
    main()
设置日志
# 日志部分
# 配置日志记录器
# 第一种方式
# level指定记录日志的级别
logging.basicConfig(level=logging.INFO,
                    format='%(asctime)s - %(levelname)s - %(message)s')
定义常量和链接数据库
# 连接数据库
mongo_client = pymongo.MongoClient("mongodb://192.168.11.133:27017/")
db = mongo_client["by_movies"]
collection = db["movies"]

# 页面爬取
BASE_URL = 'https://ssr1.scrape.center'
TOTAL_PAGE = 10
抓取某一页面的内容(电影列表)
# 抓取某一页面的内容
def scrape_index(page):
    index_url = f'{BASE_URL}/page/{page}'
    return scrape_page(index_url)

# 定义一个函数抓取网页的内容
def scrape_page(url):
    logging.info("正在抓取 %s.....",url)
    # 发起get请求
    try:
        response = requests.get(url)
        if response.status_code == 200:
            return response.text
        else:
            logging.error("抓取%s时返回无效的状态码%s",url,response.status_code)
    except requests.RequestException :
        # 如果发生异常,就会报错
        logging.error("抓取%s时发生异常",url,exc_info=True)
        # exc_info=True表示会在出现异常时,将错误信息和错误的类型等都会返回给我们
解析页面,并提取出详情页url
# 解析页面,并提取出详情页面的url
def parse_index(html):
    # 使用正则将链接提取出来
    pattern = re.compile('<a .* href="(.*?)".*?class="name">')
    items = re.findall(pattern,html)
    # print(items)
    if not items:
        return []
    for i in items:
        # 把相对链接转为绝对链接
        detail_url = urljoin(BASE_URL,i)
        # print(detail_url)
        logging.info("找到详情页面了,链接%s",detail_url)
        yield detail_url
对于详情页进行数据的获取
这部分算是比较难的部分,对于各种需要获取的数据要进行精确的匹配
def scrape_detail(html):
    return parse_detail(html)

def parse_detail(html):
    # 匹配图片的url
    cover_pattern = re.compile(
        'class="el-col.*?<img.*?src="(.*?)".*?class="cover">', re.S)
    # 使用if-else增加代码健壮性
    img_url = re.search(cover_pattern,html).group(1).split('@')[0] if re.search(cover_pattern,html) else None

    # 使用正则匹配类别
    category_pattern = re.compile(
        '<button.*?category.*?<span>(.*?)</span>.*?</button>', re.S)
    category_list = re.findall(category_pattern,html) if re.findall(category_pattern,html) else []

    # 使用正则匹配上映时间
    date_pattern = re.compile('(\d{4}-\d{2}-\d{2})\s?上映')
    date_result = re.search(date_pattern,html).group(1) if re.search(date_pattern,html) else None

    # 使用正则匹配评分
    score_pattern = re.compile('<p.*?score.*?>(.*?)</p>', re.S)
    score_result = float(re.search(score_pattern, html).group(1)) if re.search(score_pattern, html) else None
    # 使用正则匹配剧情简介
    drama_pattern = re.compile('<div.*?drama.*?>.*?<p.*?>(.*?)</p>', re.S)
    drama_result = re.search(drama_pattern,html).group(1).strip() if re.search(drama_pattern,html) else None

    # 匹配电影名称
    title_pattern = re.compile('<h2.*?>(.*?)</h2>')
    title_result = re.search(title_pattern,html).group(1).strip() if re.search(title_pattern,html) else None

    return {
        'image':img_url,
        'category':category_list,
        'date':date_result,
        'score':score_result,
        'drama':drama_result,
        'title':title_result,
    }
将获取到的数据保存进入MongoDB
def save_data(data):
    collection.insert_one(data)
    logging.info("数据保存到mongodb成功!!!!")
主程序
def main():
    # 只爬取第一页
    index_html = scrape_index(1)
    # print(index_html)
    detail_urls = parse_index(index_html)
    # print(list(detail_urls))
    for detail_url in list(detail_urls):
        # print(detail_url)
        detail_html = scrape_page(detail_url)
        # print(detail_html)
        data = parse_detail(detail_html)
        logging.info("获取到详细的数据 %s",data)
        logging.info("数据成功获取")
        save_data(data)

if __name__ == '__main__':
    main()


